A lot of users complain that it’s hard to delete the LCU folder in Windows 11. What is LCU folder? Is it safe to delete? How to empty the LCU folder in Windows 11? Now, let’s explore the answers together with MiniTool.
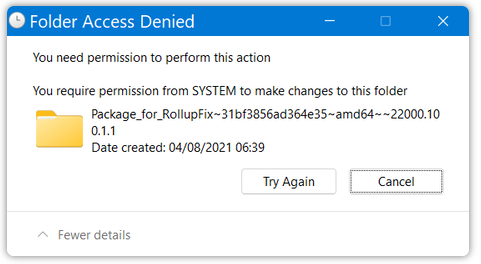
Recently, many users reported that they can’t delete LCU folder Windows 11 after each update. It’s so annoying that the LCU folder eats up the hard drive space. To free up disk space, some of them want to empty the LCU folder in Windows 11. However, an error message “You need permission to perform this action” always pops up each time they delete the folder. Here’s a true example from the Windows 11 forum.
In Windows 10 I like. to delete the large contents of the LCU folder after each update here C:WindowsservicingLCU. Windows 11 won’t let me delete the file since I get the message shown below. How can I force this deletion?
What Is LCU Folder
First of all, we need to figure out what is LCU before you delete it. LCU refers to the Last Cumulative Update which is a backup folder in case you may want to uninstall the last CU. This folder is usually located at the C:/Windows/Servicing/LCU directory in Windows 11/10.
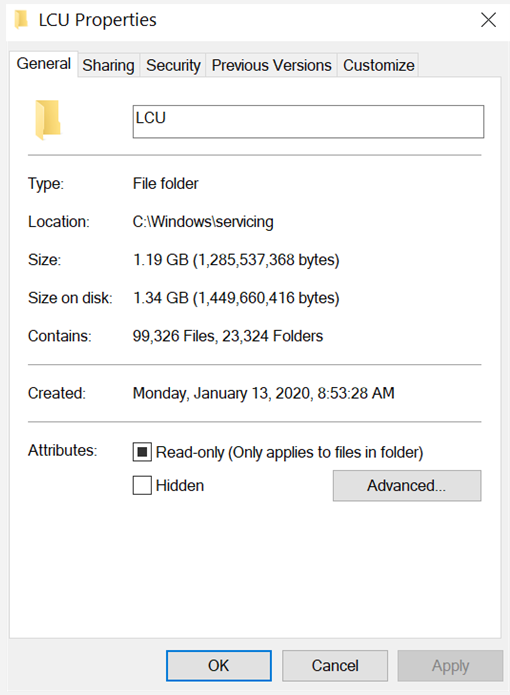
However, many users find that the LCU folder even takes up to several GBs of disk space. Why? Since the LCU folder includes the latest cumulative updates, it adds a new folder in the LCU folder each time you install a cumulative update pack. As time goes by, the LCU folder grows larger and larger if you never clean it.
Is Safe to Delete the LCU Folder
Another frequently asked question is whether it is safe to delete the LCU folder. The answer depends on which cumulative update in the LCU folder you want to delete on your computer. Usually, we recommend you delete the latest CU package in the LCU folder. This is because you may encounter broken Windows updates after you clear all contents of the LCU folder.
Why? You may have a better understanding after knowing the example. Assume that you have installed Windows update KB00001, KB00002, and KB00002 in the first three months, and then Microsoft releases Cumulative Update KB00004 which packed KB00001, KB00002, and KB0003 together. If you install the Cumulative Update, it will make a backup folder of these updates in the LCU folder.
Microsoft changes the permissions on C:WindowsservicingLCU where you can only read/execute/list contents for this folder in Windows 11, while the Administrators Group had full control in Windows 11. That’s why it’s hard to empty the LCU folder in Windows 11.
How to Empty the LCU Folder in Windows 11/10
So, how to clear the LCU folder in Windows 11? There are 4 applicable methods that you can select based on your needs.
Way 1. Take Full Ownership of the LCU Folder
To delete the LCU folder in Windows 11 smoothly, the first thing you should do is to change the permissions of the folder itself and give it Administrator Full Control. Here’s how to do that:
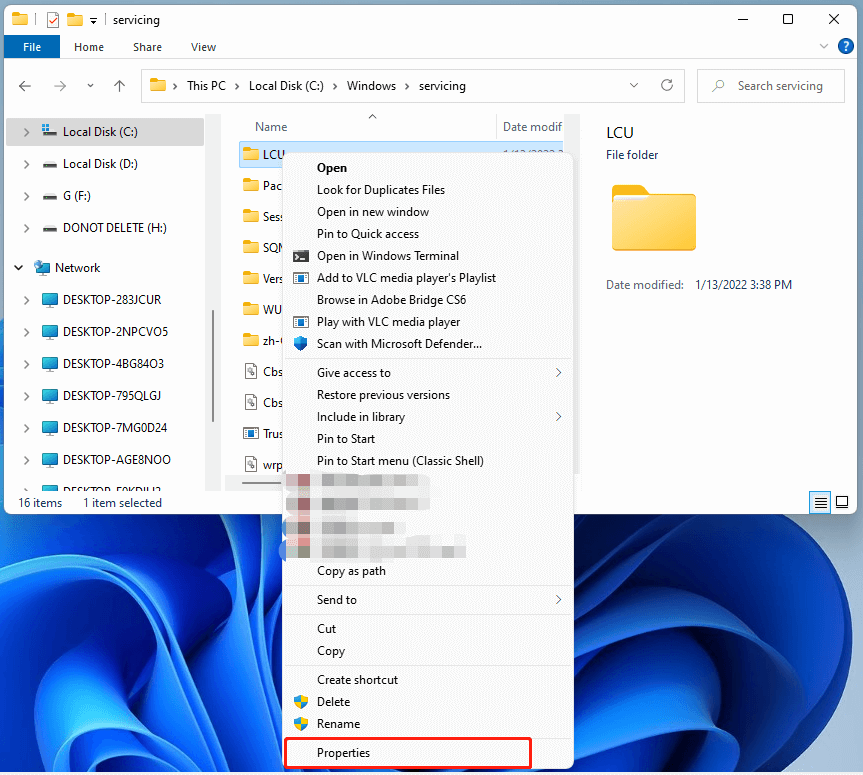
Step 1. Press Win + R keys to open the File Explorer, and then navigate to the C:/Windows/Servicing/LCU directory.
Step 2. Right-click the LCU folder and select Properties.
Step 3. Navigate to the Security tab and click on Advanced.

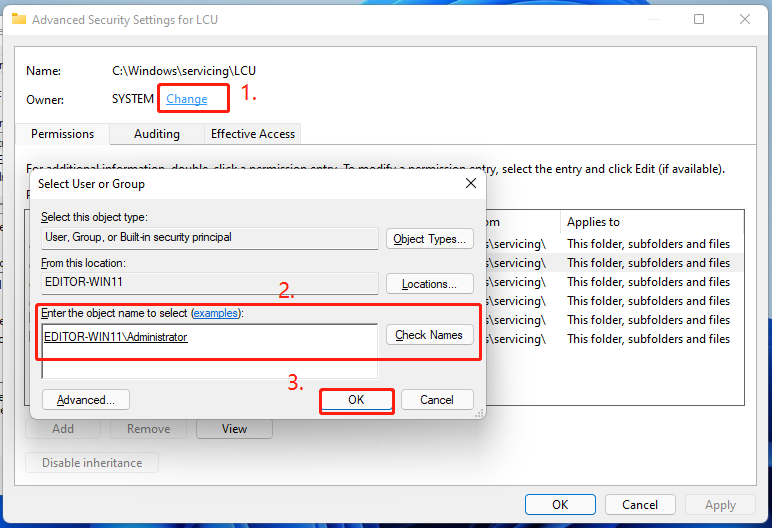
Step 4. Now the Advanced Security Settings window pops up, click on the Change link next to the Owner section. In the pop-up dialog box, enter the object name you are using (here we take Administrator for example), click on Check Names, and click on OK.
Step 5. In the Advanced Security Settings window, tick the checkbox next to Replace owner on sub containers and objects and click on OK.
Step 6. Click on Add button in the Advanced Security Settings window.
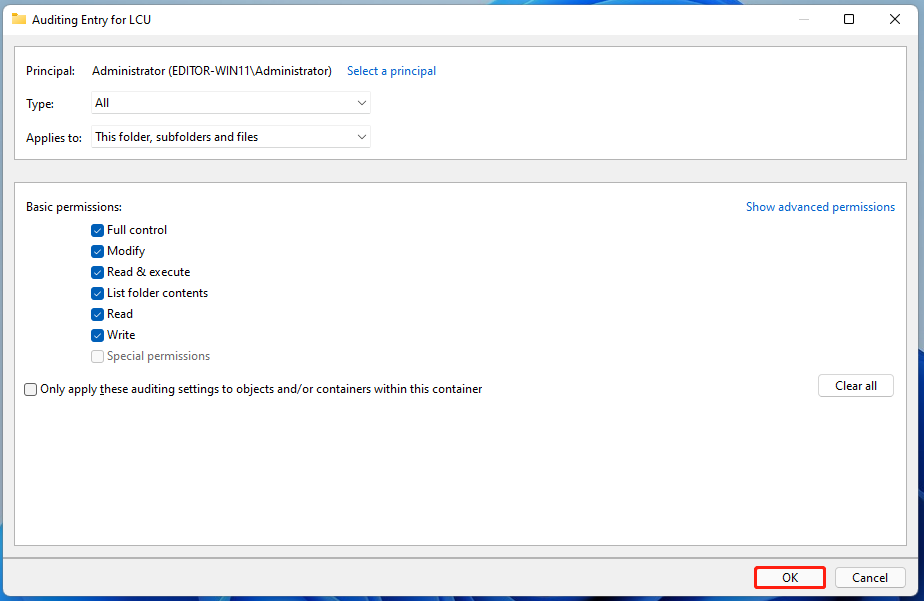
Step 7. In the pop-up window, click on Select a principal and repeat the procedure in Step 4 to type your object name.
Step 8. Tick the checkbox next to Full Control at the Basic permissions tab, and then click OK to exit the current window.
Step 9. Click on OK and Apply in the Advanced Security Settings window to execute these changes.
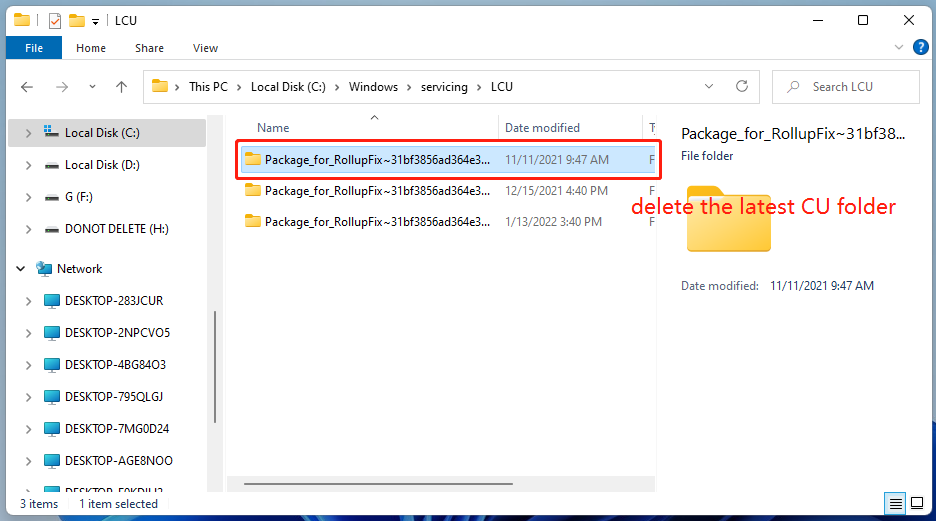
Step 10. Once done, you can open LCU folder and select the latest CU folder and delete it. Of course, you can empty the LCU folder in Windows 11 if you no longer need them.
Way 2. Use CMD
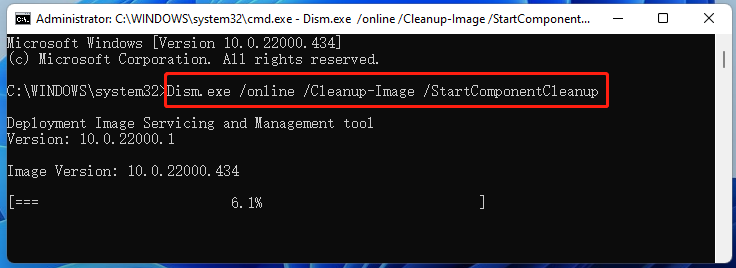
Another simple method on how to delete the LCU folder in Windows 11 is to use the elevated Command Prompt window. This operation can remove all but leave the last folder in the LCU folder. Here’s how:
Step 1. Press Win + R keys to open the Run box, and then type cmd in it and press Ctrl + Shift + Enter to access the Command Prompt window with admin rights.
Step 2. In the elevated Windows Terminal window, type the following command and hit Enter to delete the LCU folder in Windows 11.
Way 3. Run Disk Cleanup
Some users reported that running Disk Cleanup can help remove all but the latest one in the LCU folder. Here you may have a try.
Step 1. Type cleanup in the Windows search box and select Disk Cleanup from the best match.
Step 2. Select the C drive from the drop-down menu and click on OK.
Step 3. Click on Clean up system files and select the C drive again.
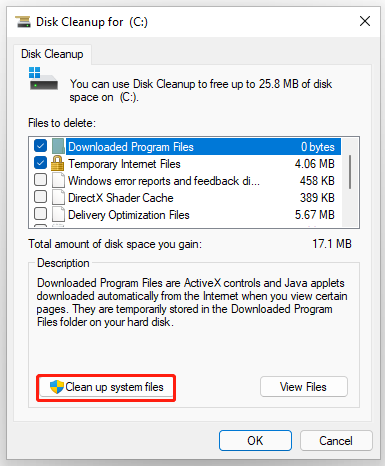
Step 4. Wait a while until the tool completes the scan, and then select the folders you want to delete and click on Delete Files.
Way 4. Use a Professional File Deleter
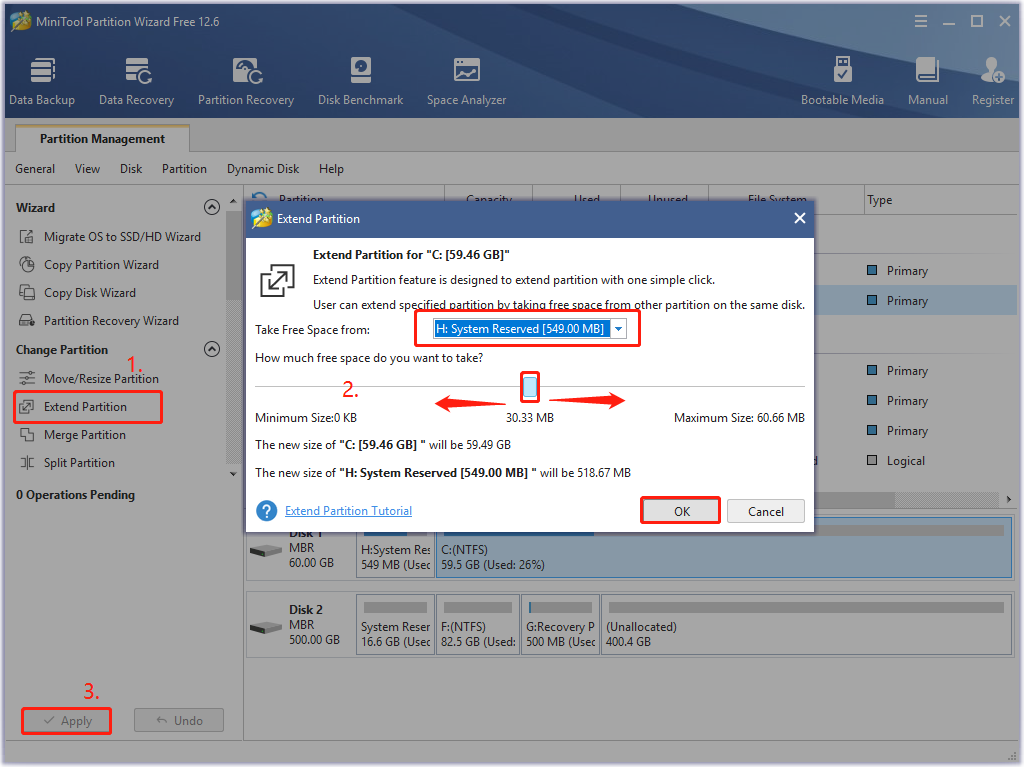
In addition, you can use a professional file deleter like MiniTool Partition Wizard. Its Space Analyzer feature helps you check what exactly eats up your system disk and delete them permanently. If you find the C drive is full but don’t want to delete the LCU folder, you can extend the C partition using the MiniTool software too. Here’s a simple guide for you.
MiniTool Partition Wizard DemoClick to Download100%Clean & Safe
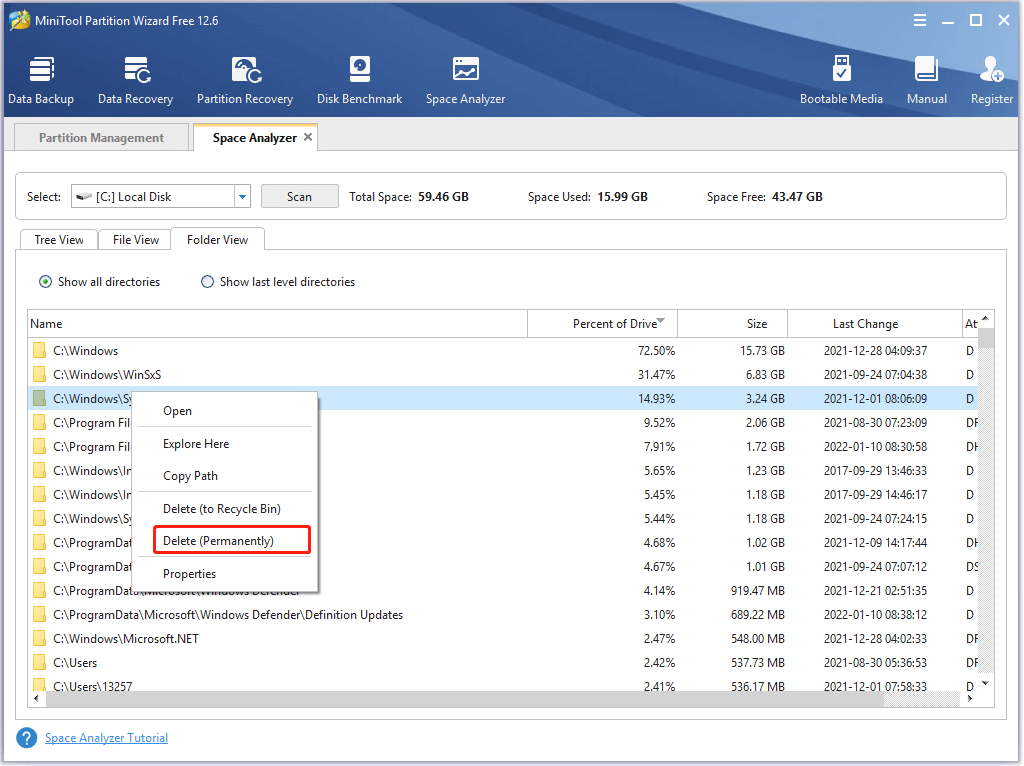
Step 1. Launch this software to enter its main interface, and then select the C partition from the disk map and click on Extend Partition from the left pane.
Step 2. Select the drive that you want to take free space from, and then drag the slider bar to occupy the free space or input the specific volume. Then click on OK.
Step 3. Click on Apply to execute the process.
User Comments :