Do you know about Windows search indexing? Do you know how to configure it to optimize searching efficiency? If you don't know about these, don't worry. MiniTool will explain them to you.
What Is Search Indexing?
In Windows OS, the process of looking at files, email messages, other content on your PC and cataloging their information is termed as Indexing. With the help of search indexing, you can get results faster by looking at an index of terms.
A well-made digital index can help quickly direct the user to the information he is looking for by scanning for common properties. In the absence of Indexing, the search process could take minutes to complete. However, when the indexing is created, you will get results just in seconds.
![[Solved] File Explorer Search Not Working in Windows 10](https://images.minitool.com/partitionwizard.com/images/uploads/2019/12/file-explorer-search-not-working-thumbnail.jpg)
How to Configure Search Indexing
1. Add or Remove Folders to Be Indexed
Step 1: Type “Windows search settings” into the Windows search box and click the best-matched result.
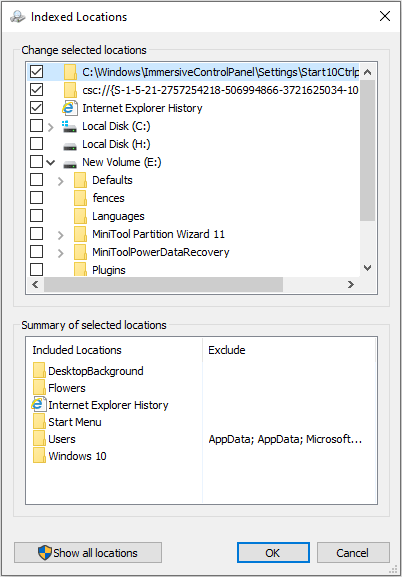
Step 2: Click “Customize search locations here” to open Indexing Options window. Then, click the Modify button.
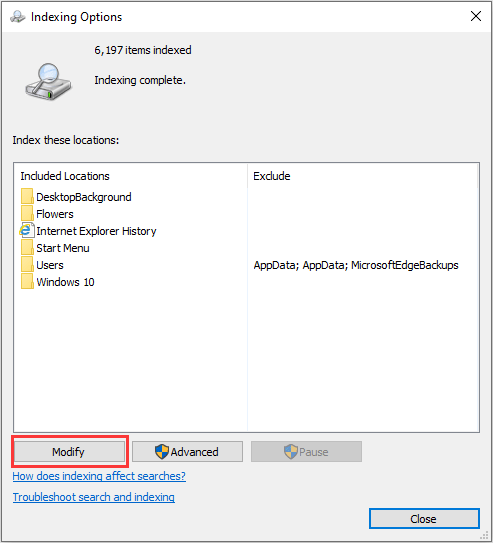
Step 3: Check the folders you search and use frequently, and uncheck folder you seldom use. Then, click the OK button to save changes.
By default, most of the common user files on your computer are indexed. Therefore, I only recommend you to check those folders which you search frequently, otherwise your index may become too large, which in turn may slow down your regular searches.
2. Add or Remove File Types to Be Indexed
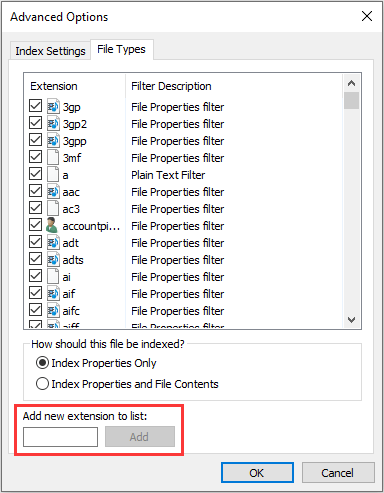
Step 1: Open Indexing Options window and click the Advanced button.
Step 2: Navigate to File Types tab and check or uncheck file types to select or de-select them. Then, click OK button to save changes. You can also add a new file extension to the list. Through this way, you can include or exclude certain file types from search.
3. Rebuild Index
If a large number of catalogs and data are changed, the index must also be changed accordingly, so that relevant content can be searched quickly and accurately. However, it takes time for the system to detect changes and rebuild the index, so you can manually rebuild the index.
To do that, you just need to click the Advanced button, locate Index Settings tab, and then click Rebuild button in the Troubleshooting box.
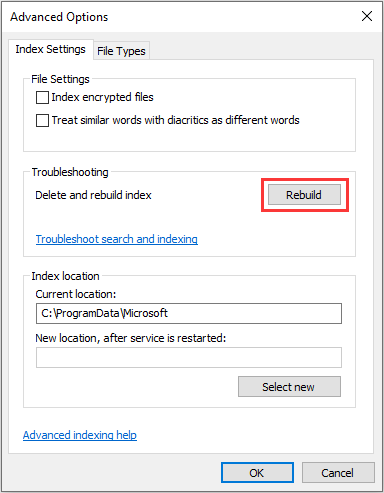
On this tab, you can also make other changes to Windows search index. For example, you can add encrypted files to the index. However, before doing this, please enable Windows BitLocker on your system drive for security purposes, otherwise Windows may show you a yellow security warning saying Cannot Verify Files.
You can also change the default location where Windows Search Index is store. This operation will restart Windows Search Service. After that, indexing will take place afresh and be saved at this new location.
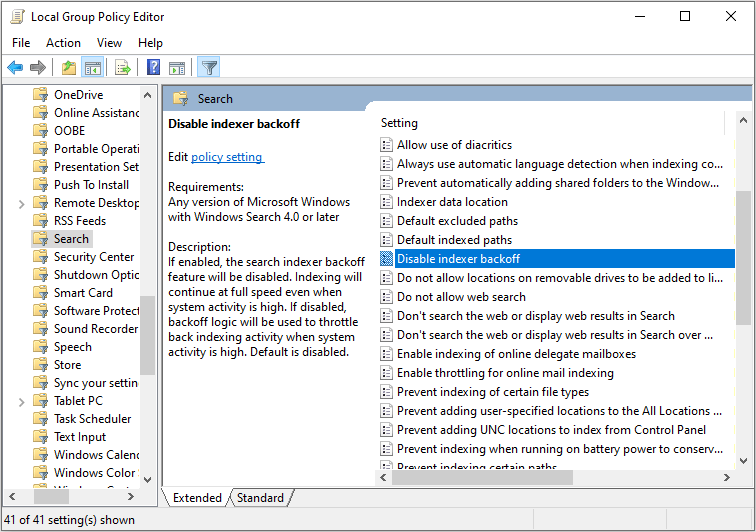
4. Disable Indexer Backoff
In order to prevent the index from occupying too much system resources and affecting the user’s work, the system will reduce the speed of the indexer when it detects that the user is currently running many tasks, thereby reducing the system resource occupation. This process is called Indexer backoff.
Although this process will reduce the use of system resources, it also reduces the indexing speed. In addition, it is not necessary for users with high computer configuration. Therefore, in this part, I will show you how to disable Indexer backoff.
Step 1: Press “Windows + R” simultaneously to open Run box. Then type “gpedit.msc” into the box and hit Enter to open Local Group Policy Editor.
Step 2: Navigate to Computer Configuration > Administrative Templates > Windows Components > Search.
Step 3: Highlight Search and scroll down the right box to find Disable indexer backoff. Double-click it and then enable it.
At times, the Search Indexer is reported to consume High Disk or CPU usage. However, I don’t recommend you to disable Search Indexer, because there are many apps depending on the index to provide up-to-date search results for your files and other content. Disabling indexing may result in the apps running either slowly or not working at all.
About The Author

Position: Columnist
Linda has been an editor at MiniTool for seven years. She continuously learns about computers and puts her knowledge into practice. Moreover, she is particularly knowledgeable in disk management, data recovery, system installation, and PDF editing. Her articles typically reference multiple examples or are based on her own experience, providing users with the most suitable solutions.
User Comments :