What is Windows Installer folder? Is it safe to delete files in this folder? This post of MiniTool Partition Wizard will tell you how to safely free up space with the help of the Windows Installer cleanup utility.
About Windows Installer Folder
In this section, several topice related to Windows Installer folder are talked about. After reading the content below, you will have an overall understanding of Windows Installer folder.
What is the Windows Installer folder?
Windows Installer folder is a protected folder with System & Hidden attributes, which can be found under the Windows folder. When you install a program in Windows, its .msi setup package will be copied to the Installer folder.
The Installer directory is a cache location for installer data files of various applications installed on the PC. When you repair, uninstall, or reinstall the program via Apps & Features in Settings or Programs & Features in Control Panel, you are required to use the .msi package from the Windows Installer folder to do these operations.
Once the corresponding setup package (.msi or .msp) file isn’t found, Windows prompts the error “The installation source for this product is not available. Verify that source exists and that you can access it.”
Common issues with the Installer folder
However, you may find that the Installer directory grows and consumes a massive amount of hard disk space. This phenomenon often occurs and it can be seen in many forums or communities. Well, here is a true example.
On my SSD machine, the C:\Windows\Installer folder is massive and takes up about 15% of my total disk space. Is there a way to clean up that folder without killing Windows 8.1/10? Tucking away the installers on the OS partition seems wasteful. -superuser.com
Can you delete all files in this folder?
The answer is negative because the Windows Installer folder contains important files for the accurate run of the system. If you delete these files, you can’t work with your PC. Actually, you should never delete the contents of the C:\Windows\Installer folder randomly.
Windows installer patches sometimes may get orphaned during the process of software uninstallation. When a program is uninstalled, the corresponding .msi package is left behind in the Windows Installer folder. Then these orphaned packages can be deleted.
Besides, many unnecessary files created during normal operations can also be removed. Based on the above fact, you can conduct a Windows Installer folder cleanup Windows 10 with offered methods in this post.
Method 1: Delete Orphaned .MSI Files via PatchCleaner
How to find the orphaned .msi files? PatchCleaner identifies orphaned files in the Windows Installer folder and offers you the option to delete these files or move them to a different location. Follow these steps to use this Windows Installer Clean up tool.
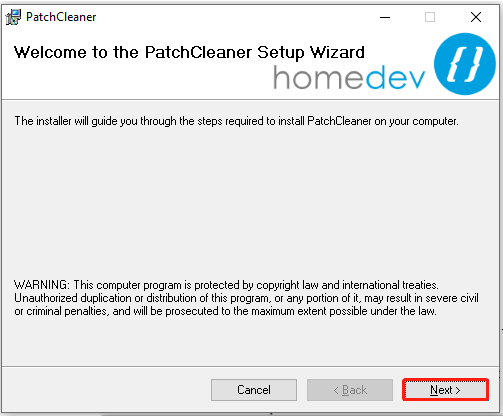
Step 1: Click here to download PatchCleaner。
Step 2: After downloading it, double-click on its setup file and follow the pop-up instructions to install it.
Step 3: When the installation process ends, run it by double-clicking on its icon on the desktop. Then you can see the corresponding sizes of used, excluded, and orphaned files in the Installer folder.
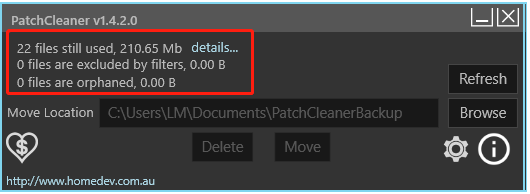
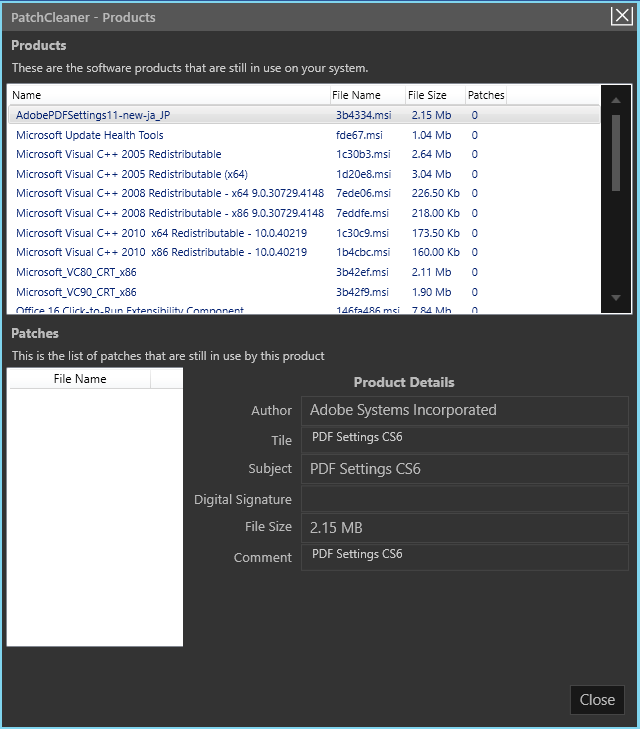
Step 4: You can click details behind each file category to see the detailed information if there are any files. For instance, here is the details of “in use” or valid program entries.
Step 5: If there are any orphaned files on your computer, click details to learn the detailed information. Then you can either delete the orphaned setup package or move it to another folder and then delete it safely after a few days.
How to safely clean up Windows Installer folder? In addition to PatchCleaner, there are some other Windows Installer cleanup programs to do that.
You might also be interested in this: 10 Best Free PC Cleaners to Clean up and Speed up Your Computer
Method 2: Make Use of Windows Settings
Step 1: Open Settings by holding the Windows and I keys at the same time.
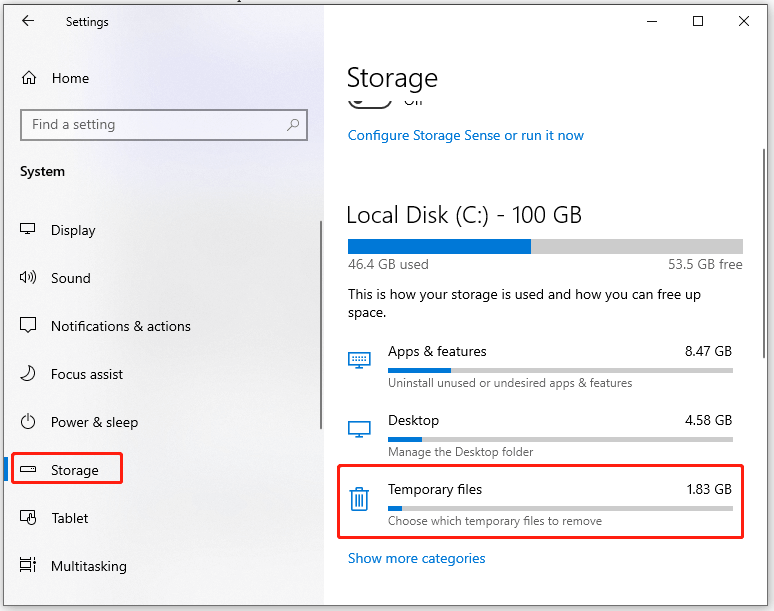
Step 2: In the Settings window, click System.
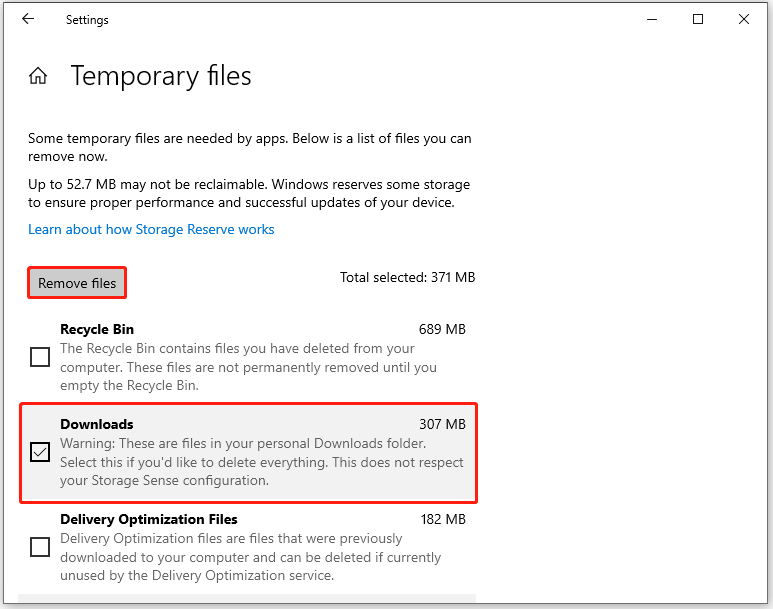
Step 3: Click Storage under the System tab, and then move to the right side of the window and tap Temporary files to continue.
Step 4: Choose file types like Windows Update Cleanup and Downloads from the list, and then click on the Remove files option to execute the operation.
Method 3: Run Disk Cleanup
Disk Cleanup is a built-in utility on Windows devices. It can help you clean up system files safely. It is a free Windows Installer cleanup utility. You can free up space via Disk Cleanup using these steps.
Step 1: Open File Explorer by pressing Windows and E keys.
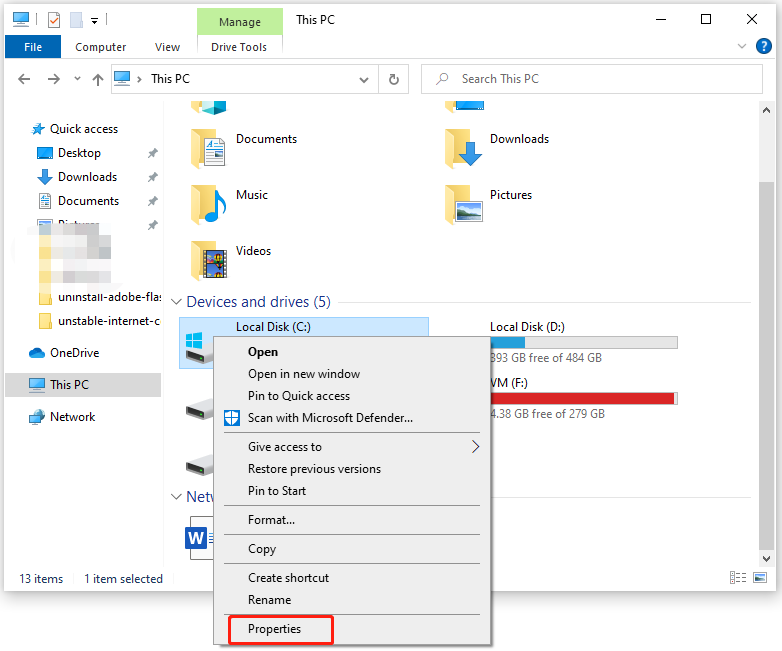
Step 2: Click on This PC in the left pane, and then find and right-click on the C drive and choose Properties.
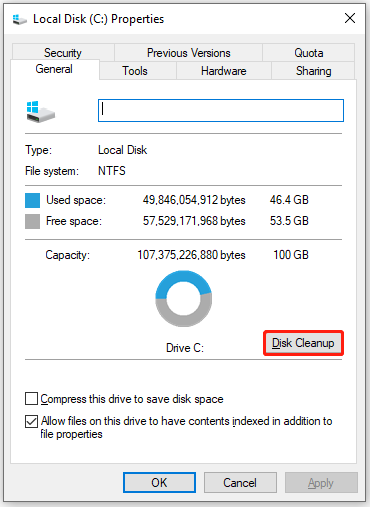
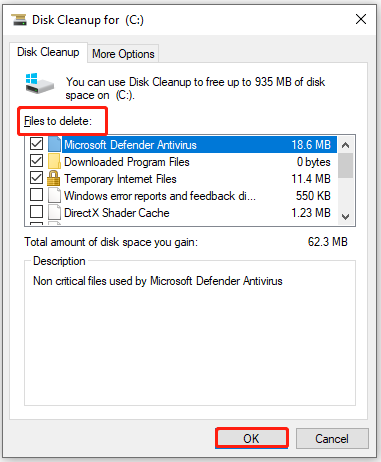
Step 3: Tap Disk Cleanup in the Properties window.
Step 4: After you click on Clean up system files, the utility will immediately calculate the disk space that you can free up from the selected drive.
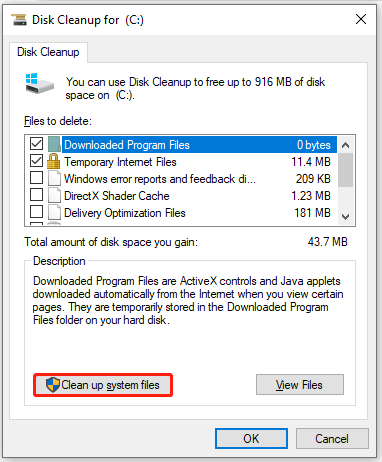
Step 5: Choose files to delete and click OK to carry out the operation.
You can directly delete unimportant files like Windows Defender, downloaded program files, temporary Internet files, thumbnails, etc.
Further reading:
Though Windows Settings and Disk Cleanup can help you do the Windows Installer folder cleanup job, they probably can’t reach your expectation. What’s more, some errors might appear while you’re using Settings or Disk Cleanup. According to user reports, errors like Settings not working, Settings app not opening, Disk Cleanup won’t open/work, Disk Cleanup stuck on Windows Update Cleanup, etc.
In cases like that, you need a third-party program to find and delete unused files in the Windows Installer folder. MiniTool Partition Wizard is an ideal option. For more information, move to the next section right now!
Related article: How to Clean up Your Computer? Top 8 Methods for You
Method 4: Use MiniTool Partition Wizard
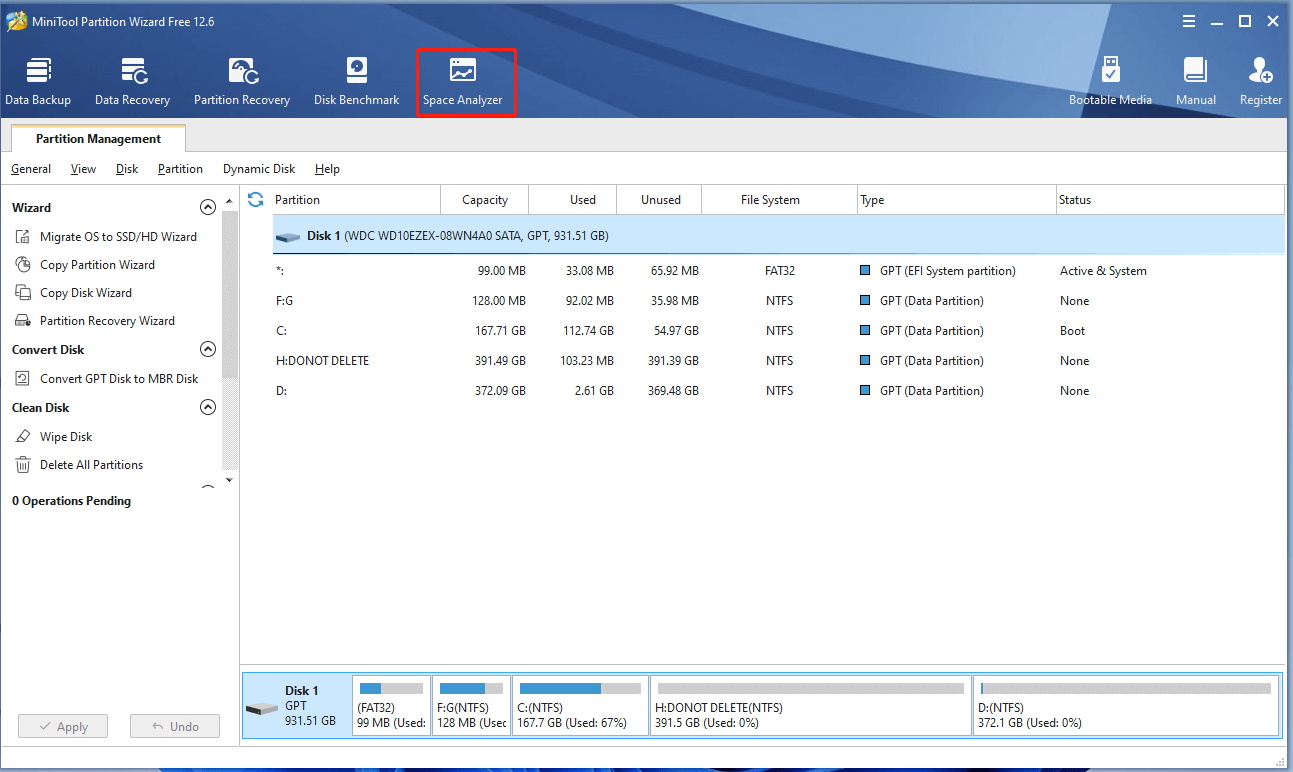
Find what is taking up your hard drive space with a professional disk space analyzer and then delete unused files or folders. MiniTool Partition Wizard is such a tool. Its Space Analyzer feature enables you to know what is exactly consuming your disk space.
Learn your hard disk usage and delete space-consuming and useless files with this free Windows Installer cleanup utility now!
Step 1: Download and install MiniTool Partition Wizard by clicking the button below and follow the on-screen instructions.
MiniTool Partition Wizard FreeClick to Download100%Clean & Safe
Step 2: Launch this app to enter its main interface.
Step 3: Click on the Space Analyzer feature in the top bar.
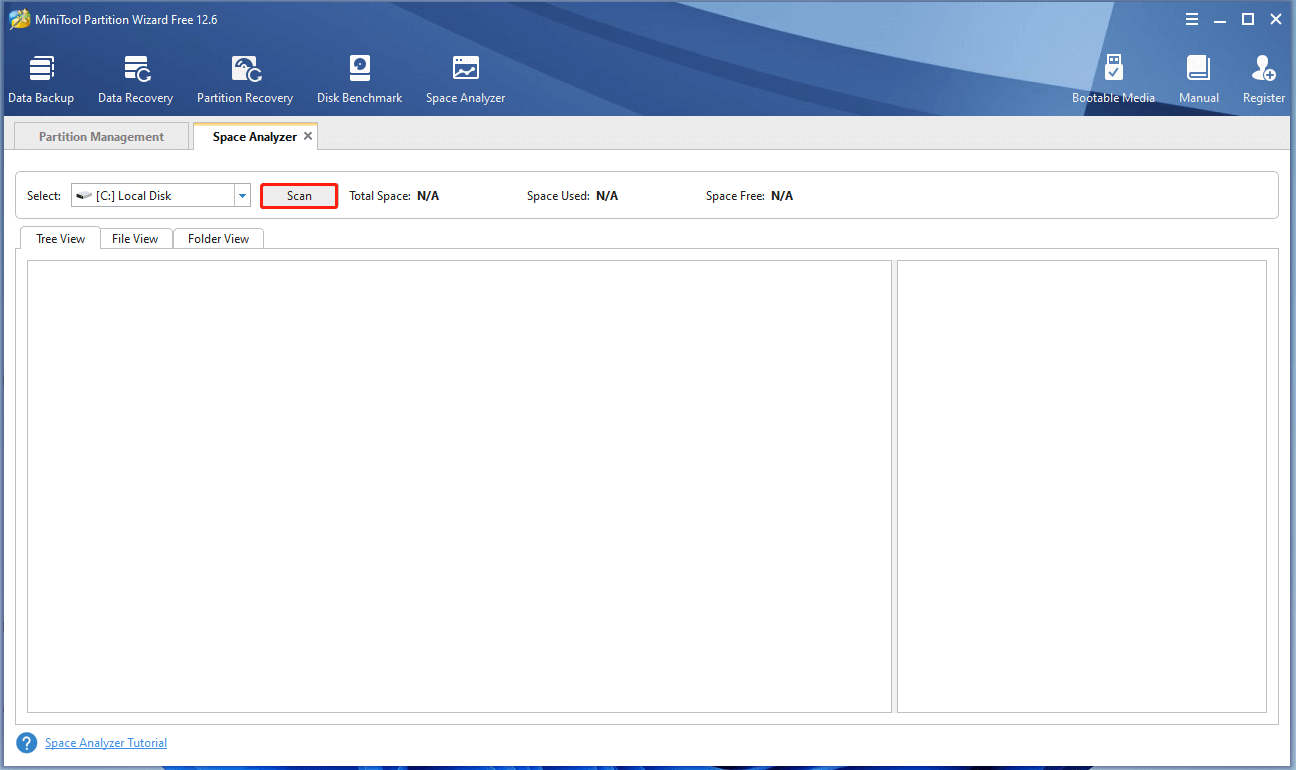
Step 4: In the next window, choose C from the drop-down menu and click Scan. Then the program will automatically scan the selected drive.
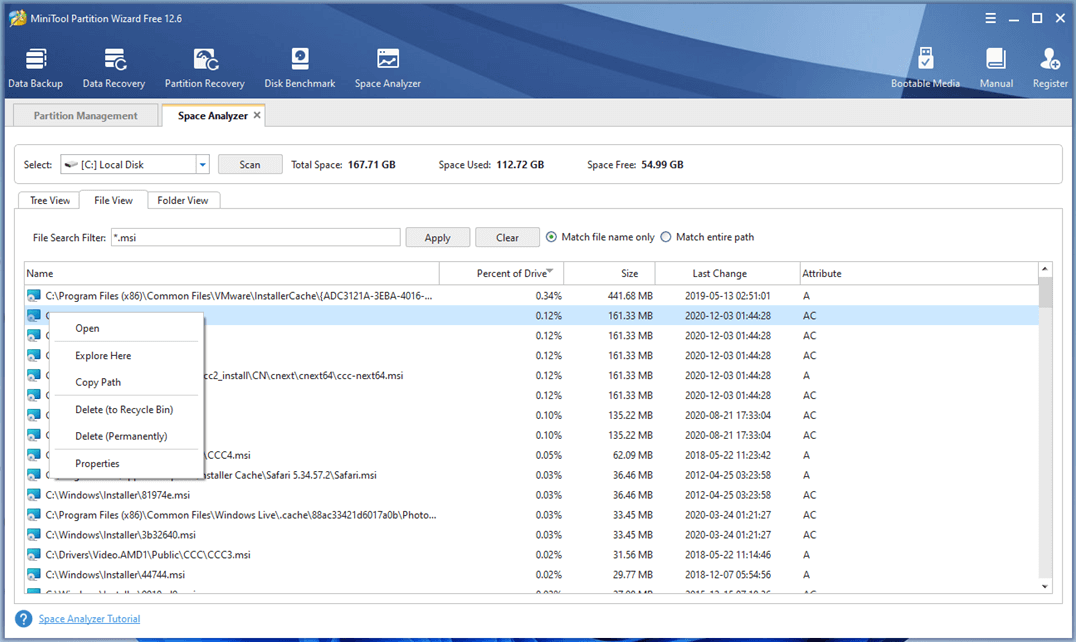
Step 5: After a while, you will receive the result. Expand the Windows folder to find the Installer folder. Likewise, expand the Installer folder to display its content. You can find the target files by using .msi or .msp file filters.
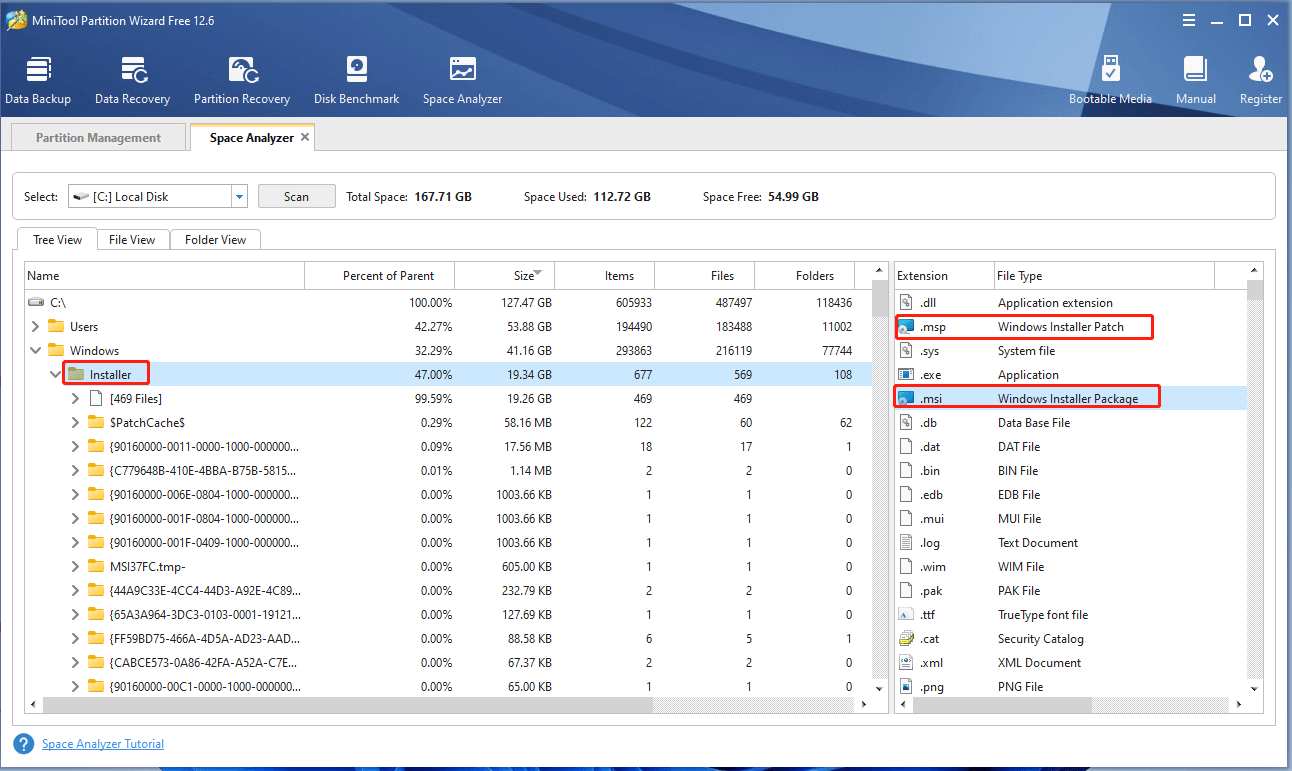
Step 6: Right-click on the unused .msi or .msp files and click Delete (to Recycle Bin) or Delete (Permanently) based on your need.
Method 5: Run Commands in CMD
In addition to the above methods, you can also perform Windows Installer folder clean up by running rmdir or rd command in CMD. Both commands can delete entire directories/folders. Besides, they work in the same way.
Here, we show you how to clean up Windows Installer folder via the rmdir command.
Step 1: Type cmd in the search box and then click Run as administrator under the searched Command Prompt app.
Step 2: In the Command Prompt window, type the command: cd <path of the folder>and hit Enter. Please remember to change the path of the directory and set it to the path of the folder. For instance, if the Windows Installer folder is located on the Desktop, you should type cd desktop and press Enter to run it.
Step 3: Delete the Windows Installer folder by running this command: rdmir Windows Installer. Type the command in the Command Prompt and hit the Enter key to execute it. After the command is executed, the Windows Installer folder will be removed.
Further reading:
To delete a directory via the rmdir command, type rmdir <directory name> and hit Enter. Please note that any directories deleted with the rmdir command can’t be recovered. You should think twice before executing the operation.
Also read: Ultimate Guide to Resolve Can’t Delete Files from SD Card Error
Bottom Line
You will learn what a Windows Installer folder is and how to safely execute a Windows Installer folder cleanup from this post. You can either clean up Windows Installer folder with a Windows built-in tool or an expertized Windows Installer folder cleanup utility.
Is this post helpful for you? Do you encounter any difficulties while executing the cleanup operation? Well, please share your questions in the following comment area. If you have any doubts about MiniTool Partition Wizard, directly contact us by sending an email to [email protected].
User Comments :