You will encounter sync timing synchronization failure while the Windows Time service is not functioning properly. How to work out it? Here are 6 solutions to it. Have a try now!
Solution 1: Disable Firewall and Third-Party Antivirus
On the one hand, antivirus can protect your computer from being attacked or infected. On the other hand, it can interfere with your clock or other programs. Then, you would receive various errors on the computer. The time synchronization failed error is one of them.
If so, you should disable Firewall or the third-party antivirus installed on the PC. To do that, you can refer to guides below.
- How to Disable Antivirus on Windows 10 Temporarily/Permanently
- [Solution] How to Disable Windows Defender Antivirus on Win10
Solution 2: Restart the Windows Time Service
If Windows time synchronization failed, try restarting the Windows Time service. This method has been proven to be useful. You can have a try.
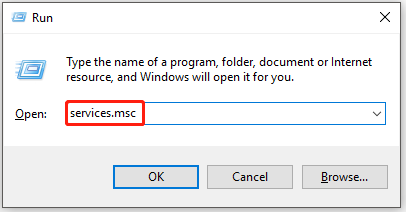
Step 1: Open the Run window by holding Windows and R keys.
Step 2: Type services.msc in the Run window and hit Enter.
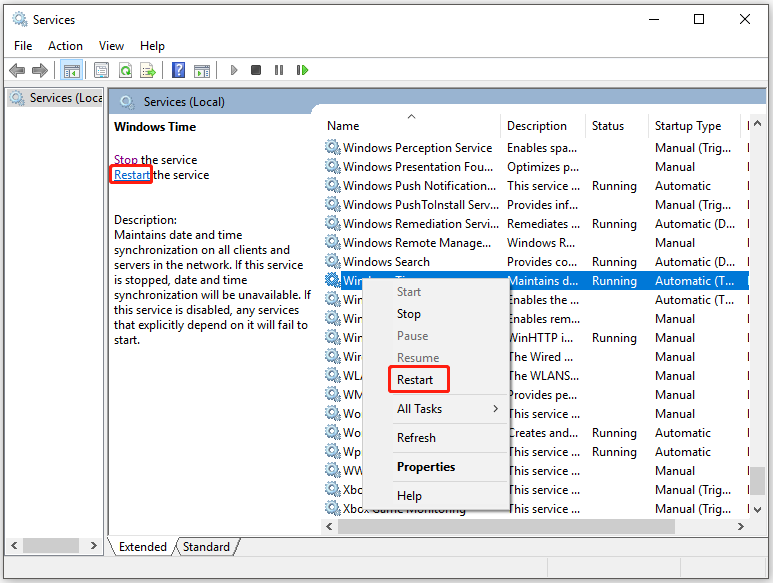
Step 3: Find the Windows Time service in the prompted window. If the status of this service is Running, right-click on it and click Restart. Alternatively, you can also highlight the service and click Restart in the left panel.
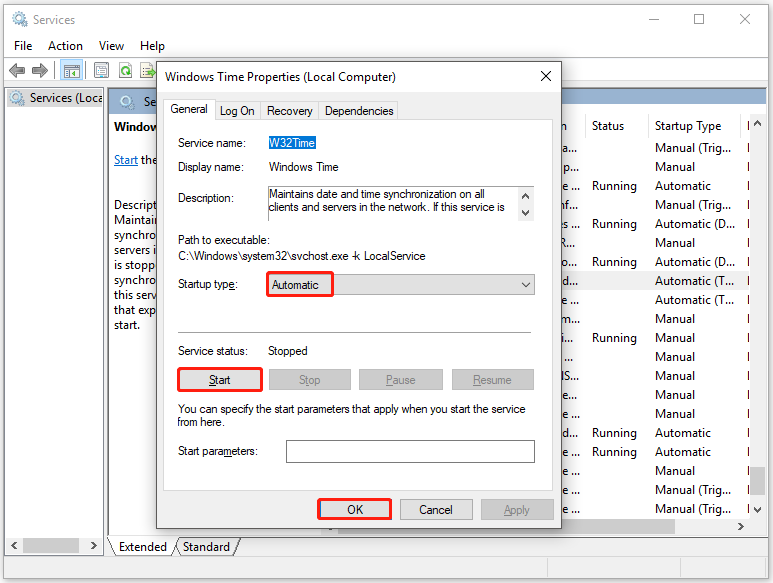
Step 4: If the status of the Windows Time service is disabled, double-click on it. In the Properties window, choose Automatic from the drop-down menu of Startup type and click Start under the Service status section. Finally, click OK to save the changes.
Solution 3: Activate the Time Synchronization Feature
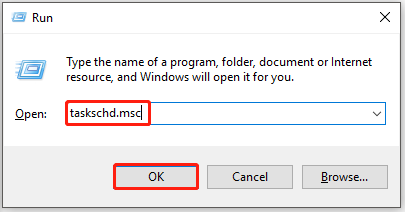
Step 1: Open the Run window, and then type taskschd.msc and click OK.
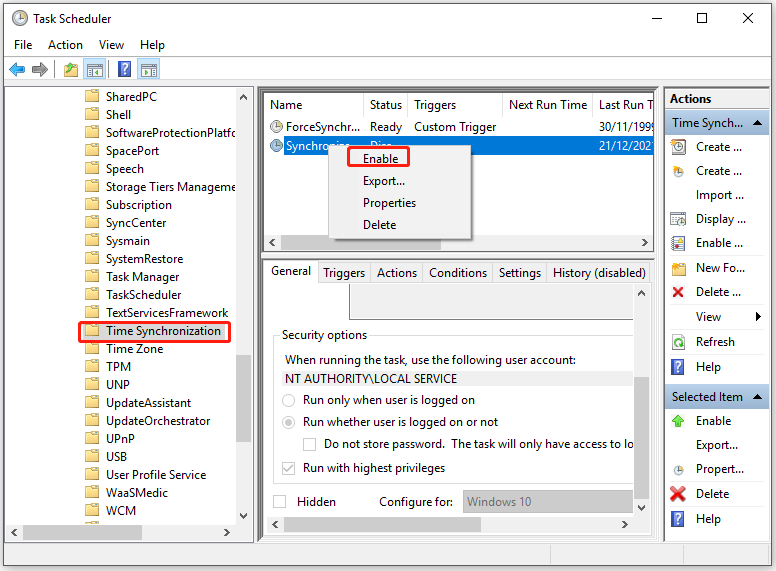
Step 2: In the Task Scheduler window, navigate to the destination by clicking Task Scheduler Library > Microsoft > Windows > Time Synchronization from the left panel.
Step 3: Move to the middle section of the Task Scheduler window. Right-click on SynchronizationTime and tap Enable.
Step 4: Now, close the Task Scheduler window and restart your computer to make the changes take into effect. Then check if the time synchronization failed Windows 10 error is fixed. If not, try other solutions.
Solution 4: Run Command Prompt Lines
If Windows 10 time synchronization failed, try running a few commands to fix the issue. Here are detailed steps for you.
Step 1: Type cmd in the search box, and then right-click on Command Prompt under Best match and tap Run as administrator.
Step 2: In the elevated window, type the following commands and hit Enter after each.
- w32tm /debug /disable
- w32tm /unregister
- w32tm /register
- net start w32time
Step 3: If the commands run successful, you will receive the “The Windows Time Service is starting.” or “The windows time service was started successfully” message.
Step 4: Close Command Prompt and try synchronizing the clock again to see if the time synchronization failed error disappears.
Firestick Remote Not Working? Top 5 Solutions to Resolve It
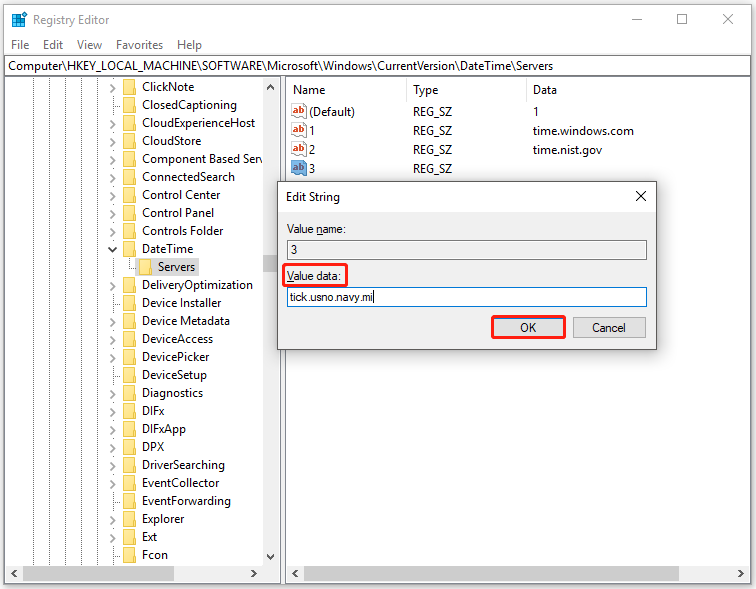
Solution 5: Add More Time Servers
Step 1: Right-click on the Windows icon on the desktop and click Run.
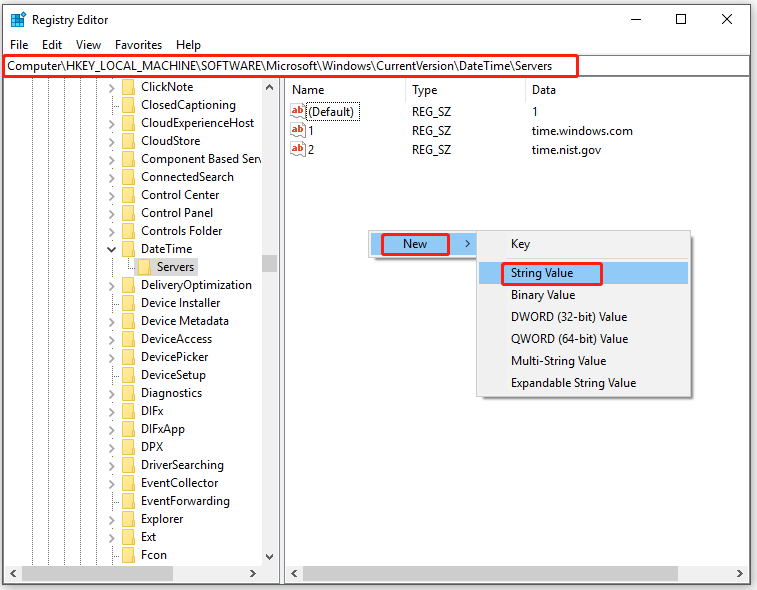
Step 2: Type regedit and hit Enter to open the Registry Editor.
Step 3: Navigate to the destination by following the following below.
Computer\HKEY_LOCAL_MACHINE\SOFTWARE\Microsoft\Windows\CurrentVersion\DateTime\Servers
Step 4: Move to the right side of the window. Right-click on the empty space and click New > String Value.
Step 5: Rename the String Value window based on your situation. As it already has 1 and 2, we rename it as 3 here. Right-click on the String Value and click Modify.
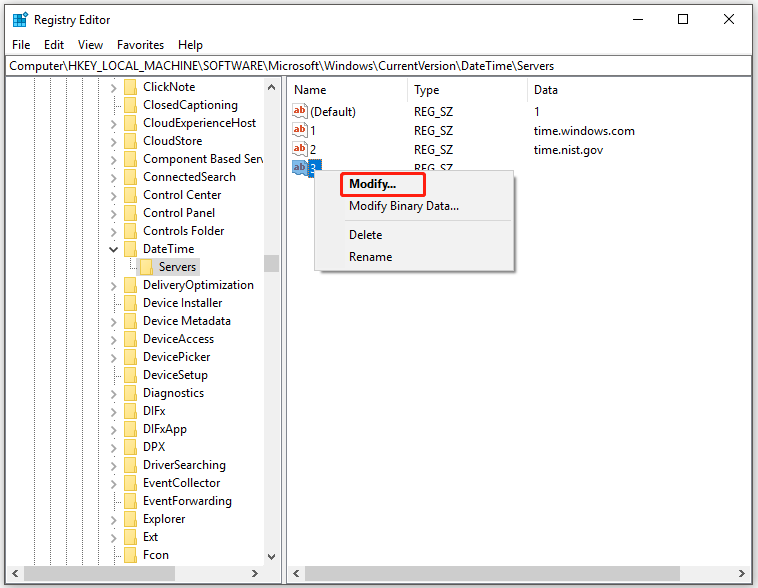
Step 6: In the pop-up window, type tick.usno.navy.mi under the Value data section and click OK to change the changes.
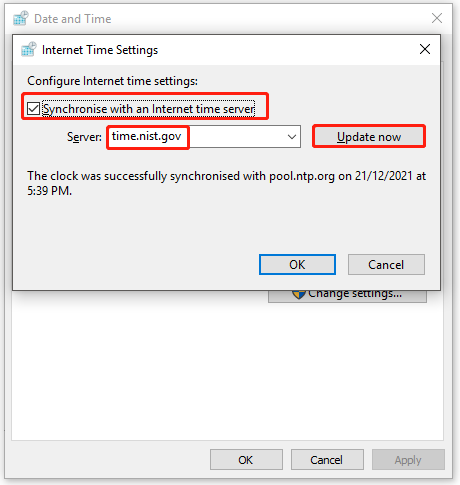
Solution 6: Update Internet Time Settings
Step 1: After opening the Run window, input control and press Enter.
Step 2: In the next window, click Date and Time to continue.
Step 3: In the Date and Time window, move to the Internet Time tab and click Change settings.

Step 4: Check the Synchronize with an Internet time server checkbox, and then choose time.nist.gov from the drop-down menu and click Update now.
Step 5: At last, click OK to save the changes.
User Comments :