You can set per-app graphical performance in Windows 10 to improve Graphics Processing Unit (GPU) performance. An app can be set to always run in Power Saving mode, or in High Performance mode. MiniTool helps you to achieve it.
You are able to customize graphical performance settings on per-app basis in Windows 10, which allows you to configure some apps for better performance and improve battery life. It is particularly useful on devices with integrated and dedicated graphics chips, because you can restrict undemanding apps to low-power integrated processor.

Change Graphics Settings in Windows 10
Step 1: Right-click Start and choose Settings from menu.
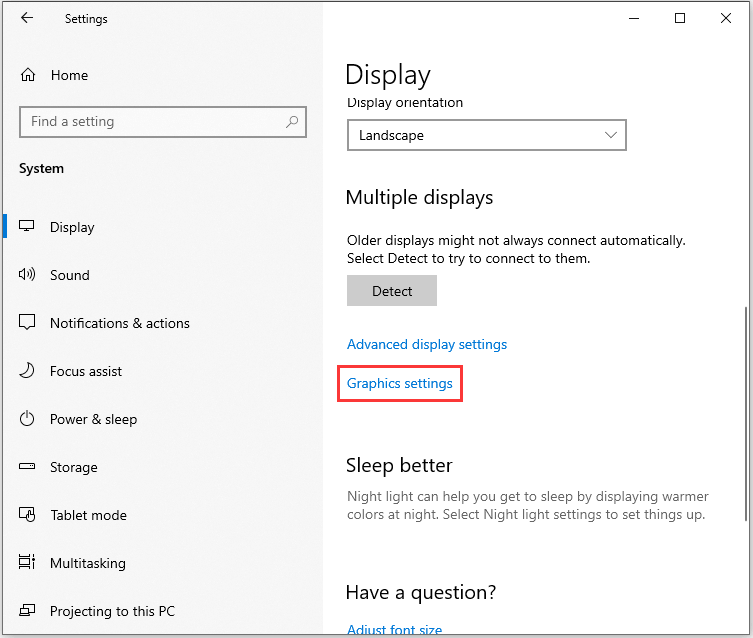
Step 2: Choose System from Settings. Then in Display, scroll to find Multiple displays section.
Step 3: Under Multiple displays, click Graphics settings link.
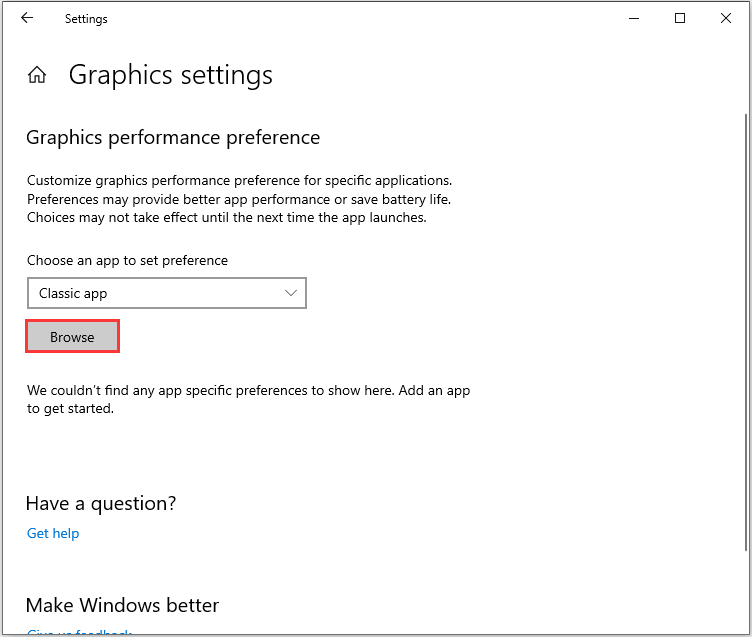
Step 4: Select the correct type from the drop-down menu.
- Choose Classic app if the app you want to run with a graphics processor is a traditional Windows desktop program.
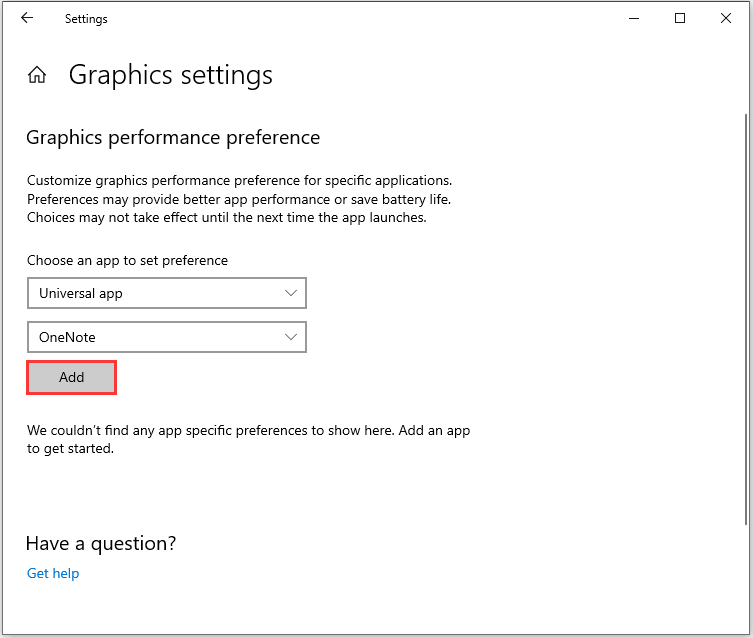
- Choose Universal app if the app you are trying to run with a graphics processor is installed from the Microsoft Store.
Step 5: For classic apps, you need to manually browse to the program’s executable file. Click Browse and you may find the program in the location “C:Program Files” or “C:Program Files (x86)”.
Step 6: For universal apps, you can choose one from the list of all the Microsoft Store apps on your system in the second drop-down menu. Select an app and click Add to put it into the list of Graphics performance preference.
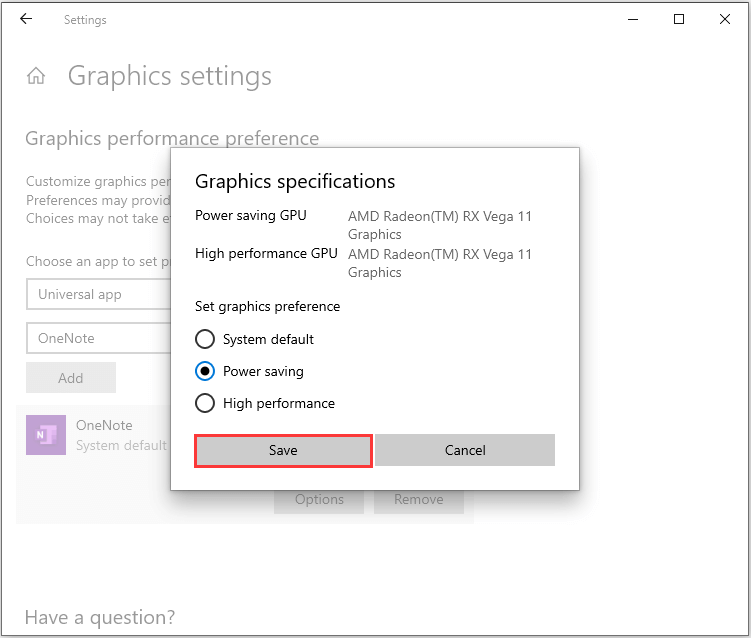
Step 7: Change performance setting. By default, all apps are configured to “System default”. To change this, you can click Options and choose “Power saving” or “High performance”. Then click Save to confirm changes.
![11 Methods to Make Games Run Faster on Computer [Work Fast]](https://images.minitool.com/partitionwizard.com/images/uploads/2019/08/how-to-make-games-run-faster-thumbnail.jpg)
Exceptions
While you would like control over the graphics preference that an app uses, some apps can’t always run as you wish. For example, some simple apps like Paint 3D cannot use the dedicated GPU and there is no way to force them to use it. Even if you do, it may not work with higher performance.
Likewise, some apps such as games will always use the dedicated GPU and you can find it in Graphics specifications.
If you find that when you change graphics settings in Windows 10 for an app, it gets poor performance, or a slow or glitching app, or app crashes appears, you need to return it to its default settings or remove it from the graphics preference all together.
User Comments :