Service Host Delivery Optimization is a service that allows you to download Windows updates faster. This service uploads some updates to the servers to allow other computers on the internet to download them faster. It helps to reduce the bandwidth issues of updating and increase the update speed.
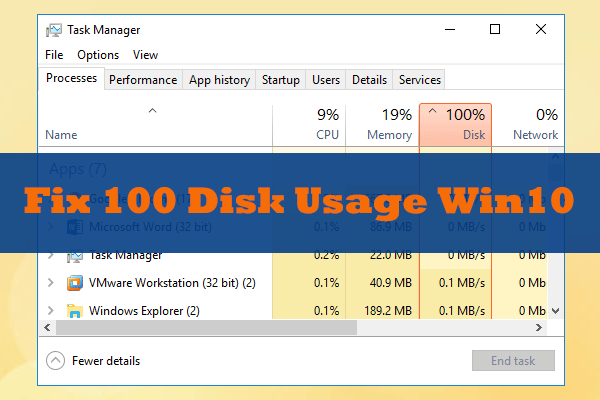
However, many users reported that high disk or CPU usage problem occurs due to Service Host Delivery Optimization. If you are facing the same problem, just keep reading this post to get workable solutions.
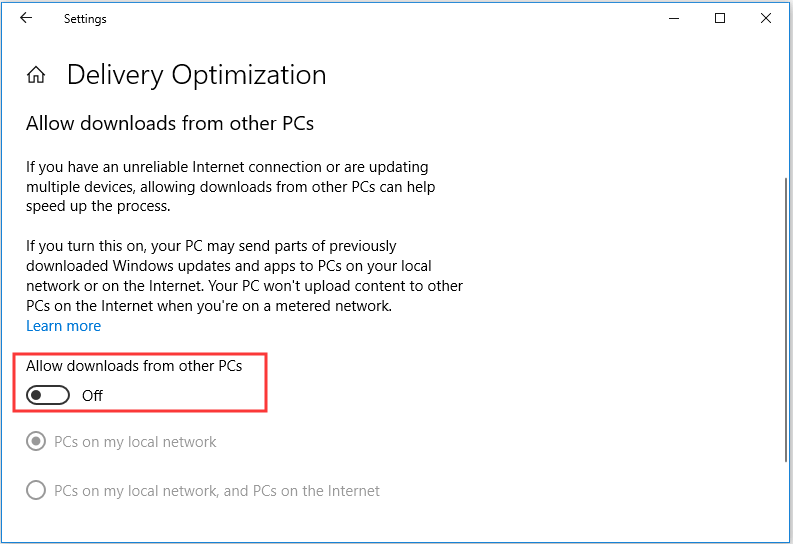
Solution 1: Disable Allow Download from Other PCs
Under the situation of low internet connections, Delivery Optimization service will also upload the new updates that you have, which may lead to high CPU. To fix this issue, you can disable this feature in Windows Update Settings.
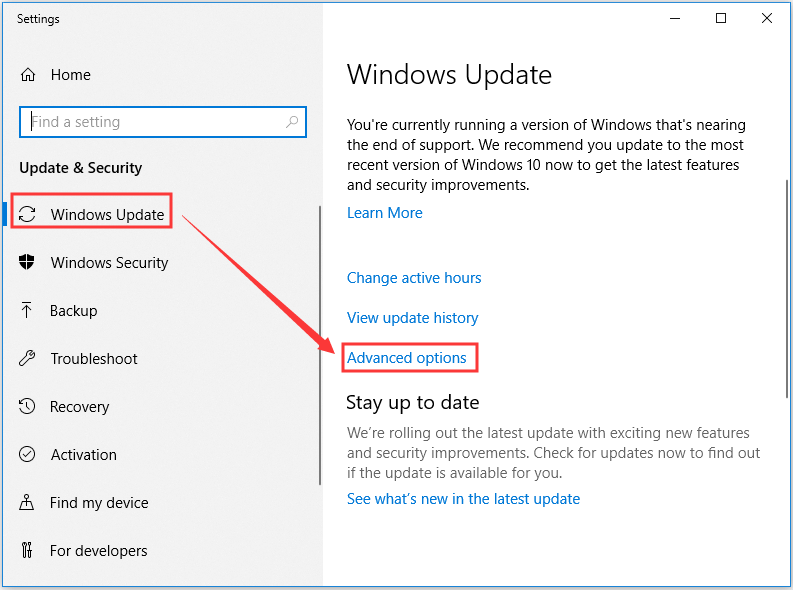
Step 1: Right-click the Start button and choose Settings.
Step 2: Select Update & Security. In Windows Update section, click Advanced options from the right pane.
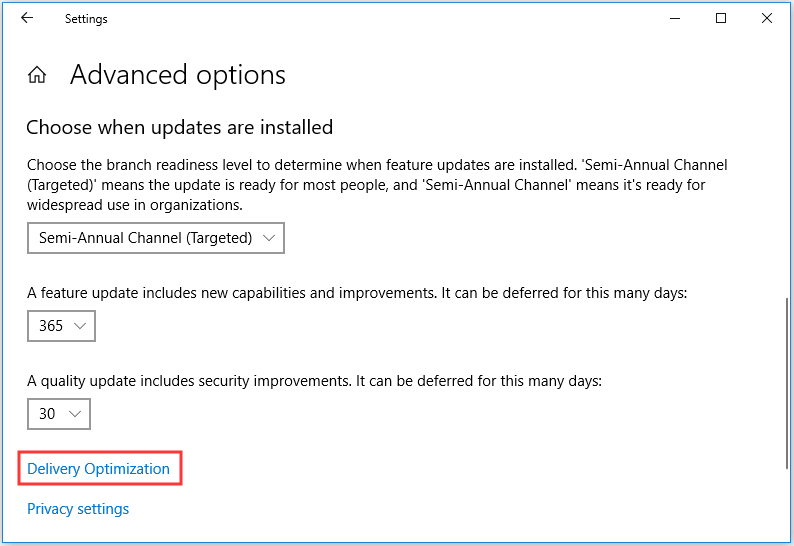
Step 3: In the new page, scroll down to Choose when updates are installed part and click Delivery Optimization.
Step 4: When you get the following page, toggle the button off to disable Allow downloads from other PCs.
Solution 2: Disable Automatic Updates on Windows Store
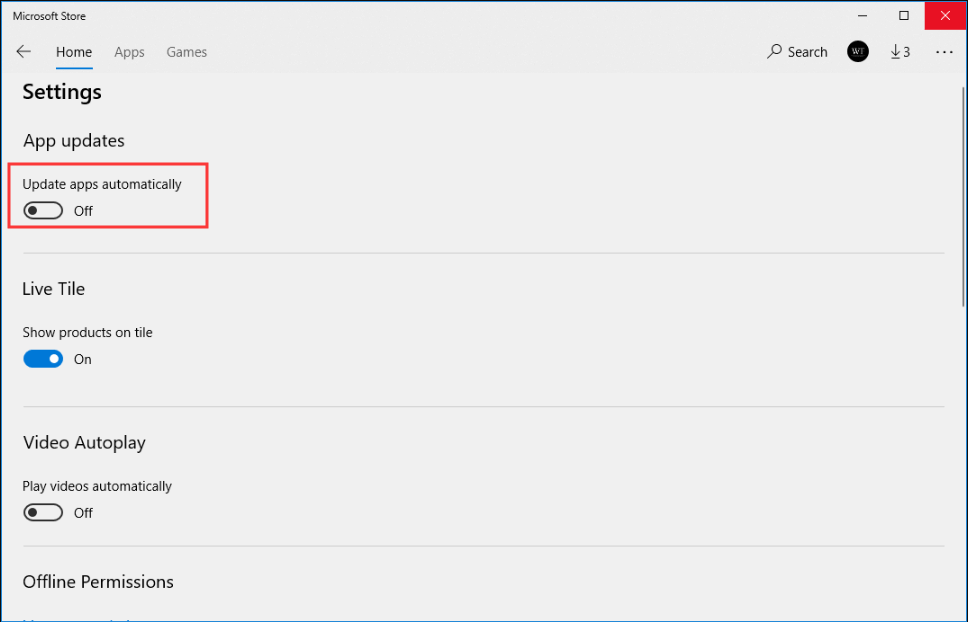
Usually, your Windows Store automatically downloads the updates in the background. You might ignore it but this can cause Service Host Delivery Optimization high CPU usage in deed. In this case, you can disable automatic updates on Windows Store to fix this problem.
Step 1: Press Windows + S to access the search bar. Type store and click the result Microsoft Store to open it.
Step 2: In the main interface of Store, click the account picture. Then, click Settings from the menu.
Step 3: In the Settings window, toggle off the button of Update apps automatically to disable it.
Step 4: Restart your computer and open the Task Manager to check if Service Host Delivery Optimization high CPU usage has been fixed.
Solution 3: Check Background Downloads
Many users reported that they experienced Service Host Delivery Optimization high CPU usage when there are Windows applications downloading/updating in the background.
Windows applications that can be accessed through Store also make use of Delivery Optimization service. So, you can open your Microsoft Store and check if there are pending or current downloads/updates. Just delete or complete them as soon as possible to fix this error.
Solution 4: Modify Your Group Policy
Another way to fix this issue is modifying your Group policy. The detailed steps are displayed below.
Step 1: Press Windows + R to open Run window. Type gpedit.msc in the box and press Enter.
Step 2: After entering Local Group Policy Editor, navigate to the following path: Computer Configuration > Administrative Templates > Windows Components > Delivery Optimization.
Step 3: In the right pane, locate the Download Mode policy and double-click it to open its properties.
Step 4: In the following window, check Enabled option and choose Bypass (100) for Download Mode.
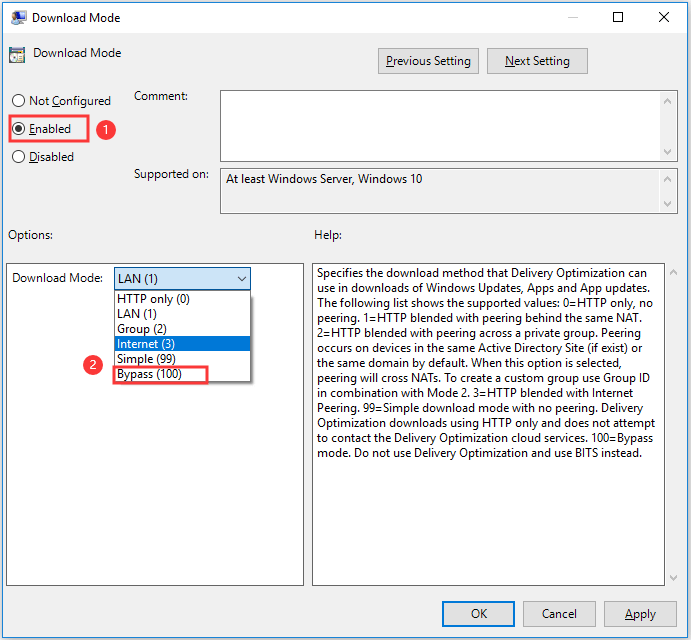
Step 5: Click Apply and OK to save the changes. Then, close the Local Group Policy Editor and restart your computer to see if the error is fixed.

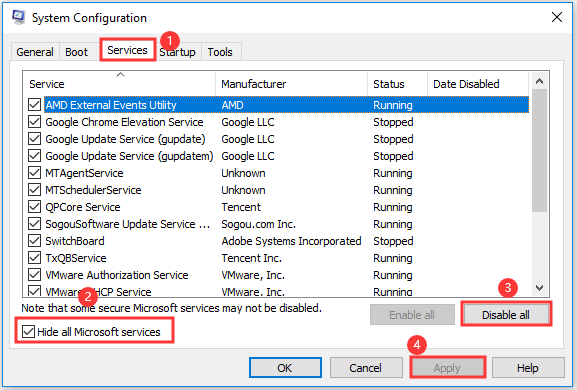
Solution 5: Perform Clean Boot
If all the solutions mentioned above fail to fix this problem, you can try performing Clean Boot.
Step 1: Type msconfig in the Run window and press Enter to open System Configuration.
Step 2: Switch to Services tab and check Hide all Microsoft services. Then, click Disable all and hit Apply button.
Step 3: Now switch to Startup tab and click Open Task Manager.
Step 4: In Task Manager, select each service one by one and click Disable button to disable all the items.
Finally, restart your computer and check if the issue still exists. If it has been solved, one of the external programs should be responsible for this issue. Then, just go to open Startup tab of the Task Manager and disable the listed items one by one.
If the problem appears again after enabling a certain program, this program should be the problematic one and you just need to removed it.
User Comments :