If you are a game lover, you might like Razer Kraken headset. However, it could be annoying if you encounter Razer Kraken mic not working issue. Fortunately, here are some solutions provided by MiniTool Partition Wizard and you can have a try if you’re bothered by the problem.
Razer Kraken headset is one of the most popular headsets produced by Razer Inc. (a global gaming hardware manufacturing company). It is designed with a virtual surround system embedded as well as superior sound quality, and there are many game lovers who prefer this headset.
However, the Razer Kraken headset has been facing a mic problem for quite a while. Many users report that their mic knot working in some applications and games. The problem could happen due to various factors, and you can try the following solutions one by one to fix it if you’re bothered by the same issue.
Solution 1: Set Razer Kraken Headset as Default
If you have multiple mics connected to the PC, the operating system might set another mic as the default device, which leads to Razer Kraken mic not working eventually. To get Razer mic to work, you need to check the status of your mic in Sound settings.
The detailed steps are as follow.
Step 1: Press Win + R to invoke Run window. Then type mmsys.cpl in the box and click OK to navigate to Sound settings quickly.
Step 2: Under Playback tab, right-click Razer Kraken headset from the list and select Set as Default Device.
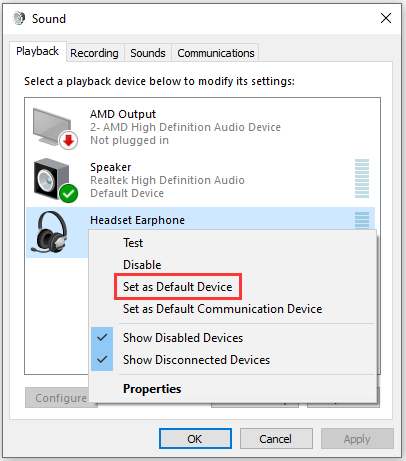
Step 3: Right-click other headsets and choose Disable. Then click Apply to save the change.
Step 4: Right-click your Razer headset and choose Properties. Then switch to Advanced tab, and select the lowest Default Format, 2 channel, 16 bit, 44100 Hz (CD Quality).
Step 5: Click OK.
Then you can restart you PC and test your Razer Kraken headset. If it still doesn’t work, you can move on to the next solution.
Solution 2: Choose the App as Administrator
To get Razer mic to work, you can also try running the application which encounter the problem as administrator to get the access to all the hardware connected. Here is how to do it.
Step 1: Right-click the shortcut of the problematic program and select Properties.
Tip: You can also right-click the executable file of the program in its installation folder and then select Properties. The location of Steam games should be C:Program Files (x86)Steamsteamappscommon.
Step 2: In the pop-up window, select Compatibility tab and check Run this program as an administrator.
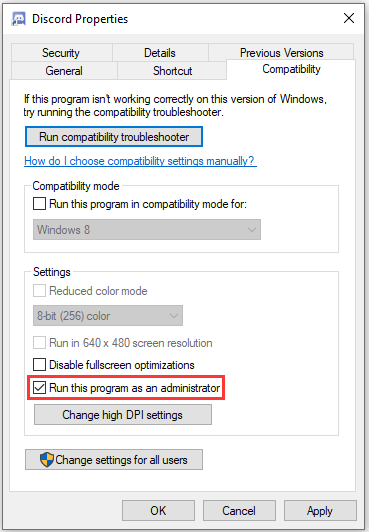
Step 3: Click Apply and OK to keep the changes.
Then you can restart your computer, re-plug your headset and launch the program again.
Solution 3: Roll Back the Audio Driver
It has been reported that many Razer headset not working issues are caused by the latest Realtek audio device drivers. In this case, you can try rolling back the involved driver.
Step 1: Press Win + R to invoke Run window. Then type devmgmt.msc and click OK to open Device Manager.
Step 2: Double-click Audio inputs and outputs to expand the category.
Step 3: Right-click Realtek Digital Output and select Properties.
Step 4: In the pop-up window, switch to Driver tab and click Roll Back Driver button.
Recommended article: How to Roll Back a Driver in Windows? A Step-by-Step Guide
Solution 4: Run Hardware and Devices Troubleshooter
Another easy way to fix Razer headset not working is to run the Hardware and Devices troubleshooter which is able to help you repair peripheral devices and might provide a fix for your Razer Kraken headset.
Step 1: Open Control Panel.
Step 2: Select View by: Large icons from the upper right corner and click Troubleshooting. Click View all from the left pane.
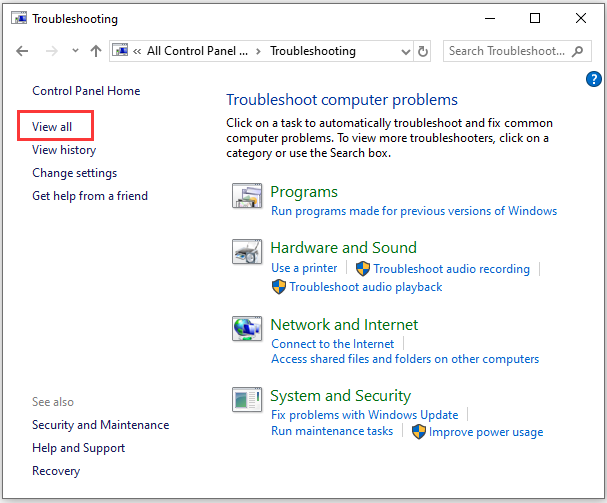
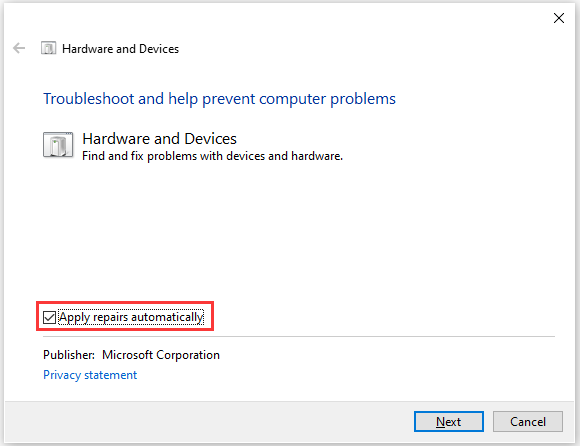
Step 3: Select Hardware and Devices. In the pop-up window, click Advanced and check Apply repairs automatically. Then click Next and the troubleshooter will check for any related problems and try to fix them. Just wait patiently and follow the onscreen instructions to finish the process.
User Comments :