It can be a rather frustrating problem that OBS keeps lagging while you are streaming or recording videos. But you don’t need to worry. This guide from MiniTool Partition Wizard shares some feasible methods that may help you fix the OBS lagging issue.
OBS Studio is free and open-source software for video recording and live streaming, and it is favored by many YouTubers and vloggers. However, sometimes the user experience of OBS may not so satisfactory. According to the reports, some users encounter the OBS lagging issue while streaming or recording videos with this application on Windows computers.
What can you do if you come across the OBS recording choppy or laggy issue? Well, you need to do the following things first to exclude the possible network and hardware issues.
- Make sure your internet connection is stable.
- Check if there is a hardware issue with the cable, port, or router.
- Restart modem and router.
If the OBS recording laggy issue appears again after the test, the methods below might be helpful for you. You don’t need to try them all – just work your way down the list until you fix the problem effectively.

Method 1: Close Unnecessary Processes
In most cases, the lag issue is due to some background processes taking up lots of bandwidth or other system resources. So, the first method you can try is to close all the unnecessary processes.
Of course, you can check the resource usage of these background items and close them in a targeted manner. Here’s a simple guide:
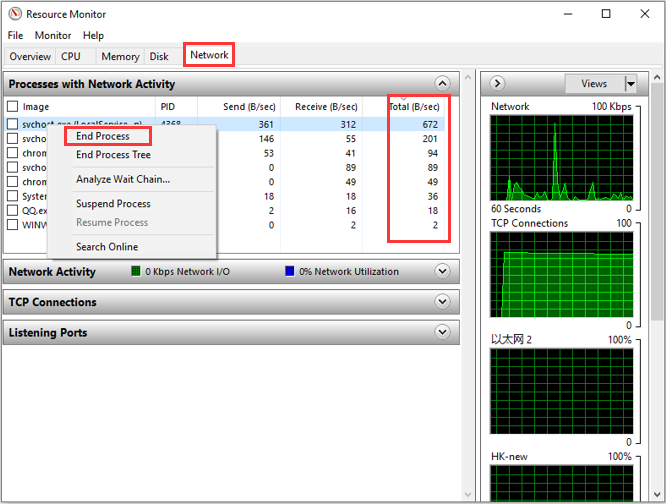
Step 1: Press Windows + R to open the Run dialog. Input resmon and click OK to open Resource Monitor.
Step 2: Click the Network tab and view the processes with network activity.
Step 3: Right-click the process using too much bandwidth and choose End Process. Then, click End process in the confirmation window to continue.
Method 2: Flush DNS Cache
The DNS cache enables users to access information faster but it may also cause certain network-related issues. In this case, you can go to flush DNS cache for your system.
Just open the Run window, input cmd, and press Ctrl + Shift + Enter to launch Command Prompt as an administrator. Then, type the following commands one by one and press Enter after each to execute them:
- ipconfig /release
- ipconfig /renew
- ipconfig /flushdns
After the process is complete, you can check if the OBS lagging issue is resolved. If not, please move on to the next method.

Method 3: Modify OBS Settings
The improper OBS settings could also lead to the OBS lag issue. To getter a smoother streaming and recording experience in OBS, you can follow the steps below to modify its output settings.
Step 1: Open your OBS application and click File > Settings.
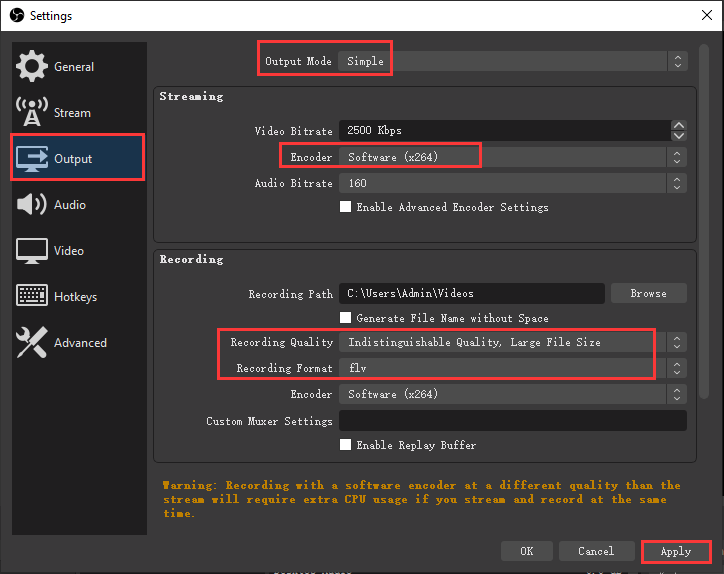
Step 2: In the pop-up window, click the Output section in the left pane.
Step 3: In the right pane, do the following modifications:
- Output Mode: Simple
- Encoder: Software (x264)
- Recording Quality: Indistinguishable Quality, Large File Size
- Recording Format: flv
Step 4: Click Apply and OK to save changes.
Once it’s done, you can try streaming or recording videos again to check if the OBS lagging issue disappears.
Method 4: Allow OBS Through the Firewall
As it turns out, the firewall may block certain processes related to OBS, ending up with OBS recording choppy or laggy. To stop the firewall from interfering with your OBS, you can go to set allow OBS through the firewall.
Step 1: Type control panel in the search bar and click the result to open it.
Step 2: Navigate to System and Security > Windows Defender Firewall.
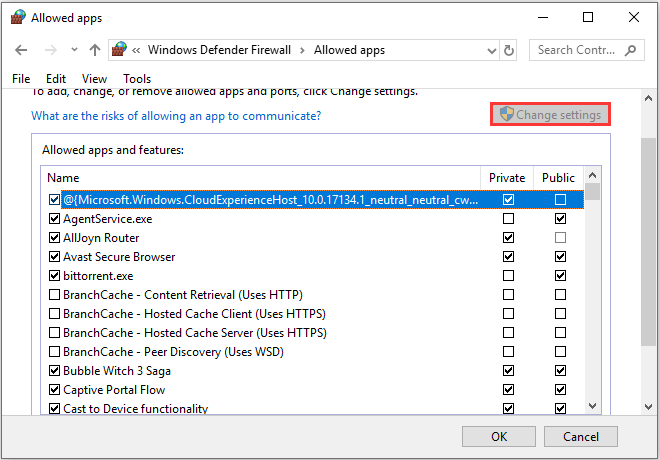
Step 3: In the left pane, click Allow an app or feature through Windows Defender Firewall.
Step 4: Click Change settings to make the settings editable. Then, find the OBS from the listed apps and check both Private and Public boxes for it. Click OK.
Method 5: Update Network Adapter Driver
In addition, the outdated or corrupted network adapter driver is also a possible reason for OBS recording laggy. If the above methods don’t resolve the problem for you, you can consider updating your network adapter driver by following the instructions below.
Step 1: Right-click the Start button and choose Device Manager.
Step 2: Double-click the Network adapters category to expand it.
Step 3: Right-click the network adapter you are using and choose Update driver.
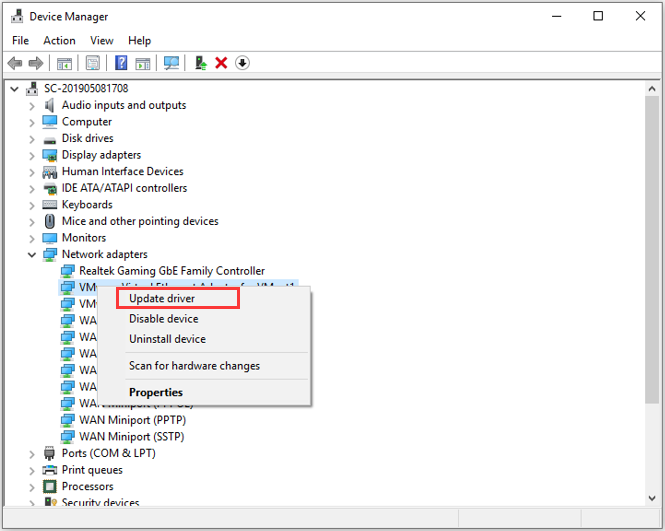
Step 4: Click Search automatically for updated driver software to continue and follow the on-screen instruction to complete the process.
If Windows cannot find available updates for your network adapter driver, you can visit the official website of its manufacturer and download and install the latest updates manually, or you can make use of a reliable third-party driver updater.
User Comments :