Have you encountered Failed to retrieve directory listing error when connect to the FileZilla server? In this post, MiniTool Partition Wizard offers you 3 ways to fix the FileZilla failed to retrieve directory listing error and you can try then one by one.
FileZilla Failed to Retrieve Directory Listing
FileZilla is a free and open source FTP (File Transfer Protocol) application, divided into client version and server version, with all FTP software functions. The Client has cross-platform support but the Server only supports Windows.
The FileZilla server is installed on a PC providing file storage services and the FileZilla client is installed on your PC. In this way, you can upload your files to the server on the remote PC or download files from the server to your local PC.
However, some people report that they have encountered “FileZilla failed to retrieve directory listing” error when they try to connect to the server, just as the following picture shows:
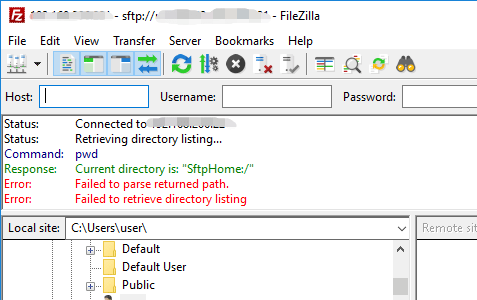
As for how to solve this issue, you can try the following methods.
What Are The Best File Hosting Services For You In 2021
Fix 1. Create a Firewall Rule
FileZilla uses Passive Mode by default to send and receive files as well as directory listings. This is often done on random TCP ports, even if a port has been reserved for FTP service on the host machine and for incoming connections.
However, Firewall won’t allow random TCP IP connections. In this case, you can try to create a Firewall rule. Here is the guide:
Step 1: Custom port range in FileZilla.
- Launch the FileZilla Server on the Server computer.
- Choose Edit > Settings.
- In FileZilla Server Options window, navigate to General settings > Passive mode settings tab and highlight it in the left panel.
- In the right panel, check Use Custom Port Range option and enter 2100 in the two boxes.
- Click OK to save changes.
Step 2: Change Firewall settings.
- Press Windows key + I to open Windows Settings.
- Go to Update & Security > Windows Defender > Open Windows Defender Security Center > Firewall & network protection > Advanced settings.
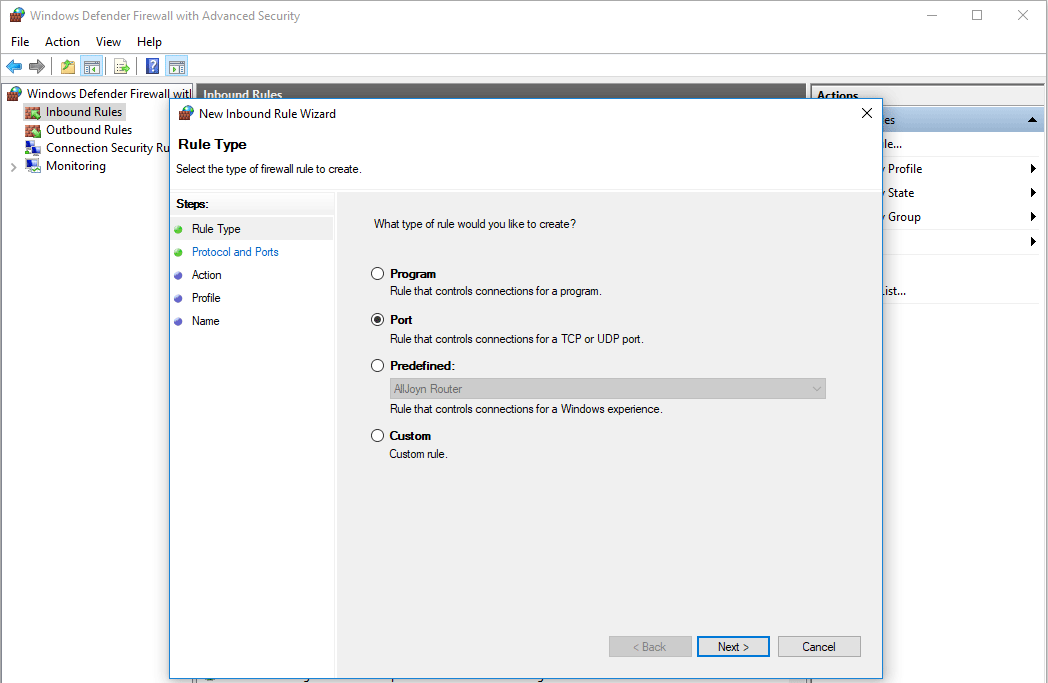
- Choose Inbound Rules and right-click on it. Then, choose New Rule.
- Check Port and click Next.
- Check TCP option and Specific Local Ports Then, enter #,2100 in the space and click Next (# is the port number reserved for FTP and you should replace it according).
- Check Allow the connection option and click Next.
- Check Domain, Private, and Public Then, click Next.
- Enter a name and click Finish.
- Repeat this same process for Outbound Rules to add the same rule for it as well.
![Windows Firewall Can’t Change Some of Your Settings [4 Fixes]](https://images.minitool.com/partitionwizard.com/images/uploads/2021/01/windows-firewall-cant-change-some-of-your-settings-thumbnail.jpg)
Fix 2. Use Plain FTP
- Open FileZilla Client on the Client computer.
- Click File > Site Manager.
- Add the site or server you want to connect to if it’s not already in site manager. You should add the hostname, change Encryption to only use plain FTP, change Logon Type to Normal, and enter username/password.
Fix 3. Change FTP Configurations
- Open FileZilla Client.
- Click Edit > Settings.
- Click FTP under Connections. Then, under Transfer Mode, check Active option and Allow Fallback to other transfer modes on Failure option in the right panel. This will change the transfer mode from passive to active.
- Click Active Mode under FTP. Then, under Active mode IP, check Ask your operating system for External IP Address
- Click Passive Mode under FTP. Then, check the Fall Back to Active Mode
- Click OK to save changes.
If the above methods don’t work, you can try adding sftp:// before the hostname when you connecting the server.
About The Author

Position: Columnist
Linda has been an editor at MiniTool for seven years. She continuously learns about computers and puts her knowledge into practice. Moreover, she is particularly knowledgeable in disk management, data recovery, system installation, and PDF editing. Her articles typically reference multiple examples or are based on her own experience, providing users with the most suitable solutions.
User Comments :