Did you fail to update Windows? Some users have reported that they meet the error code 0x8024401c when they perform Windows update. Don’t be worried. MiniTool offers you 4 solutions to remove the issue.
If you run into a problem when you install the Windows updates with the error code 0x8024401c, you can fix it using the following fixes.
Fix 1: Check the Network Settings
Network issue is likely to cause error 0x8024401c, and you can check the settings in two ways.
Switch Network Connection
Some users have fixed this error by switching the network connection.
If you are using Wi-Fi in your computer, you can try disconnecting it and switch to wired connections or Ethernet connection.
Vice versa, if you are connecting the wired network, you need to change to Wi-Fi connection.
Then run Windows update to see if error 0x8024401c has been fixed.
Uncheck IPv6
You can also uncheck IPv6 and make your computer run with IPv4 network to solve the Windows update error 0x8024401c.
Follow the steps below.
Step 1: Click the Internet icon from the bottom-right corner and choose Network & Internet settings.
Step 2: Make sure you have selected Status in the left pane, and click Network and Sharing Center from the right pane.
Step 3: Click Change adapter settings.
Step 4: Right-click the network that is currently used and click Properties.
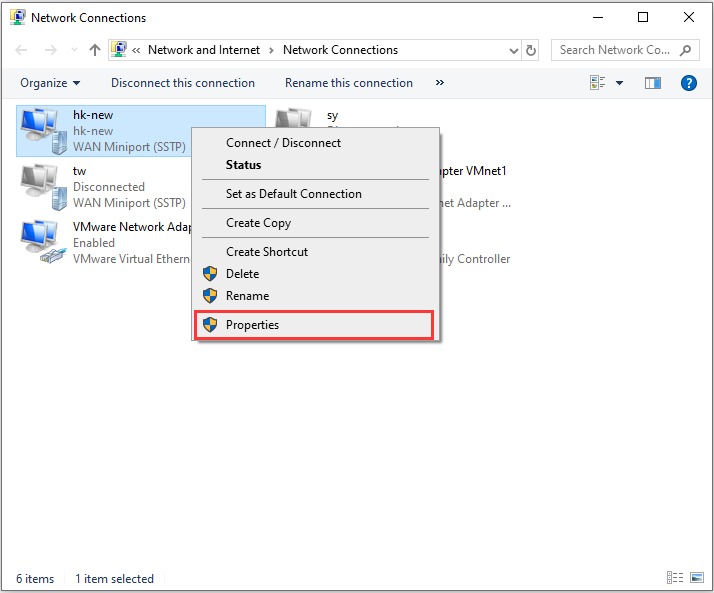
Step 5: Click Networking tab in the pop-up window. Then uncheck Internet Protocol Version 6 (TCP/IPv6) and click OK to save the changes you have made.
Fix 2: Modify the Registry Editor
Registry Editor is also a good tool to remove the issue when error 0x8024401c happens to your computer.
Step 1: Press Win + R to open Run window. Then type regedit in the box and click OK to go to Registry Editor.
Step 2: Copy and paste the following path to the address bar: HKEY_LOCAL_MACHINESOFTWAREPoliciesMicrosoftWindowsWindowsUpdateAU.
Step 3: Double-click UseWUServer in the right pane and change the value data to 0.
Step 4: Click OK to save the changes you have made.
Step 5: Close Registry Editor and restart your computer.
Now you can check for updates and error 0x8024401c should have been removed.
Fix 3: Run SFC Scan
Corrupted system files may cause Windows update error 0x8024401c. To fix the problem you can use System File Checker (SFC) which helps automatically check and repair the corrupted or incomplete system files.
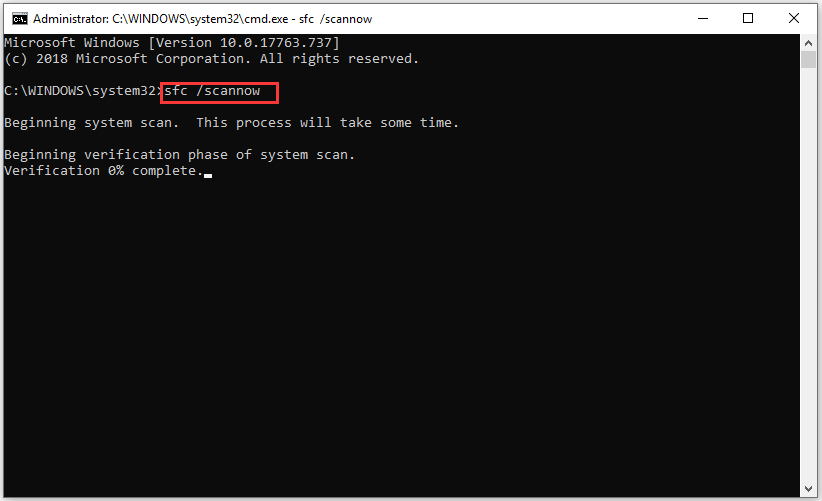
Step 1: Press Win + S to open Search, and type cmd in the box.
Step 2: Right-click Command Prompt and select Run as administrator.
Step 3: Input sfc /scannow and press Enter to run the command.
Step 4: Wait until verification 100% complete. Then restart your PC and try updating Windows to see whether the error is solved.
Fix 4: Perform A Clean Boot
If the solutions above couldn’t solve your problem, you can try performing a clean boot to fix error 0x8024401c.
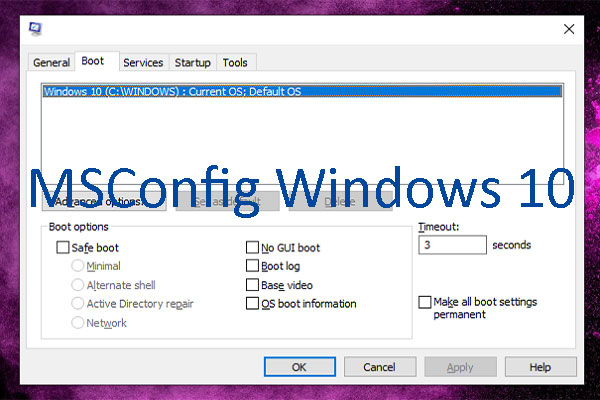
Step 1: Input msconfig in the Run window and press Enter to open System Configuration.
Step 2: Click Service tab, and check Hide all Microsoft services at the bottom of the window.
Step 3: Click Disable all and then click OK.
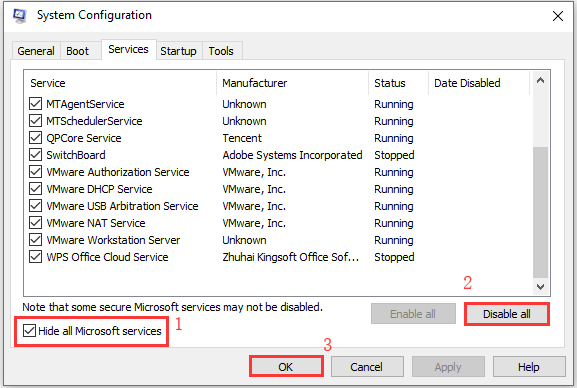
Step 4: Restart your computer.
User Comments :