This article will show how to enable and customize Clipboard History in Windows 10. By the way, as a Windows user, you may need a useful Windows program named MiniTool Partition Wizard which can help you manage hard drive easily.
Windows 10 Clipboard History
Windows 10 boasts a ton of features baked into the OS. One of such features is the Clipboard History which some Windows 10 users may think useful, and others not so much.
The Clipboard feature is one of the most common features of Windows 10. Cutting or copying bits of text or an image from one application and then pasting it into another is a common process that many of us perform on an almost daily basis. The common feature makes the process even easier.
Where you put something into the clipboard, all that was stored in it was erased. However, the Clipboard History feature unlocks multiple save slots to store multiple items in the clipboard for later use.
Please note that this feature is available in recent versions of Windows 10 but it is disabled by default.
Enable and Customize Clipboard History in Windows 10
This part will show you how to enable and customize Clipboard History in Windows 10. Now let’s explore the steps.
Enable Clipboard History in Windows 10
Here is the tutorial on enabling Clipboard History in Windows 10.
Step 1: Open the Settings app and navigate to the System screen.
Step 2: Scroll down the left side of the Settings window until you find the Clipboard feature.
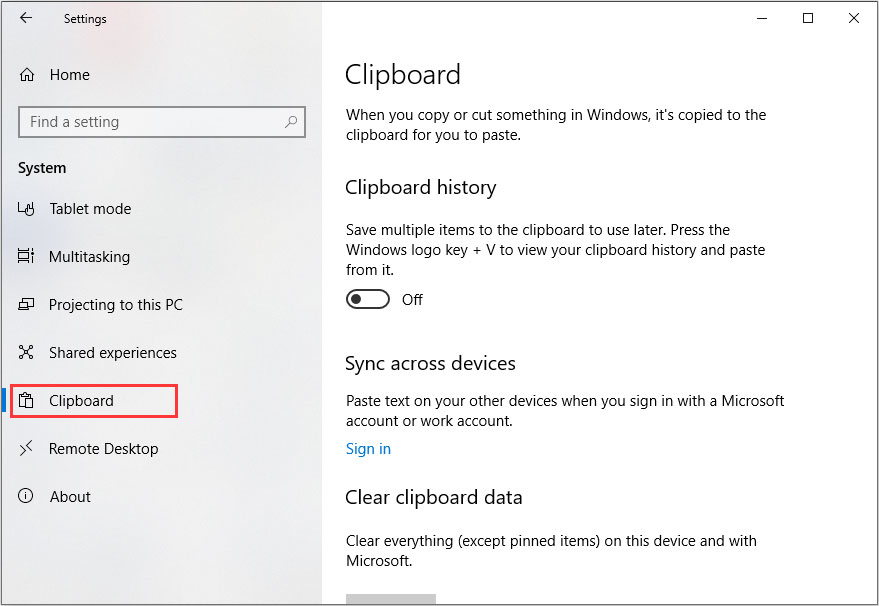
Step 3: Look at the right-panel which should display the corresponding options. The Clipboard History option has a toggle beneath it which you can click to enable or disable depending on its state.
Now you have enabled the feature, and it is time to test it to find out how useful it is. To do so, you can use the following shortcut: press the Windows and V keys on the keyboard together.
After pressing, you will get a pop-up window that should be empty because you just enabled it and have not copied to the clipboard yet.
Let’s try copying something to the clipboard. Firstly, copy something for the internet or somewhere, and open the Clipboard History panel again. And you will see the copies now on the Clipboard History window.
This can be very useful in case you accidentally copied something else, like text and image, to the clipboard but don’t want to type it again. That is really convenient but that is just about it because you cannot recover files that you copy to the Clipboard or other data.

Now you have known how to enable and view the Clipboard History, and here is a simple tutorial on pasting something from the Clipboard History.
Step 1: Place the cursor in the application that you want to paste the content into, like Chrome, Word, or any location that accepts text input.
Step 2: Once you have done that switch to the Clipboard History pane and left-click on the content. It will be pasted at the cursor instantly.
Customize Clipboard History
You can optionally choose to sign in to your Microsoft Account to save the Clipboard History to the cloud.

You can set this option at the Clipboard settings screen. Once you choose to enable it, the history will be synced across other devices, like your phone, another PC, or other devices that you sign in to.
Therefore, you can copy something to the Clipboard on your computer and sync it with your devices that you use.
Please note that it is not recommended to sync the history across other devices when Clipboard content contains important data in case of data leakage. Speaking of which, you can manually clear the Clipboard by clicking the X next to each entry or use the Clear Clipboard option in the Settings screen to delete all the data that was stored previously.
You may notice the pin icon next to each entry in the Clipboard History. You can use it to pin specific items to the panel.
Final Words
This article comes to an end, and I hope you have mastered how to enable and customize Clipboard History in Windows 10.
User Comments :