If you have updated your OS to Windows 10 Anniversary Update, you may have noticed the Windows Ink Workspace feature. What’s the function of this feature? Can you disable it? In this post, MiniTool will show you answers to these questions.
Windows Ink Workspace
What Is Windows Ink Workspace? Windows Ink Workspace is a new feature in Windows 10 Anniversary Update, displayed as a pen-shaped icon. This feature makes digital pen input more usable for every PC user. To speak it more clearly, with this feature, you can use a digital pen to create sticky notes, draw on a whiteboard or a screenshot via Sketchpad or Screen sketch.

How to enable Windows Ink Workspace? To use this feature, you need to click the pen-shaped icon on the taskbar.
How to customize pen experience? You can also customize pen experience in Windows Settings. To do that, please navigate to Settings > Devices > Pen. Now, you can choose quick actions for a single click of your pen, a double click, or a long press.
If you want to remove this feature from your PC for some reason, you can disable it. In this post, there are two ways about how to disable Windows Ink Workspace. Keep reading and figure out what they are.
Way 1: Disable Windows Ink Workspace via Group Policy
This way is not available on Windows 10 Home. If you use Windows 10 Home, you can try the next way.
Step 1: Press Windows + R to call out the Run window. Type gpedit.msc on the Run window and click the OK button.
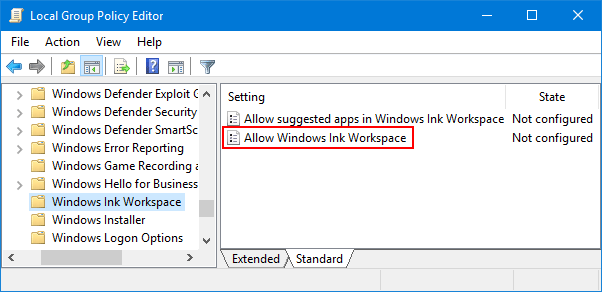
Step 2: On the Group Policy window, navigate to the following path:
Computer Configuration > Administrative Templates > Windows Components > Windows Ink Workspace
Step 3: Click the Allow Windows Ink Workspace setting on the right-pane.
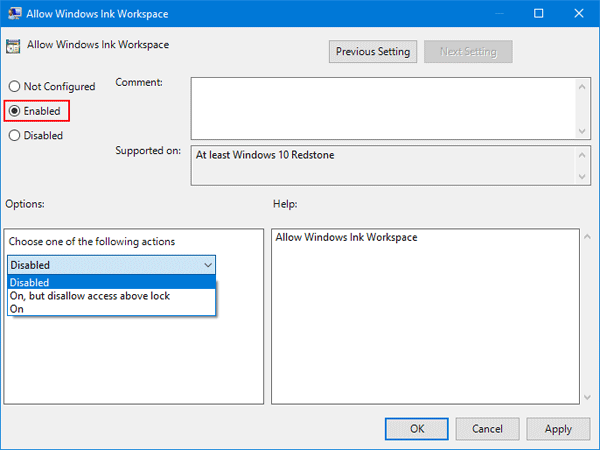
Step 4: Select the Enabled option and then select Disabled from the drop-down menu under Options. Click Apply and OK.
Step 5: Restart your computer and there should be no Windows Ink Workspace icon in the taskbar. And the Show Windows Ink Workspace button on the taskbar context menu will become unavailable.
Way 2: Disable Windows Ink Workspace via Registry Editor
Step 1: Press Windows + R key to call out the Run window. Type regedit on the Run window and then click the OK button.
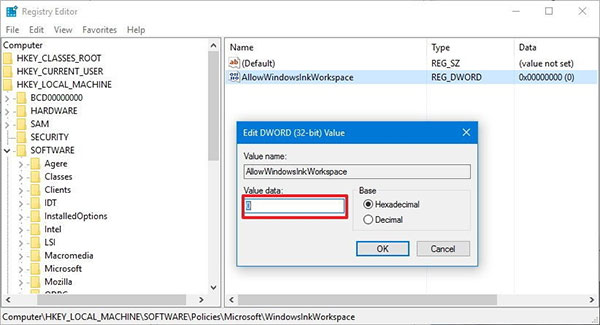
Step 2: On the Registry Editor window, navigate to the following path:
HKEY_LOCAL_MACHINESOFTWAREPoliciesMicrosoftWindowsInkWorkspace
Step 3: Create the AllowWindowsInkWorkSpace key.
- expand the WindowsInkWorkspace key;
- right-click the empty space in the right pane;
- select New > DWORD (32-bit) Value;
- name the key as AllowWindowsInkWorkspace and then set its Value data to 0. Click the OK
Step 4: Reboot your computer to apply the changes. You should receive the same result as Way 1 displays.

User Comments :