Is it annoying that the computer screen keeps rotating automatically? Reading this MiniTool Partition Wizard article, you can learn how to disable automatic screen rotation on Windows 11 through three efficient methods.
Automatic screen rotation is a common feature for devices with screens such as mobile phones and laptops. It can work because these devices are equipped with gyroscope sensors and accelerometers. With automatic screen rotation, your device can automatically rotate the desktop to landscape or portrait mode according to your movement.
In most cases, automatic screen rotation is very convenient for you to watching videos or reading books. However, sometimes it may interfere with your viewing experience. Therefore, you may want to disable it. This post will provide you three different methods to turn off automatic screen rotation On Windows 11.
Method 1: Disable Automatic Screen Rotation via Windows Settings
You can use Windows Setting to turn off automatic screen rotation. Here is the guide.
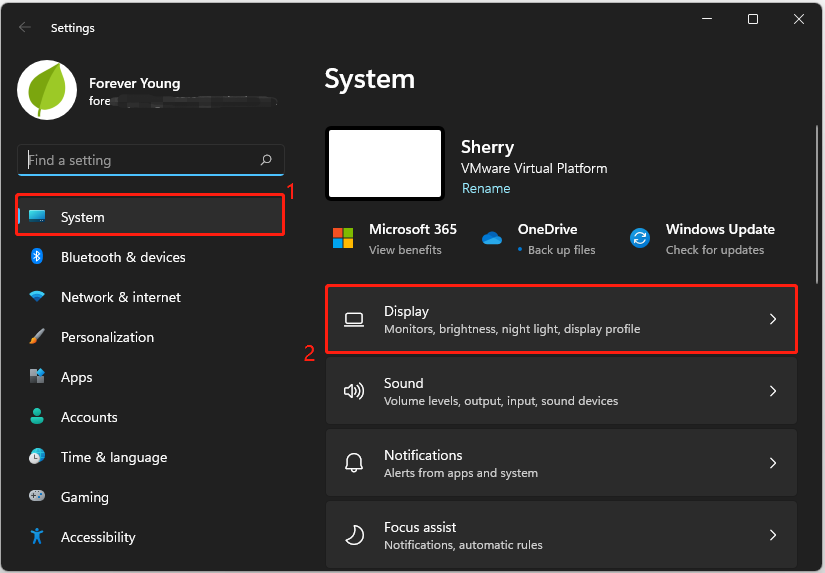
Step 1: Press Windows + I to open Windows Settings.
Step 2: Select System on the Settings homepage.
Step 3: Click on Display.
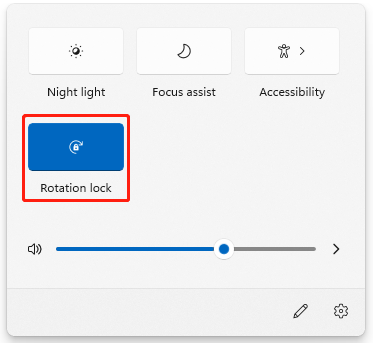
Step 4: Under the Scale & layout section, turn the Rotation lock option on.
After these operations are completed, you can close the Settings window. Then your PC screen won’t rotate automatically. If you want the screen to automatically rotate again, you can follow the above steps to open the interface of Display and then turn the Rotation lock option off.
Method 2: Disable Automatic Screen Rotation via the Action Center
Besides, you can also prevent the Windows 11 screen from rotating automatically by using Action Center. The specific steps are as follows.
Step 1: Press Windows + A to open Action Center.
Step 2: Click the Rotation lock button.
After completing the steps, the screen won’t rotate automatically as your device changes its orientation. To make the screen rotate automatically again, you can repeat the above operation.
Method 3: Disable Automatic Screen Rotation via Registry Editor
To prevent the Windows 11 screen from rotating automatically, you can also use Registry Editor. Here is the tutorial.
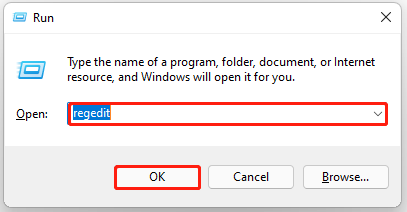
Step 1: Press Windows + R to open the Run dialog box.
Step 2: Type “regedit” and then click OK or press Enter.
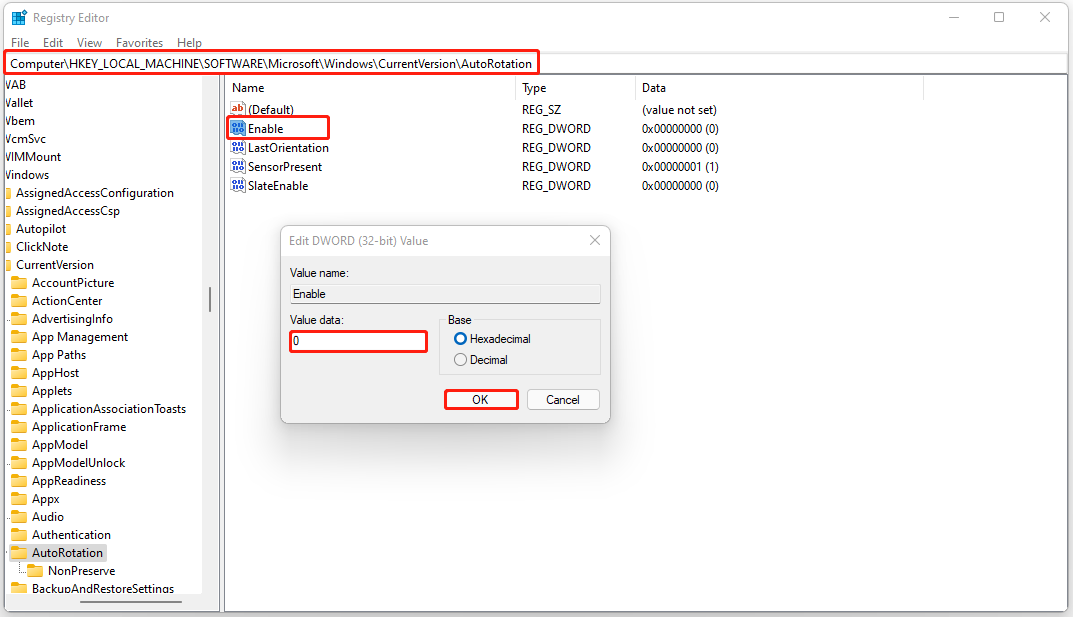
Step 3: Navigate to the following path:
HKEY_LOCAL_MACHINESOFTWAREMicrosoftWindowsCurrentVersionAutoRotation
Step 4: Double-click the Enable DWORD and set the value data to 0. Then click OK.
After that, close the Registry Editor and restart your device. Then the automatic screen rotation on Windows 11 will be turned off. If you want to turn it on, you can visit the same DWORD value and revert its Value data to 1.
With the above three ways, you can easily disable automatic screen rotation on your device with Windows 11 operating system.
User Comments :