What Is DirectX Graphics Tools
DirectX Graphics Tools, also known as DxDiag, is an optional feature in Windows 11. This feature can be used to identify issues that are related to display, audio, video, and other multimedia applications. In addition, it can be able to create Direct3D debug devices in the DirectX runtime and trace real-time GPU usage, check system information, and analyze frames.
Have you installed Windows 11 DirectX Graphics Tools? If not, here is a full guide on how to install Graphics Tools in Windows 11. Let’s keep reading.
How to Install DirectX Graphics Tools Windows 11
As above mentioned, the DirectX Graphics Tools utility is not installed in Windows 11 by default. You need to download it from Optional features manually. Here’s how to install DirectX Graphics Tools Windows 11.
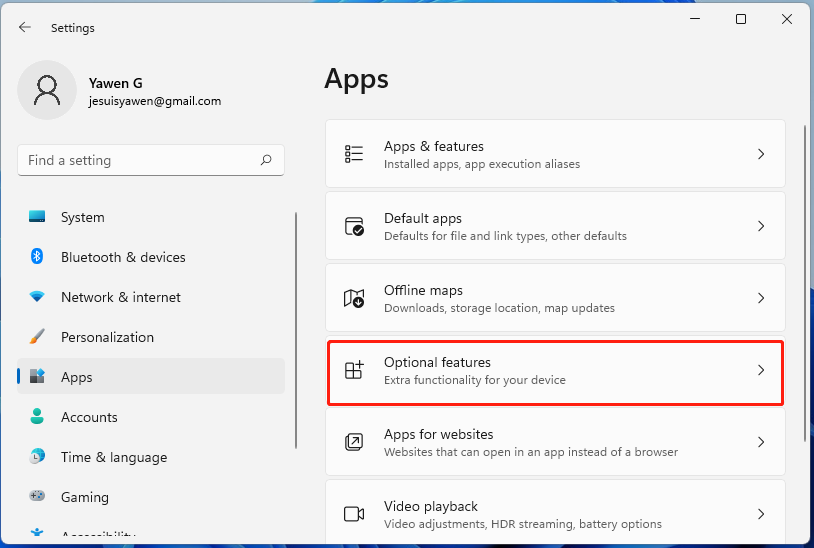
Step 1. Press Win + I keys to open the Settings window, and then select Apps from the left vertical pane and select Optional features from the right pane.
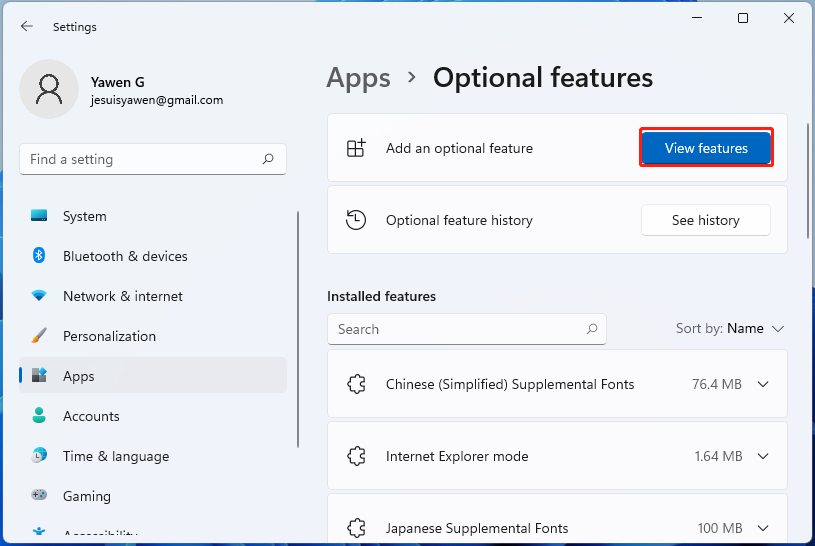
Step 2. Go to the Add an optional feature section and click on View features to expand a list of all downloadable features.
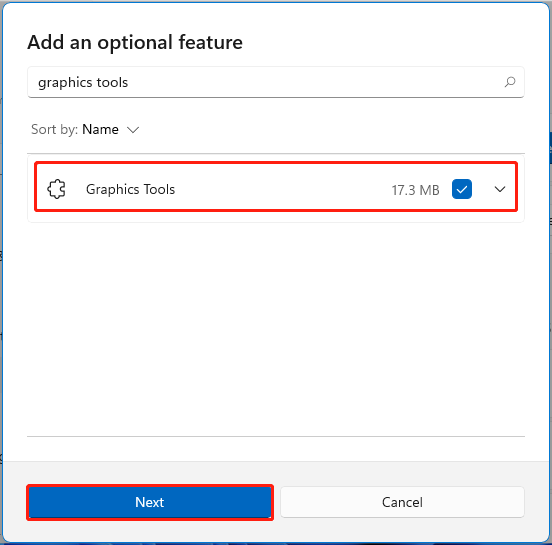
Step 3. In the pop-up window, type graphics tools in the Search box. Once the result shows in the list, tick the checkbox next to Graphics Tools and click on Next.
Step 4. Click on Install to start downloading the Windows 11 DirectX Graphics Tools.

Step 5. Now, you need to wait for the installation to complete. Once installed, you can expand the Recent actions tab in the Optional features panel. If you have successfully installed it, the Directx Graphics Tools will display here.
How to Use DirectX Graphics Tools Windows 11
Now, you should have installed the DirectX Graphics Tools. Here comes a new question: how to use DirectX Graphics Tools Windows 11. To do so, follow the steps below.
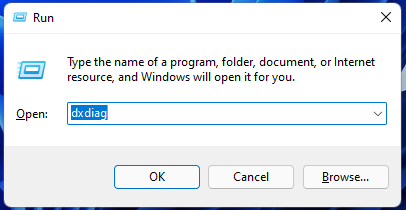
Step 1. Press Win + R keys to open the Run dialog box, and then type dxdiag in it and hit Enter. Then click on Yes if you are prompted to open this tool.
Step 2. In the DirectX Diagnostic Tool window, you should find the green progress bar at the bottom left of the screen. It indicates that the Graphics Tool is diagnosing your computer.
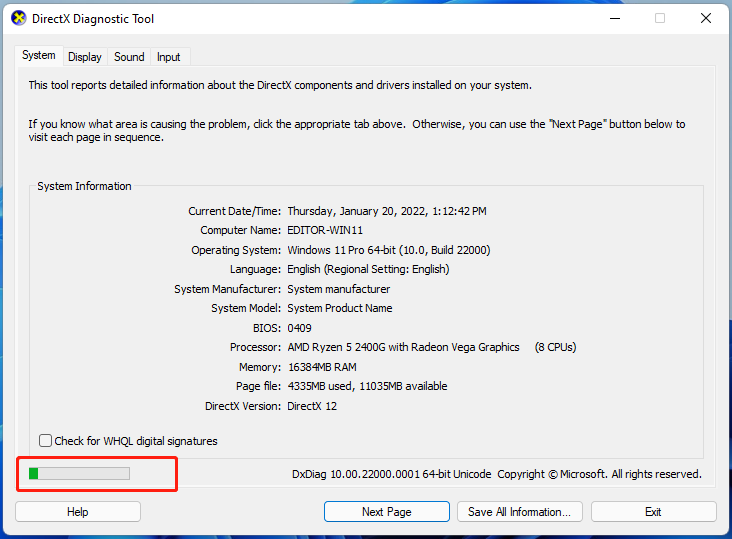
Step 3. Wait for the process to finish. Once done, you can save the diagnosing results by clicking on Save All Information.
How to Fix Windows 11 DirectX Errors
Sometimes, however, this DirectX Graphics Tools may run into various errors in Windows 11. How to fix Windows 11 DirectX errors? If you are also troubled by the DirectX issues, you can try the several common solutions below.
- Check the DirectX version in Windows 11
- Download and install the latest DirectX version for Windows 11
- Update your Windows 11 system to the latest build
- Update your graphics card driver
- Perform a clean boot
- Run System File Checker
![How to Empty the LCU Folder in Windows 11? [4 Simple Ways]](https://images.minitool.com/partitionwizard.com/images/uploads/2022/01/empty-lcu-folder-in-windows-11-thumbnail.jpg)
User Comments :