Virtual disk can be used to store the files, the operating system and other data like a normal hard disk. A great number of users consult google about how to create a virtual disk on Windows 10/8/7. In today’s article, MiniTool Solution will walk you through a full guide about how to create a virtual disk.
What Is a Virtual Drive
A virtual disk enables you to make full use of storage space like an actual disk storage device. With a virtual disk drive, you can store the files, the operating system and other important data. After the virtual hard drive is mounted, you can use it as a normal hard drive or removable storage device.
In addition, virtual disk drives can be used as shared storage on your network. In other words, sending and receiving files between the virtual disk drive and the computer become easier without getting access to your physical hard drive.
Well, the more important thing is about how to create a virtual disk. Please keep reading the following part to view this full tutorial.
How to Create a Virtual Disk on Windows 10/8/7
The full guide given below to create a virtual disk can work with Windows 10/8/7. Here we take Windows 10 for an example.
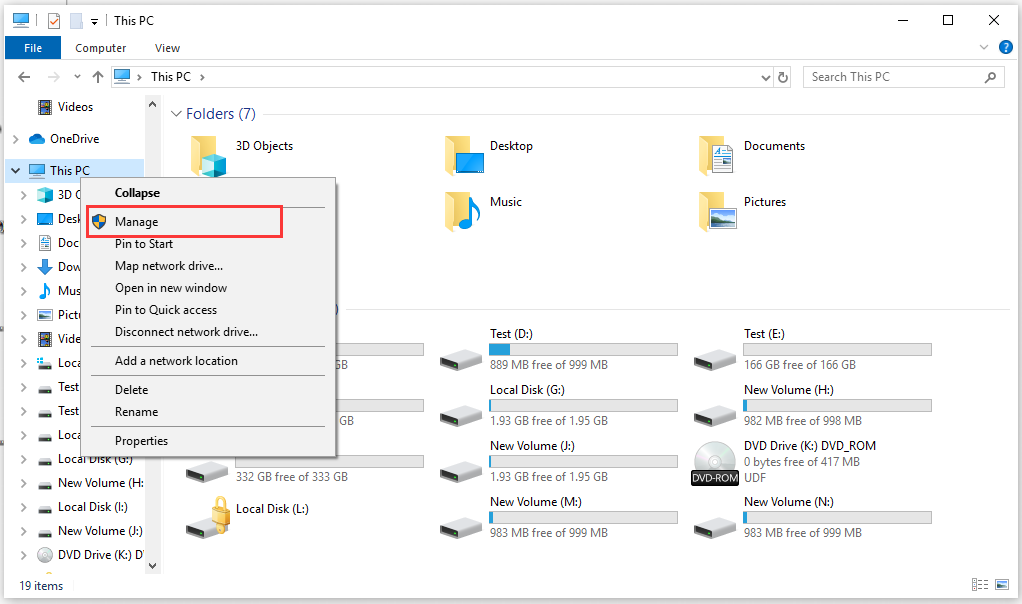
Step 1. Open your Windows File Explorer, then right-click on My Computer (Windows 7) or This PC (Windows 10/8) and select Manage.
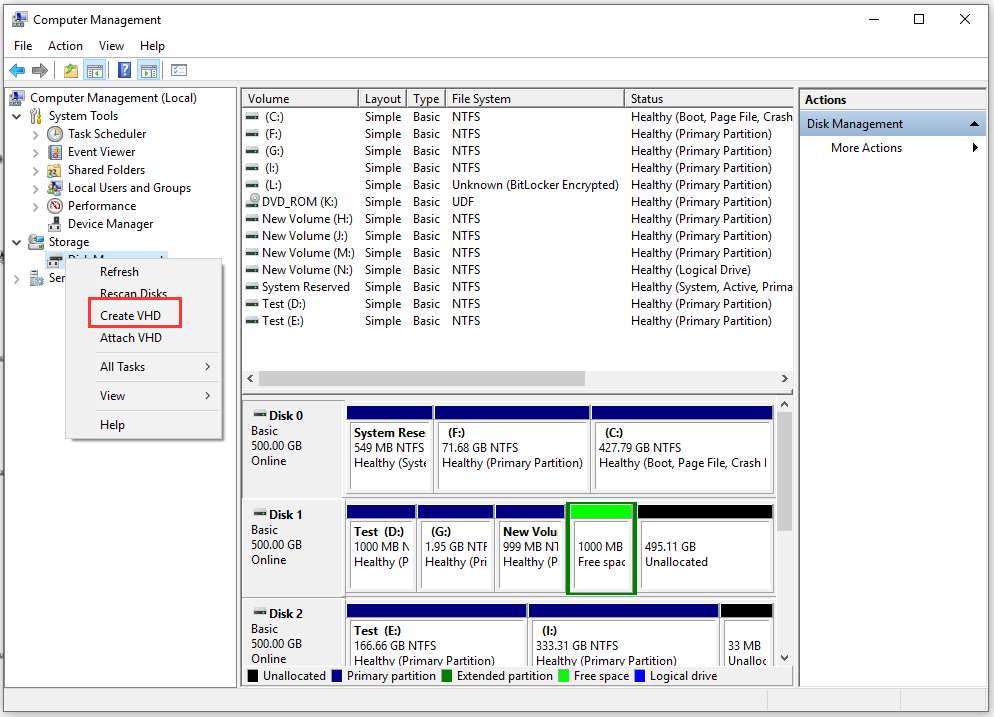
Step 2. Navigate to Disk Management inside the Computer Management (Local) window. Then right-click Disk Management and click on Create VHD button.
Step 3. In the pop-up window, you can specify the virtual hard disk location on the machine. Click the Browse button to choose a drive and determine how much disk space you need to take from it for the virtual disk creation. After the virtual disk drive settings are finally configured, click on OK. This process will take some time to complete.
Note: If you want to create a virtual disk with the VHD format, the maximum size of the hard drive should not be higher than 2040 GB, which should be large enough for most users. Well, if you want to create a virtual disk drive with more storage space, the VHDX format is a good choice.
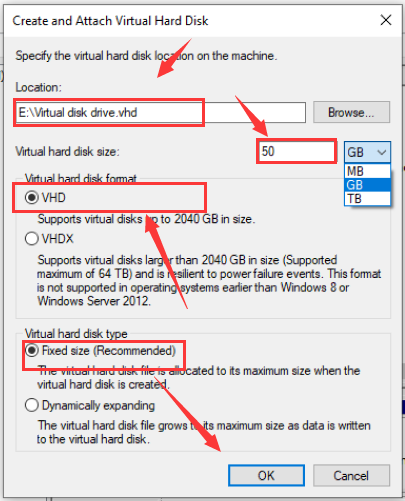
There are two options of virtual hard disk size: Fixed Size recommended and dynamically increase the size of the virtual hard drive you can choose.
- If you choose the fixed size, the size allocated for the virtual hard drive will be reserved right away after you create a virtual disk.
- If you choose dynamically expanding, the size allocated for the virtual hard drive will increase as you add files to it. Here you can choose the appropriate settings based on your requirements.
- Then you need to mount the virtual hard drive after creating a virtual disk as we mentioned at the beginning.
There are detailed steps to mount a virtual disk on Windows 10/8/7:
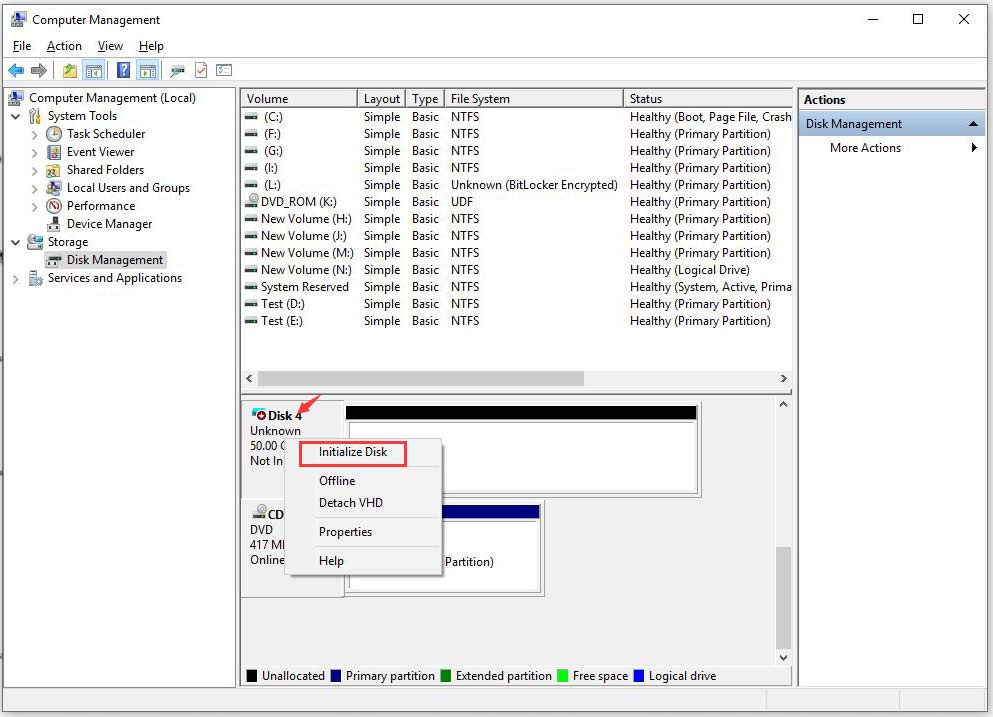
Step 1. In Disk Management, you will see a virtual disk you just created. Now navigate to the virtual disk you created by scrolling down in the list of storage devices and right-click it to click on Initialize Disk.
Step 2. Then a new window pops up, there are two options MBR or GPT disk you can create, just choose the one depending on your requirements. Here we choose MBR as an example and click OK.

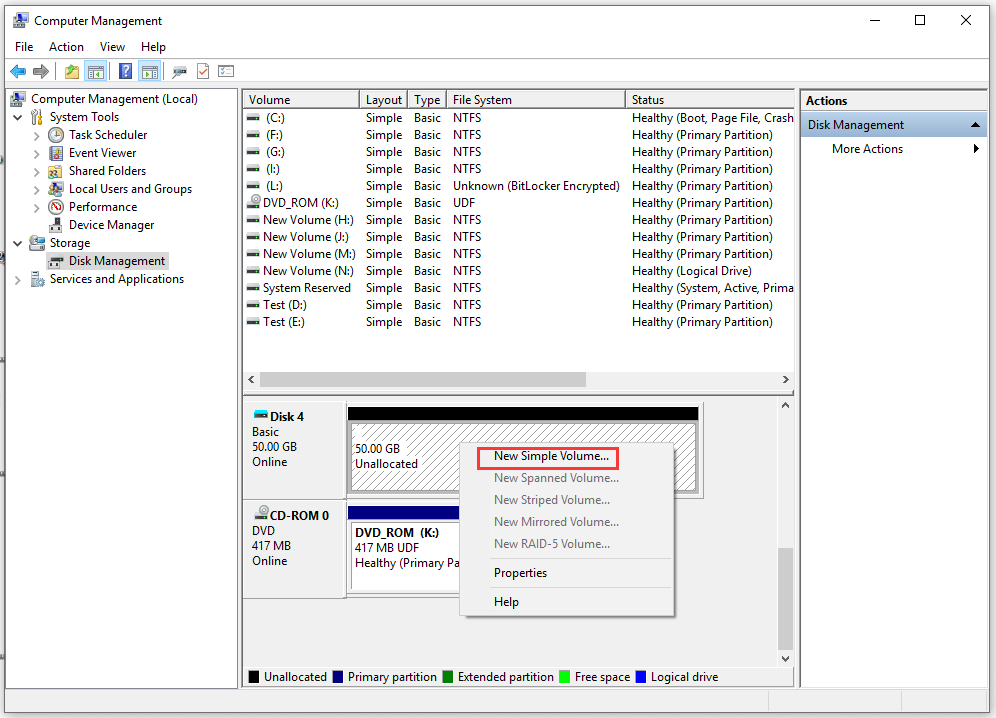
Step 3. Now a virtual disk drive is created. You can right-click the unallocated space and select New Simple Value to create a partition in this virtual disk.
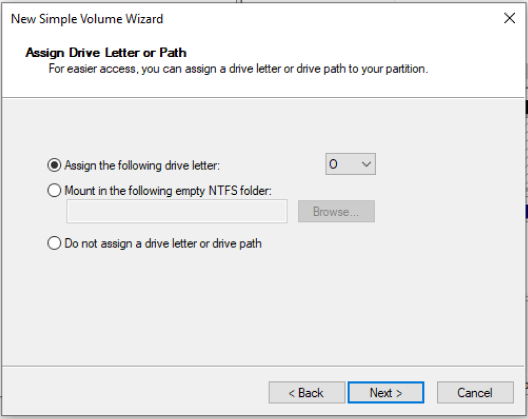
Step 4. Inside the new window, assign a drive letter and format the virtual hard drive by following the prompts. Here it is recommended to format the disk in the NTFS file system.
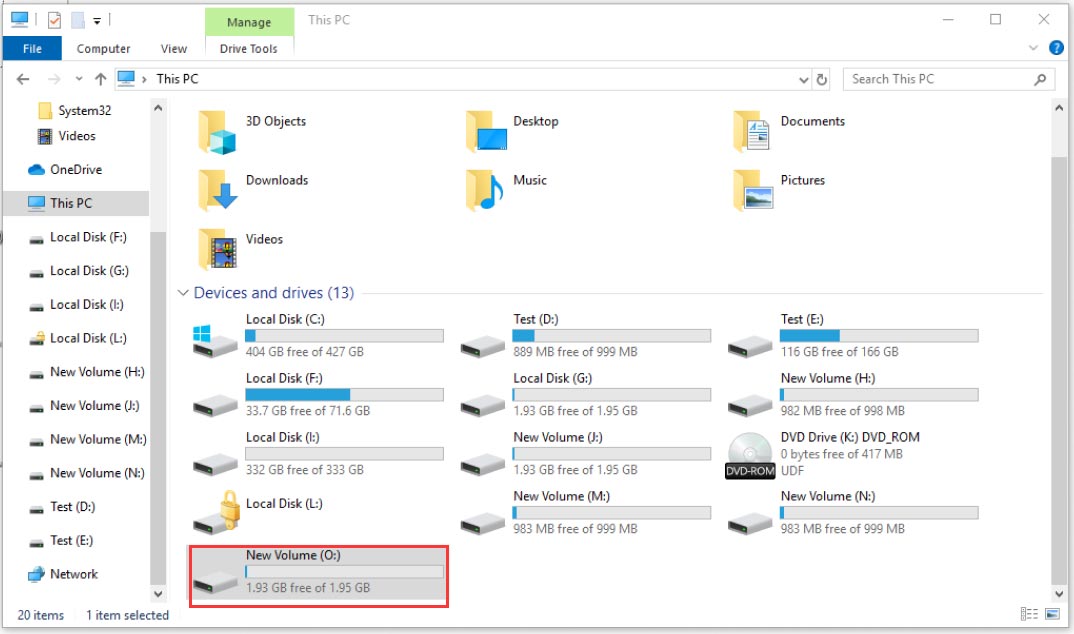
Step 5. After the virtual disk drive is created, you can find this virtual disk drive as a removable storage device within This PC.
Well, all about how to create a virtual disk and mount the virtual disk are told to you. Now, it’s your turn to have a try.
User Comments :