CPU is also known as a processor that is made of millions of transistors. It serves as the brain of a computer to execute various commands and processes needed for the operating system. CPU speed will affect the speed of interacting with other computer components including memory, hard disk, etc.
Usually, the faster the CPU process the commands, the faster the computer device will be. An excellent CPU speed is a vital important parameter that determines the overall computer performance. So, it is necessary to perform a CPU speed test when purchasing a new computer.
How to test CPU speed in Windows 10? After analyzing several posts and user reports, we summarize some simple methods to check CPU clock speed.
MiniTool System Booster TrialClick to Download100%Clean & Safe
Method 1. Open the System Properties
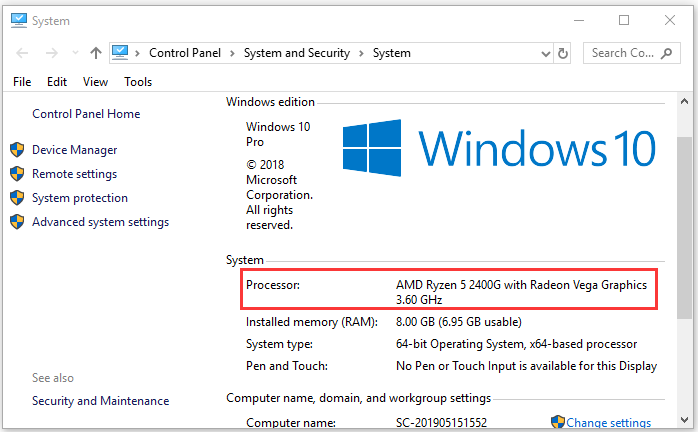
The first and simplest method on CPU speed test is to check the system properties on your computer. To do so, follow the steps below:
Step 1. Press Win + E keys to open the File Explorer, and then right-click This PC on the left pane and select Properties from the context menu.

Step 2. In the pop-up window, navigate to the System section on the right pane and check the Processor field. Here you will find the CPU type and its speed.
Method 2. Open the Settings App
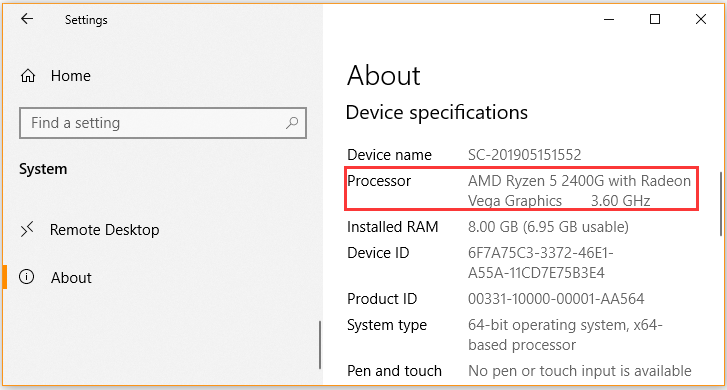
Another simple CPU speed test is to use the Settings app. For that:
Step 1. Press Win + E keys to open the Settings app and click on System in the pop-up window.
Step 2. Scroll down the left side bar to reach the About section and navigate to the Device specifications at the right pane. Then you can see the CPU clock speed in the Processor field.
Method 3. Use the Msinfo32 Utility
The msinfo32 utility can help you perform a CPU benchmark test and check the number of cores of CPU installed on your CP. Here is a simple guide to use msinfo32.
Step 1. Press Win + R keys to open the Run dialog box, and then type msinfo32 it and hit Enter.
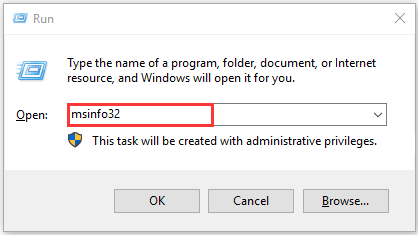
Step 2. Navigate to the Processor section and then you will find the CPU type and speed.

Method 4. Use Task Manager
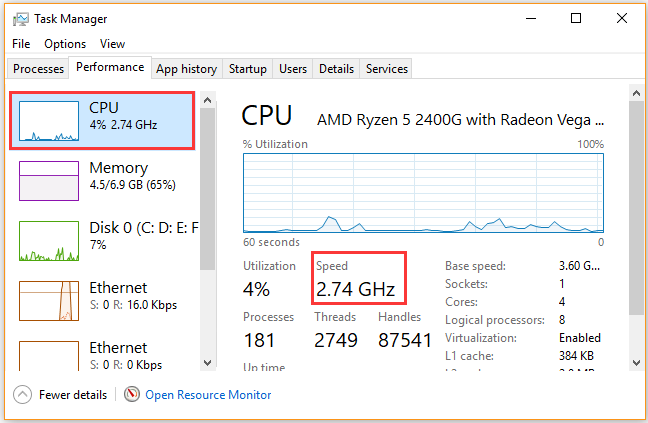
If you want to know your current CPU clock speed when running an app, this method is suitable for you. Let’s see how to use Task Manager to make a CPU speed test.
Step 1. Right click the toolbar at the bottom of your screen and select Task Manager from the elevated menu.
Step 2. Navigate to the Performance tab and click on CPU from the left side. Then you can view the CPU speed at the right side.
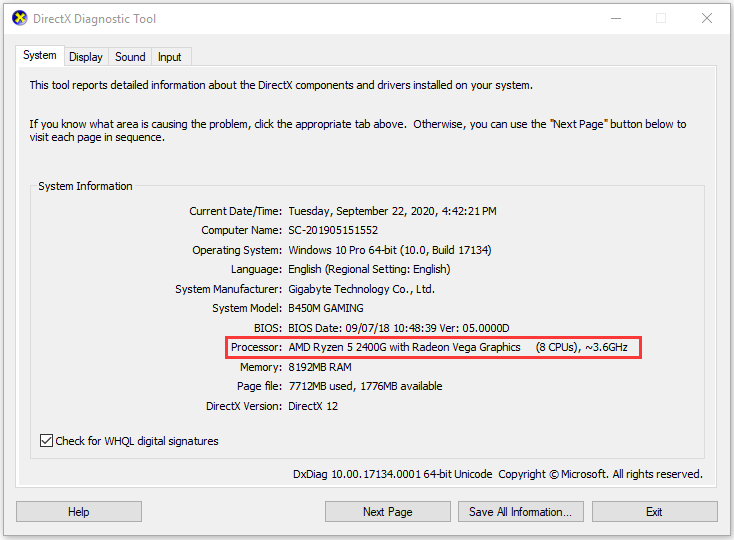
Method 5. Use DirectX Diagnostic Tool
DirectX Diagnostic tool is an effective method for processor speed test. This tool can not only check CPU speed but know more configurations of the processor. To use the feature, open the Run dialog box, and then type Dxdiag in the box and hit Enter. In the pop-up window, you can find the CPU configurations and speed under the System Information section.
User Comments :