As one of the most popular voice translating applications, Clownfish voice changer works well in most time. However, sometimes you may encounter Clownfish not working error. To help you solve this issue, MiniTool will offer you some troubleshooting methods in this post.
Solution 1: Update Clownfish to the Latest Version
When Clownfish not changing voice, you can check if your Clownfish is outdated. The outdated Clownfish can cause your Clownfish voice changer not changing voice. In this case, you need to update Clownfish to the latest version with the following steps.
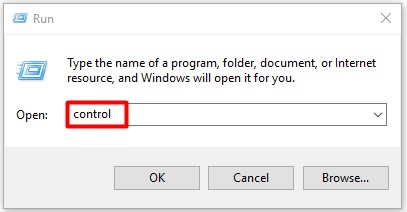
Step 1: Open Control Panel from the Run utility.
- Open Run window by holding Windows plus R
- Type control in the window and then press Enter to open the Control Panel
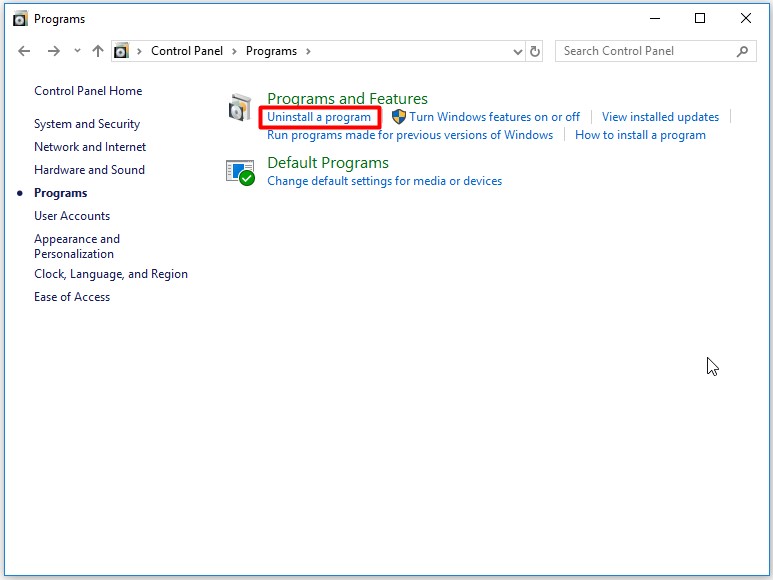
Step 2: Set the View by type as Category in the Control Panel window and then click on Uninstall a program under the Programs section.
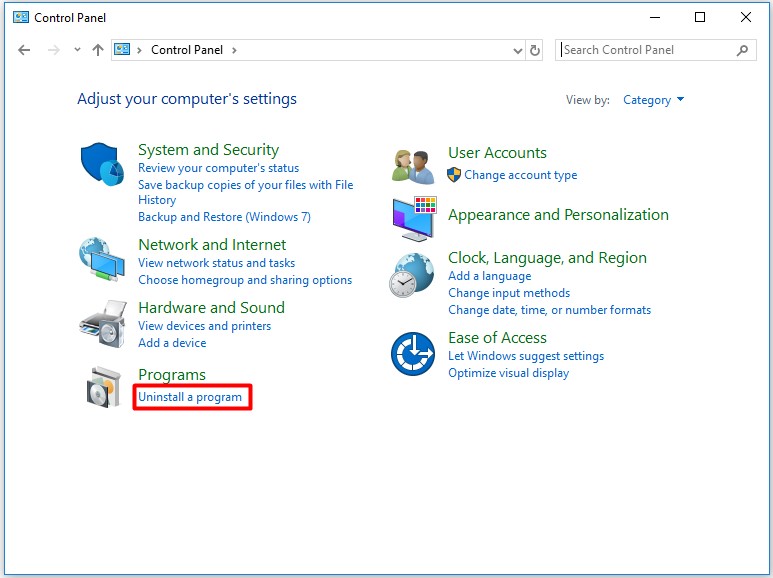
Step 3: If you are prompted with the window below, click on Uninstall a program to go on. If not, skip this step.
Step 4: Find and right click on the Clownfish Voice Changer from the listed programs and click Uninstall.
Step 5: After that, go to the official website of Clownfish Voice Changer by clicking here to download and install the latest Clownfish version.
Step 6: Now, restart your computer and check if the Clownfish voice changer not working issue still occurs.
Top recommendation: How to Check If Drivers Are up to Date? Here Are Details
Solution 2: Install Clownfish in the Default Folder
The Clownfish voice changer not working error can happen to you as well when the Clownfish application is not installed in the default folder. Hence, once you encounter this issue, you’d better check the installation location of Clownfish. If the location is wrong, you should reinstall Clownfish in the default folder (usually in local C drive in Windows).
To do that, you need to remove Clownfish and then download and install it from its official website. For the detailed steps, you can refer to Solution 1.

Solution 3: Check the Version of the Platform
Clownfish Voice Changer usually is utilized on Skype, Discord, and other applications. If you already run the latest Clownfish version but still encounter the Clownfish not working error, you should check the version of the platform.
Here, we take checking the version of Skype as an example.
Step 1: Launch your Skype and click on the profile picture shown in the left side of the main interface.
Step 2: After that, you will get a new window. What you should do is to drop down the window and click on About this version from the listed options.
Step 3: Then you will get the detailed information of this version. Move to the official website of your platform and compare the latest version information to your current one. If they are the same, you should try other methods to fix the error. If they are different, you should update the platform to the latest version and then check if the error is fixed.
Solution 4: Install Microphone in Clownfish
Microphone is also a vital factor for the Clownfish voice changer not changing voice error. It is because that the application needs your microphone to detect your voice and translate it to the system.
Therefore, if you get a wrongly installed microphone or outdated microphone drivers, the Clownfish not working error will occur. How to install microphone in Clownfish correctly? Here are steps.
Step 1: Run your Clownfish on the computer and then right click the Clownfish icon in the taskbar to open it.
Step 2: Hang over your mouse on the Setup option and then click on System Integration from the sub-menu.
Step 3: In the next window, choose the microphone that is working normally and click on Install to continue. Then the microphone will be installed automatically.
Step 4: After that, reboot your computer and check if the error is resolved.
User Comments :