Receiving the error code 0xc1900104 on your computer? Don’t worry! It is a common Windows update error for all Windows operating systems. In this post, MiniTool Partition Wizard tells you how to fix the Windows update error 0xc1900104.
Some users reported that they received the 0xc1900104 error when installing the Windows 10 feature update. This issue means that the update process gets stuck or won’t complete within the required time. It appears when the update gets failed or stuck during installation at a certain percentage like 61% or 99%.
I cannot update my laptop Windows 10 to version 20H2. Keeps hanging at 61% installed with error code "0xc1900104". What can I do to complete the Windows 10 update?
--from Microsoft Community
What Causes the 0xc1900104 Error?
Here, we summarize some possible reasons for the error 0xc1900104. For instance, it may be caused by some issues with your system files or hardware configuration. Besides, this error may occur if your device does not have enough disk space to download and install the feature update.
Fortunately, there are several methods you can try to resolve the 0xc1900104 error.
Way 1. Run the Windows Update Troubleshooter
You can try running the Windows Update troubleshooter to fix the 0xc1900104 error.
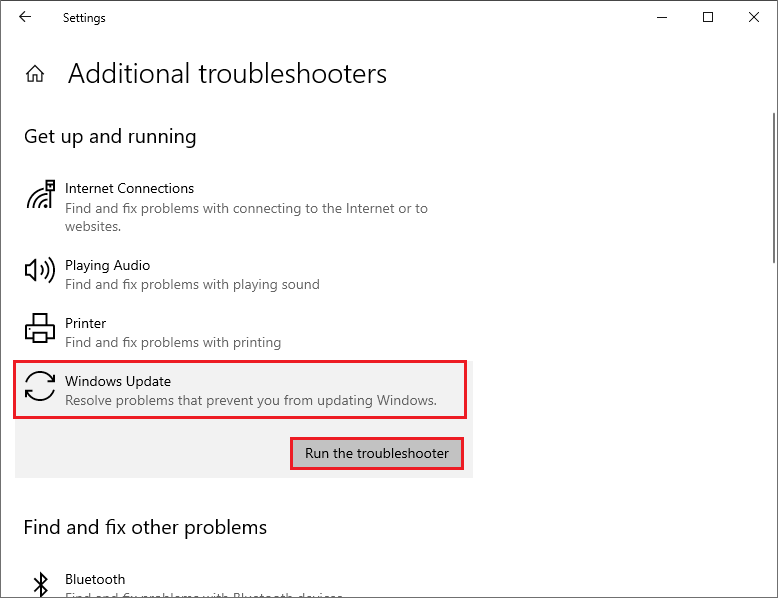
Step 1. Go to Settings > Update & Security > Troubleshoot > Additional troubleshooters.
Step 2. In the next interface, click Windows Update and select Run the troubleshooter.
Step 3. Then follow the on-screen wizard to finish troubleshooting. Once done, reboot your computer and check if the issue disappears.
Way 2. Increase System Partition Size
Since the error code 0xc1900104 can be caused by insufficient disk space, you can free up disk space and increase system partition size. You can right-click the Windows icon and select Disk Management. If there is unallocated space right behind the system partition, you can right-click the system partition and select Extend Volume to increase the partition size.
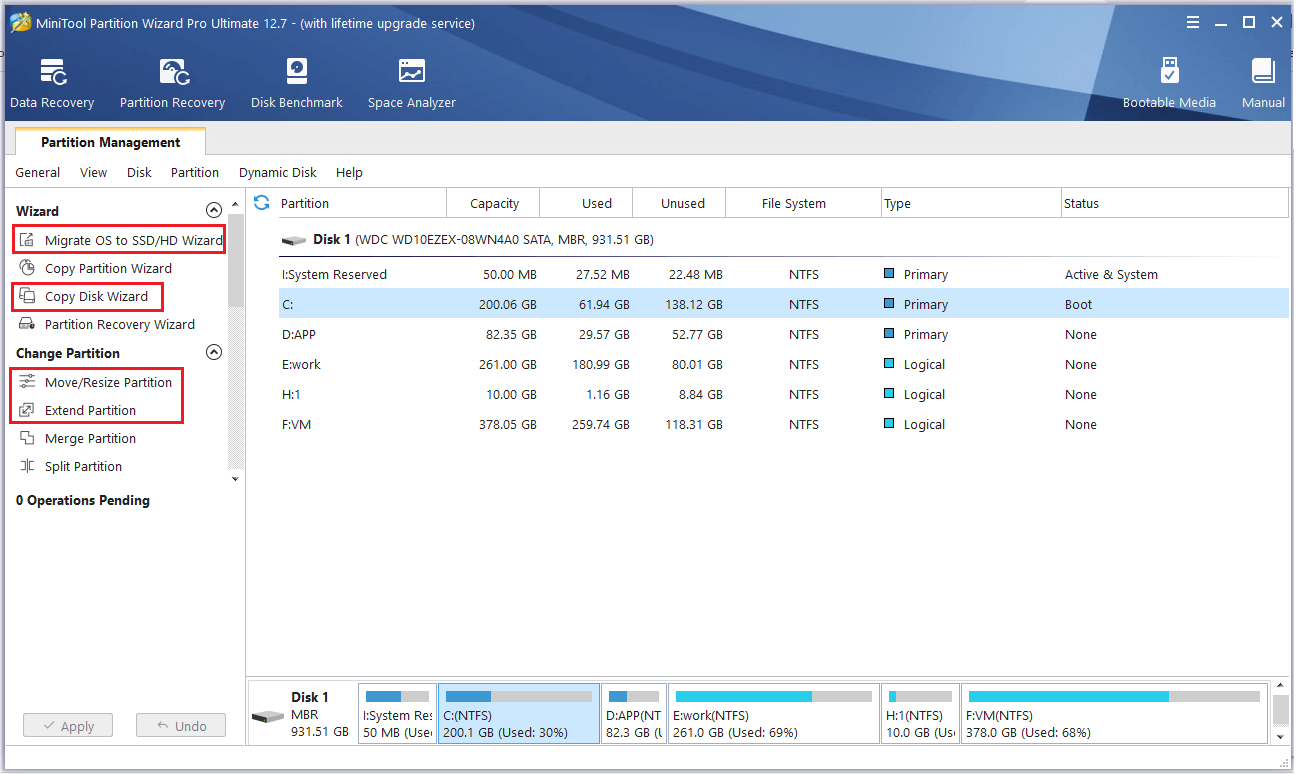
However, in most cases, you may encounter the “Extend Volume feature is greyed out” issue in Disk Management due to the limitations of it. Thus, using MiniTool Partition Wizard is a better choice. It can help users extend partition whether there is unallocated space on the hard disk or not. Download and install MiniTool Partition Wizard. Then you can follow this guide to extend the system partition.
You can use the Extend/Move/Resize feature to extend the partition, or use Copy Disk or Migrate OS to SSD/HD Wizard feature to upgrade your hard drive to a larger one.
MiniTool Partition Wizard DemoClick to Download100%Clean & Safe
Way 3. Run DISM
To get rid of the error, you can run DISM (Deployment Image Servicing and Management) to repair corrupted system files.
Step 1. Press Win + R to open the Run dialog box. In the box, type cmd and press Ctrl + Shift + Enter to run Command Prompt as administrator.
Step 2. Then type the following commands in the window and press Enter after each one.
DISM /Online /Cleanup-Image /CheckHealth
DISM /Online /Cleanup-Image /ScanHealth
DISM /Online /Cleanup-Image /RestoreHealth
Step 3. Once done, reboot your system.
If the error still exists, you can use MiniTool Partition Wizard to check file system errors and bad sectors. Launch MiniTool Partition Wizard, right-click the partition to be checked, and select Check File System or Surface Test. You can see this post.
Way 4. Rename SoftwareDistribution Folder
If the 0xc1900104 error still exists, you can try fixing it by renaming SoftwareDistribution folder.
Step 1. Run Command Prompt as administrator. Then type the following commands and press Enter after each.
- net stop wuauserv
- net stop cryptSvc
- net stop bits
- net stop msiserver
- Ren %systemroot%SoftwareDistribution SoftwareDistribution.old
- Ren %systemroot%System32catroot2 catroot2.old
- net start wuauserv
- net start cryptSvc
- net start bits
- net start msiserver
Step 2. Once done, reboot your PC and check if the issue is solved.
In addition to the above methods, you can create a system restore point and then use Media Creation Tool or Microsoft Update Catalog to update your Windows manually. Besides, you can reset the Windows Update Components to fix the error code 0xc1900104.
Conclusion
Now, this post comes to an end. Is it useful to you? Do you have any nice methods to fix the Windows update error 0xc1900104? You can feel free to share them with us in the following comment part.
User Comments :