Perhaps you have been bothered by xinput1_3.dll not found error when you launch a game or software. No need to worry about this issue anymore, as MiniTool Solution will show you in this post how to fix this error with 5 easy fixes.
About Xinput1_3.dll Not Found Error
XInput1_3.dll is a component of DirectX, a platform developed by Microsoft to handle the input from a Microsoft game controller. The xinput1_3.dll file is shared by several installed applications. If this file gets damaged or missing, all the linked application will fail to start.
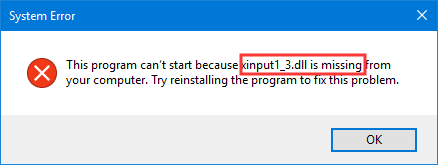
You might receive xinput1_3.dll not found or xinput1_3.dll is missing error in your Windows 10 PC for various reasons. This error appears accompanied by various messages in different case and the statement in the following picture is one of the common error messages.
In the following contents, 5 feasible solutions are provided and you can try them one by one until you remove this error.
Fix 1: Updated Your Microsoft DirectX
To fix xinput1_3.dll not found error, you should firstly make sure that you have updated your Microsoft DirectX to the latest version.
If you are using DirectX 9, just go to Microsoft official website, and download and install the DirectX End-User Runtime Web Installer.

If you are using DirectX 10/11/12, you can update your DirectX only by updating your Windows, because they are built in Windows system (Windows 7/8/10) and there is no standalone download file for it.
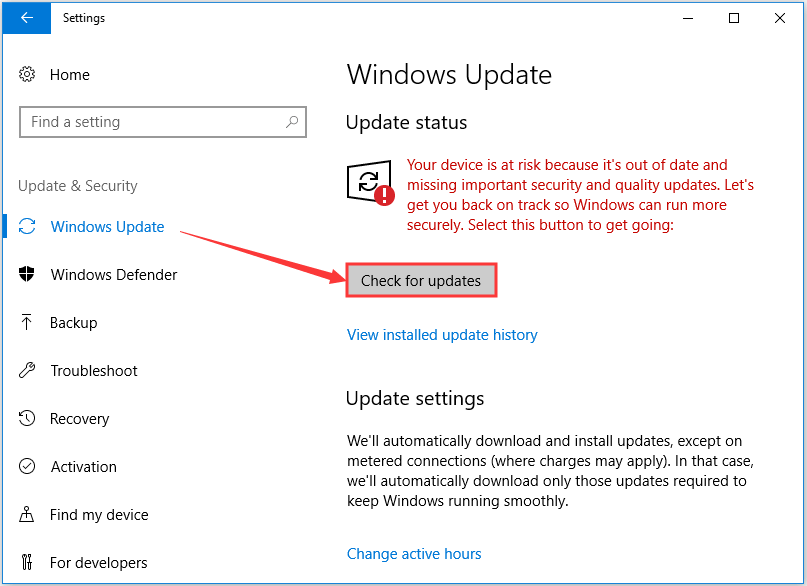
To update Windows, just open the Settings and navigate to Update & Security > Windows Update. When you get the following interface, click Check for updates. If there are any updates available, your Windows will download and install them automatically.
Fix 2: Install DirextX For the Problematic Program
If you encounter xinput1-3.dll not found error while launching a certain program, you can try installing the DirectX version of the problematic program to fix it. Because a copy of DirectX is usually included on the installation disc of the game/program.
So, you just need to find DirectX installation package on your game or application disc and it will install the DirectX needed and supported in the current version of Windows.

Fix 3: Reinstall the Problematic Program
If xinput1_3.dll missing error happens to certain software, you can consider reinstalling the problematic software alternatively. Follow the steps below to reinstall your program safely.
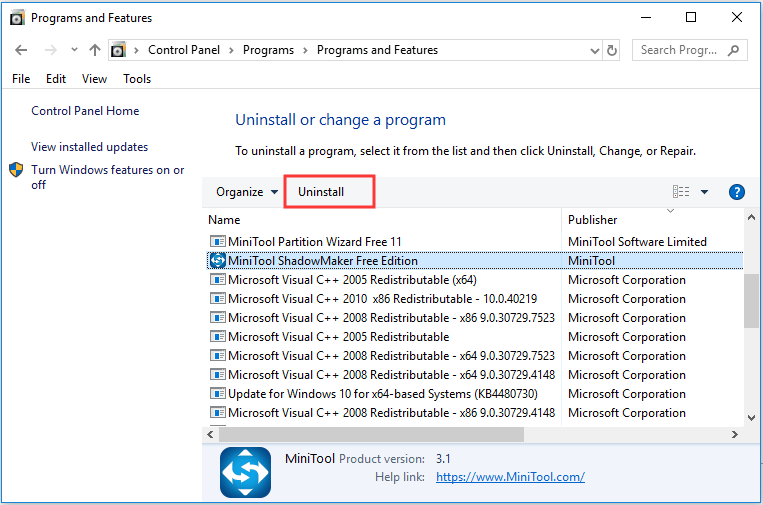
Step 1: Open Control Panel and navigate to Programs > Programs and Features.
Step 2: Locate and select the problematic application among the listed items click Uninstall. Then, follow the onscreen instruction to uninstall the target program.
Step 3: Download the uninstalled program from its official site and follow the prompts to reinstall it on your computer. If you installed the program using a CD before, just insert the CD and launch the installer to install it again.
Now, you can open the application again to check if the error has been removed.
Fix 4: Update Game Controller Drivers
The old or outdated graphics or game controller drivers can also lead to xinput1-3.dll error. So, you can try updating the related drivers by following the steps provided below.
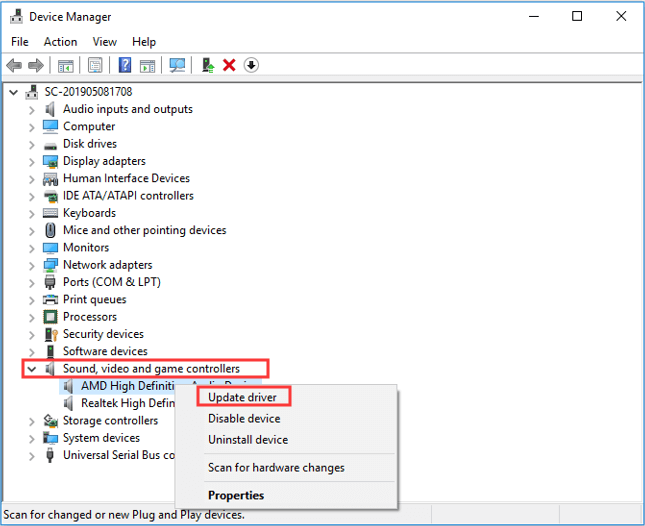
Step 1: Press Windows and R to open Run window. Type devmgmt.msc in the empty box and click OK.
Step 2: In the Device Manager window, double-click Sound, video and game controllers to expand it.
Step 3: Right-click your game controller driver and select Update driver from the drop-down menu. Then, follow the instruction on the screen to complete the update.
Step 4: Finally, restart your computer and xinput1-3.dll missing error should be removed.
Fix 5: Perform System Restore
If all the solutions mentioned above fail to fix the problem, you can choose to perform system restore. You might get the xinput1_3.dll error after making certain changes to a specific file or configuration, and performing system restore can make the settings back to the state before you making changes.
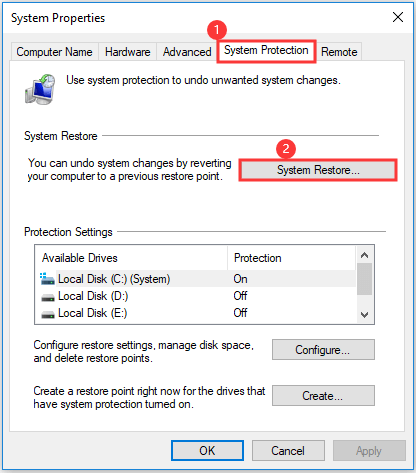
Step 1: Type restore in the Search bar and click Create a restore point from the search results to open System Properties window.
Step 2: Under System Protection tab, click System Restore.
Step 3: Click Next in the welcome page.
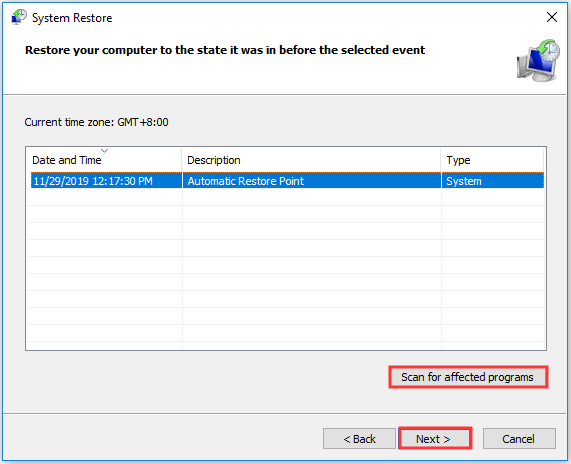
Step 4: You will get the following page where all the available restore points are listed. Select the restore point you want to use and click Next.
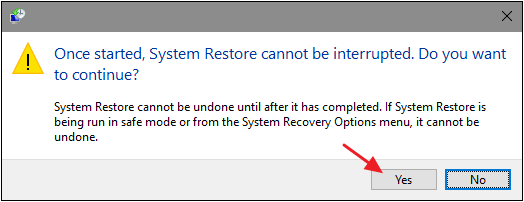
Step 5: After confirming the operation, you will get a warning message. If you have prepared well for this system restore, click Yes to start.
Then, Windows will restart your computer and start the restore process. Just wait patiently until the process is finished. Now, the xinpu1-3.dll not found problem should have been fixed.
User Comments :