What should I do when Windows 10 can’t remove printer? You may raise such a question like many other people. This issue is not hard to troubleshoot actually. In this post, MiniTool offers you some fixes for the issue and methods to remove printer from Windows 10.
Though printer brings much convenience in daily life, it sometimes may have some errors with itself. For instance, you probably encounter printer not printing, printer offline, printer prints blank pages, and other issues when using printer.
Aside from that, many people complain that Windows 10 can’t remove printer. This issue annoys a large number of people. How to solve it? You can try the fixes below.
Fix 1: Removing Printer Driver from Print Server Properties
Step 1: Open Control Panel.
Step 2: In the Control Panel window, change the View type to Small icons and click on Devices and Printers.
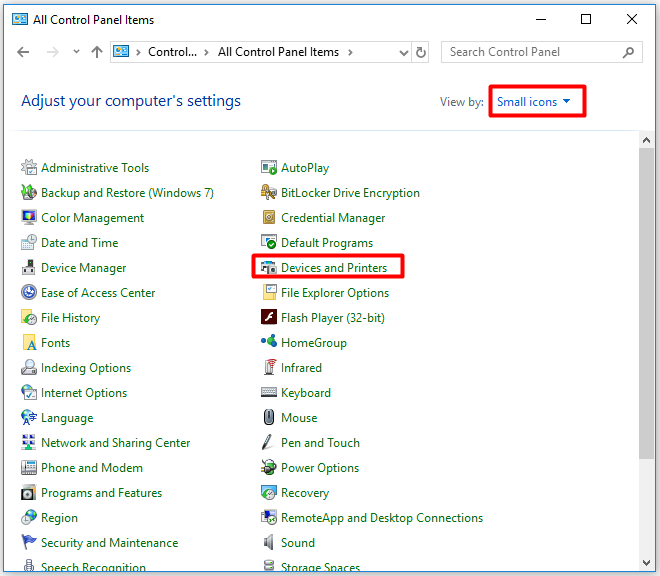
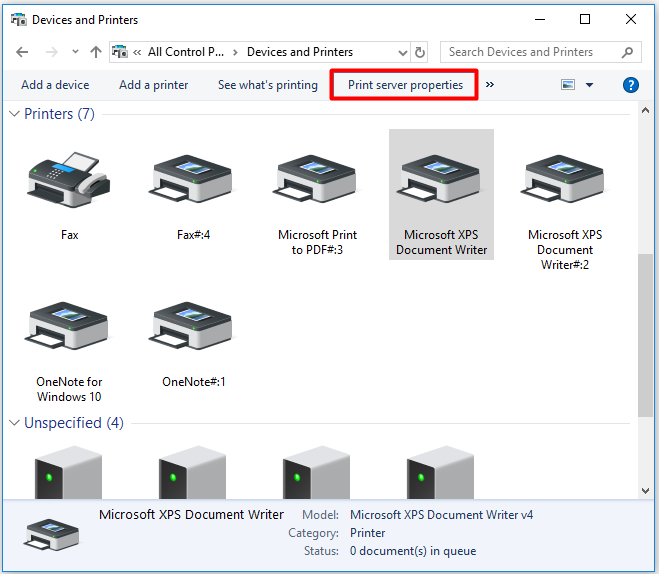
Step 3: Click on the Printer server properties tab to continue.
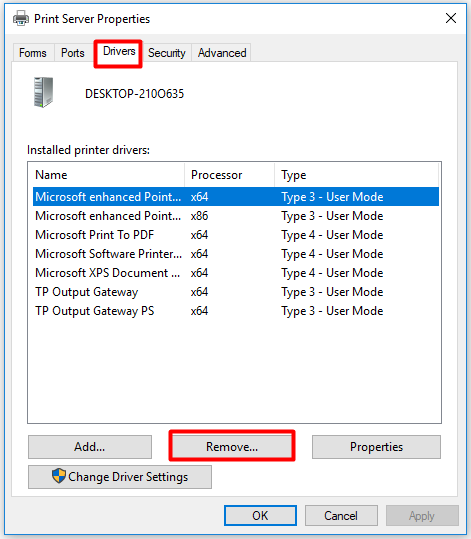
Step 4: Navigate to the Drivers tab and then choose the printer driver you want to remove from the list. Then click on the Remove button.
Step 5: In the pop-up window, choose Remove driver and driver package and click OK.
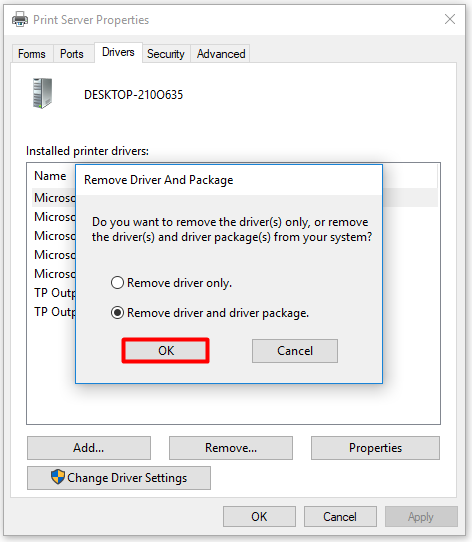
After that, you can remove printer in Settings > Apps & Features.
Windows 10 cannot remove printer? Here are some fixes for you. Try them now!
Fix 2: Cancel All Print Tasks
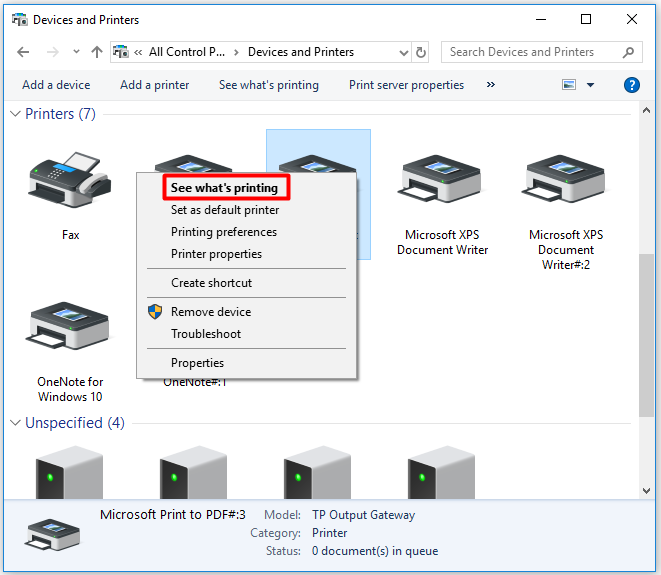
Sometimes, you can’t remove printer Windows 10 because there are active print jobs on your device. In this case, you should see what’s printing and then remove all printing tasks. After that, you can remove printer properly.
Go to Devices and Printers section by following the Step 1 and Step 2 in Fix 1. Then right click on your printer and click the See what’s printing option in the prompted menu. After that, you can see all the printing tasks on your PC. Remove all entries from the printing queue.
Bonus Tup: How to Remove Printer
In this part, we would introduce some methods to remove printer.
Method 1: Remove Printer from Settings
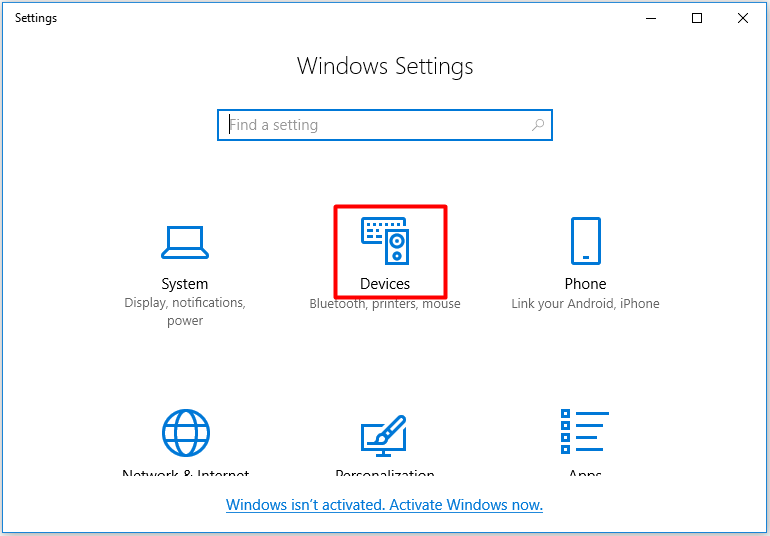
Step 1: Open Settings by pressing Windows and I keys, and then click Devices.
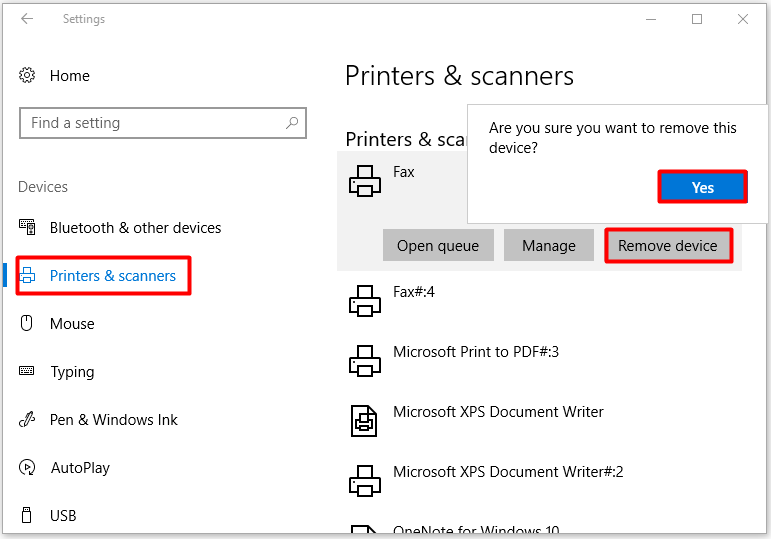
Step 2: In the next window, click on Printer & scanners option in the left pane. Move to the right side of the window and scroll down the content to find your printers. Then click on the printer to remove and click the Remove device option. In the pop-up confirmation window, click Yes to execute the operation.
Method 2: Remove Printer from Control Panel
To remove printer from Control Panel, follow the steps below.
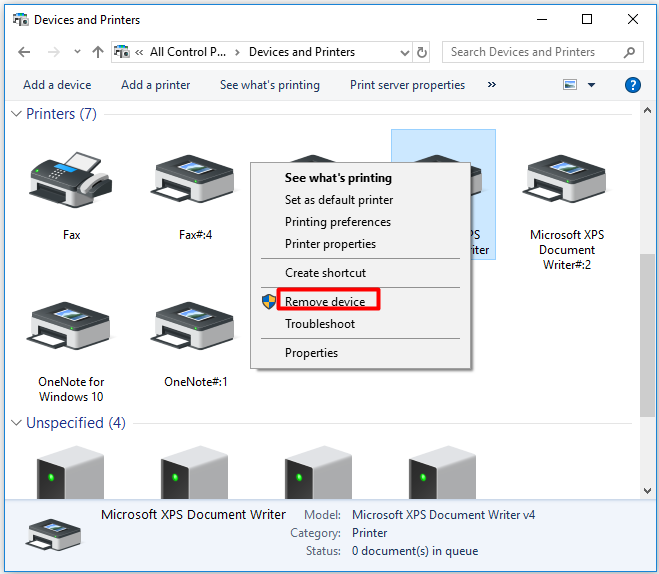
Step 1: Open Control Panel and then click Devices and Printers.
Step 2: Right-click on the printer to delete and click on the Remove device option. Then follow the on-screen instruction to finish uninstallation.
Method 3: Remove Printer from Registry Editor
Step 1: Open the Run window by pressing Windows + R keys, and then type regedit and hit Enter.

Step 2: After entering Registry Editor, follow the path below to locate the destination. Then right-click on your printer and click Delete.
Step 3: After deletion, restart your computer. Then move to Devices and Printers and delete the printer.
If you want to remove printer, here are some methods for you.
User Comments :