Many users report experiencing the Wi-Fi certificate error on their Windows 10/11. If you are also trying to figure it out, then this post is what you need. MiniTool Partition Wizard will provide you with several effective fixes.
Wi-Fi has become the preferred option for connecting to the Internet, however, errors associated with it have also appeared. “Wi-Fi certificate error” is one of them. This bug prevents users from accessing certain websites.
Well, what causes the Wi-Fi certificate error? It could be due to incorrect network settings or incorrect date and time and outdated network drivers.
Way 1: Set the Correct Time and Date
The first thing you should do after encountering the Wi-Fi certificate error problem is to make sure your system displays the correct date and time.
To change your system’s date and time, here is the guide:
Step 1: Press the Win + I key to open Settings, and then click on Time & Language at the left panel of the screen.
Step 2: Turn off Set time automatically, and then click on Change under Change date and time.
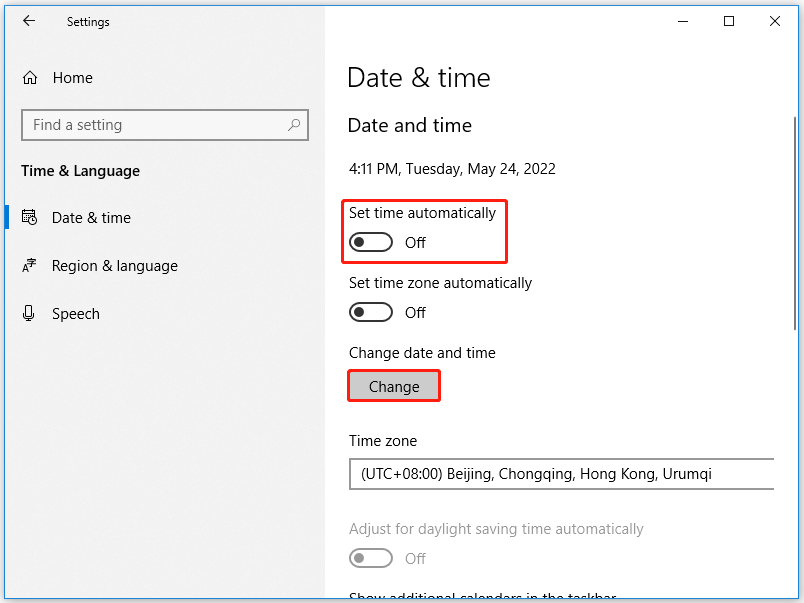
Step 3: In the next window, set the correct date and time, and then click on Change.
Once done, you need to restart your PC, and then check if the Wi-Fi certificate error on Windows 10/11 is fixed.
Way 2: Change Windows Time Properties
You also try to change Windows time properties to solve the Wi-Fi certificate error on Windows 10/11. The steps are as follows:
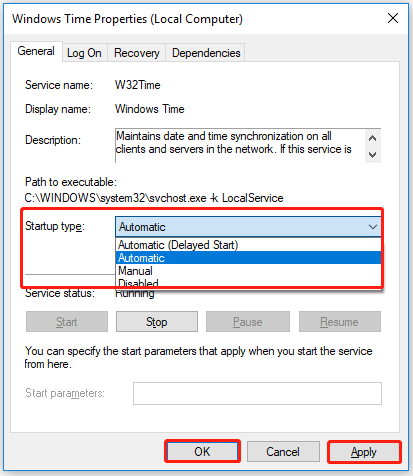
Step 1: Press the Win + S key to open the Search menu. Then enter Services in the text box and press Enter.
Step 2: In the Services window, find the Windows Time option and right-click on it. Then choose the Properties option from the context menu.
Step 3: In the next window, select Automatic next to Startup type. Then click on Apply > OK to save the changes.
Way 3: Update Network Drivers
The Wi-Fi certificate error can also be caused by outdated network drivers. So, you can update the network drivers by the following either of the methods below.
- Visit the official website, check if there is an update available, and download it.
- Update network drivers in Windows 10/11 using Windows Update.
Way 4: Enable Hyper-V
Some users have reported that enabling Hype-V has fixed the Wi-Fi certificate error. So, you can also enable Hyper-V to solve this error.
Step 1: In the Search menu, type Turn Windows features on or off and press Enter.
Step 2: In the Windows Features window, locate Hyper-V and check the Hyper-V box.

Step 3: Finally, click on OK.
After that, check if the Wi-Fi certificate error on Windows 10/11 gets fixed.
Way 5: Reset Network Settings
If none of the above methods helped resolve the issue, you can also try resetting your network settings. This will fix any kind of network-related issues. You can follow the steps below.
Step 1: Press the Win + I key to open Setting. Then click on Network & Internet > Status.
Step 2: At the right panel of the screen, click on Network reset.
Step 3: There will be a pop-up window with the information about Network reset. Just click on Reset now to continue.
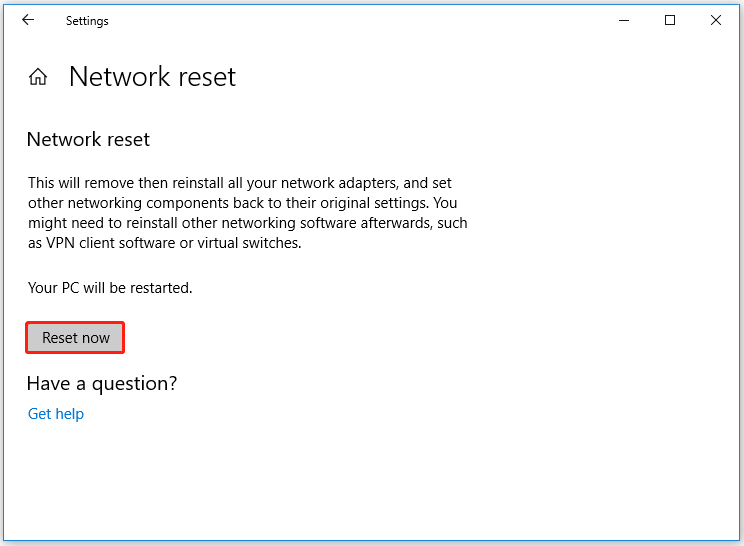
Step 4: Click on Yes to the confirmation box that pops up.

Bottom Line
In the above article, we conclude the guide on how to fix the Wi-Fi certificate error on Windows 10/11. Hope the above methods can help you. If you have other methods, please share them with us.
About The Author

Position: Columnist
Vega enjoys helping people with computer problems, including disk management, data recovery, data backup, and more. She is constantly expanding her knowledge in related fields. And she will continue to bring more easy-to-understand professional articles to help people solve various problems on the PC.
User Comments :