BitLocker is a feature in Windows that allows users to encrypt data stored on drives and helps ensure privacy and security from intrusions. But many users reported encountering the “failed to open the BitLocker control panel tool” error in Windows 10/11.
When setting up BitLocker on a Windows 11/10 PC, if you receive a “failed to open the BitLocker control panel tool error code 0x80004005” error message, please refer to the following methods to resolve the issue.
Method 1: Check if BitLocker Is Supported
The first thing to do is to check if your operating system supports BitLocker. Because Microsoft only offers BitLocker on the Enterprise and Professional editions of Windows. Therefore, if you use any other version, you may not be able to run BitLocker.
To check if your system supports BitLocker, follow the steps below:
Step 1: Press the Win + S key to open the Search menu and enter System Information in the text box.
Step 2: Right-click the relevant search result and select the Run as administrator option from the connect menu.
Step 3: On the right side of the System Summary tab, scroll down to the Device Encryption Support section and check next to it. If it says Meets perquisites, you can use BitLocker on your computer. However, if it displays any other message indicating incompatibility, BitLocker cannot be used on a Windows 11/10 PC.
Method 2: Enable BitLocker Drive Encryption Service
The BitLocker Drive Encryption Service is responsible for running BitLocker on your computer. Whether you’re using Windows 10/11, you’ll need this service running in the background to continue using BitLocker tools. However, if it is stopped or turned off for any reason, you will not be able to use BitLocker.
To enable BitLocker Drive Encryption Service, follow the steps below:
Step 1: Type Services in the Search menu, and then click on the relevant search result.
Step 2: In the right panel of the Services window, locate BitLocker Drive Encryption Service. Then right-click on the Start option.
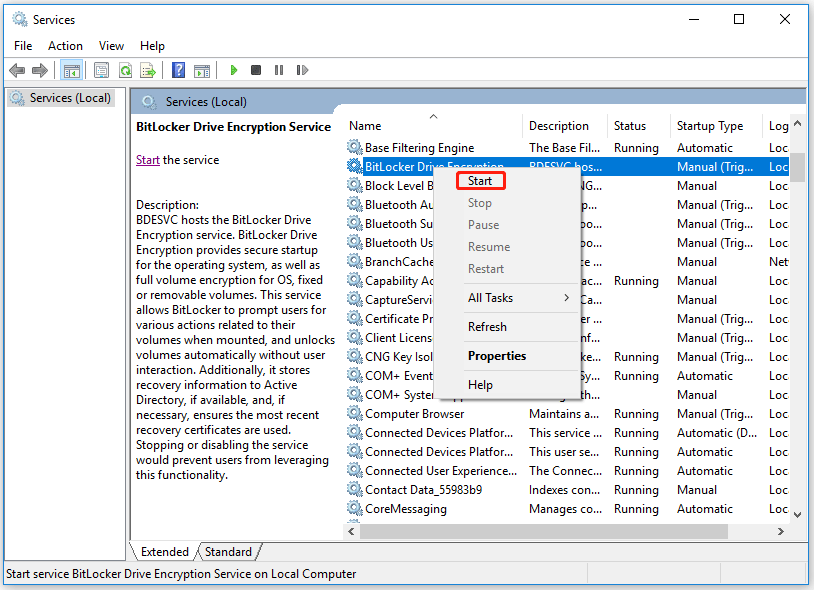
Step 3: Once done, click on OK to save the changes.
After that, you will use BitLocker without the “failed to open the BitLocker control panel tool” error.
Method 3: Enable Group Policy Setting
When you log in to your user account, you need to turn on additional authentication. Otherwise, you may encounter the “failed to open the BitLocker control panel tool” error. So, follow the steps below to open the appropriate settings:
Step 1: Press the Win + R key to open the Run dialog box. Then type gpedit.msc and press Enter to open Local Group Policy Editor.
Step 2: Now navigate to the following path:
Computer Configuration > Administrative Templates > Windows Components > BitLocker Drive Encryption > Operating System Drives
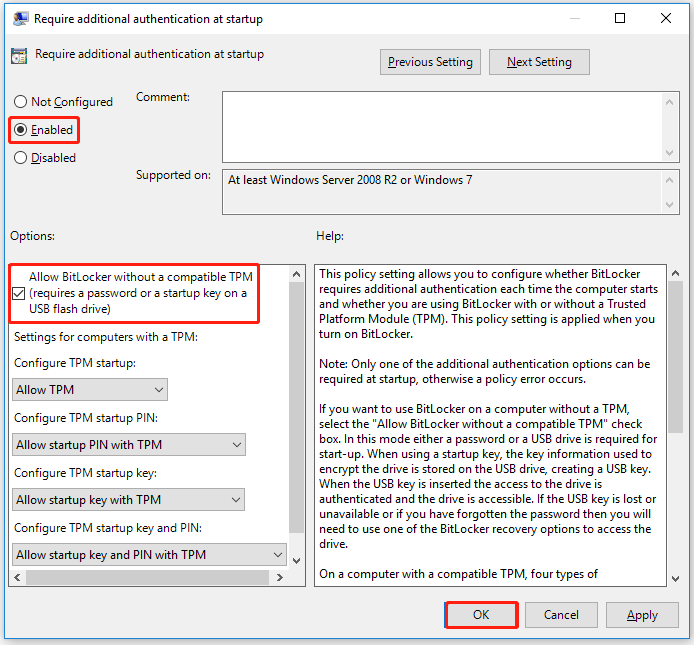
Step 3: In the right panel, double-click on the Require additional authentication at startup setting.
Step 4: In the next pop-up window, choose the Enabled option and check the Allow BitLocker without a compatible TPM box. Then click on the OK button.
Method 4: Perform the SFC and DISM Scan
If the error is caused by any missing or corrupt system files, you can try to fix them by running the System File Checker (SFC) and Deployment Image Servicing and Management (DISM) tools. The steps are as follows:
Step 1: Press the Win + S key to open the Search menu and type cmd in the text box. Then right-click the relevant search result and select Run as administrator.
Step 2: In the Command Prompt window, type the following command: sfc /scannow and press Enter.
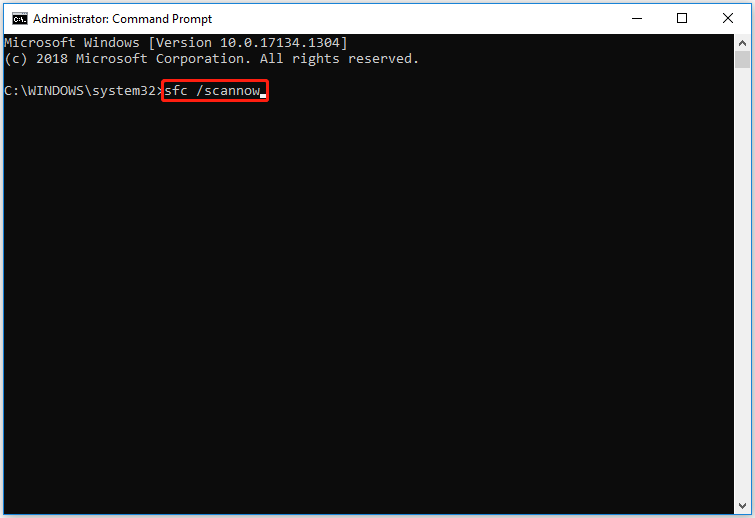
Step 3: After the scanning process is complete, if it describes that the corruption is resolved, close Command Prompt and restart Windows 10.
If the SFC tool fails to repair corrupted files, you can use the DISM tool.
Step 1: Open the Command Prompt as administrator. Then type DISM.exe /Online /Cleanup-image /Restorehealth. Then press Enter.
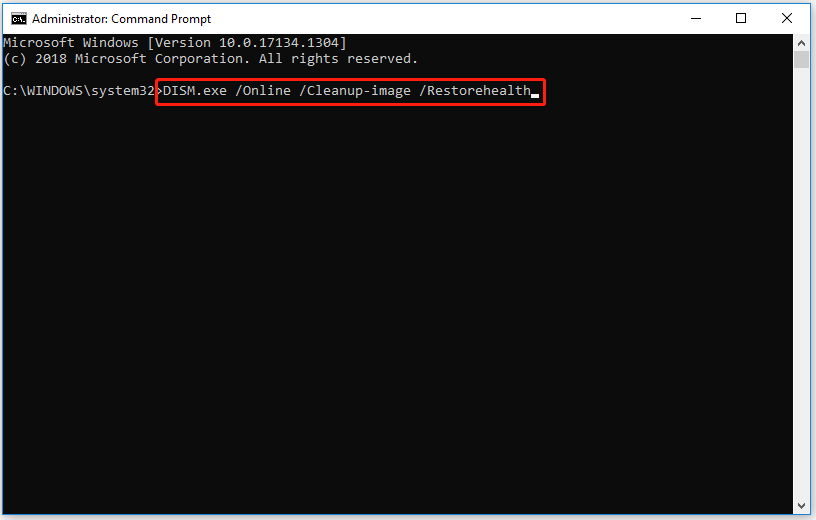
Step 2: After the scanning process is complete, restart your computer to check if the error has been solved.
If the above methods don’t work, then you can try to perform a system restore. You can refer to this article: What Is System Restore Point and How to Create It? Look Here!
About The Author

Position: Columnist
Vega enjoys helping people with computer problems, including disk management, data recovery, data backup, and more. She is constantly expanding her knowledge in related fields. And she will continue to bring more easy-to-understand professional articles to help people solve various problems on the PC.
User Comments :