100 Disk Usage Caused by System and Compressed Memory
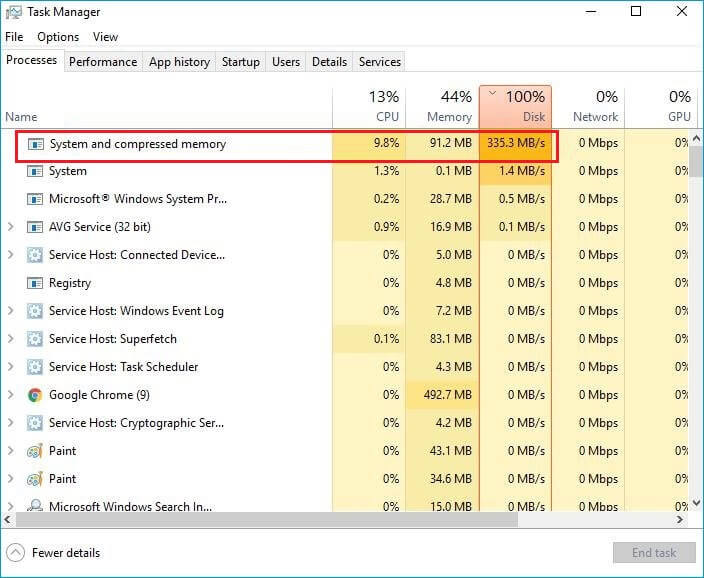
System and compressed memory is responsible for the compression of files and folders and the management of RAM. Under normal circumstances, system and compressed memory takes a slight of CPU usage rate. But in some circumstance, system and compressed memory process also arouse the 100 disk usage issue in Windows 10.
This is not alarmist. If you messed up the virtual memory settings like changing the paging file size from Automatic to a set value, the system and compressed memory process starts taking up 100% of the affected disk.
It is entirely possible for Windows 10 users to get affected by this issue. See users’ say from answers.microsoft.com:
System and Compressed memory frequently runs at 100% Disk usage for 2 to 3 minutes at a time, effectively preventing any other computer operation from occurring – so the machine just hangs until the disk becomes available again. I’m running an older laptop (Toshiba Satellite Pro) with Windows 10 Pro. I’m not sure if the problem is my laptop is not powerful enough, or if there is something weird happening in the operations.
Right here in this post, you will learn the most effective solution to remove system and compressed memory high disk usage based on Windows 10:
Solution 1. Scan for Virus/Malware
Certain virus and malware can lead to System and Compressed Memory high disk usage. To get rid of this issue, you just need to do the followings:
Step 1: Download and install trustworthy antivirus software.
Step 2: Do a full scan of your computer using the antivirus and clear all the potential threats.
Step 3: Now restart your computer and check the system and compressed memory disk usage.
Solution 2. Repair Corrupt System Files
A system file is any file with the system attribute turned on. Files and folders with system attribute logged on should usually be left alone. To keep operating system running smooth and stable, users should not change, move, or delete these files. For this reason, system files typically are hidden by default and have the read-only attribute.
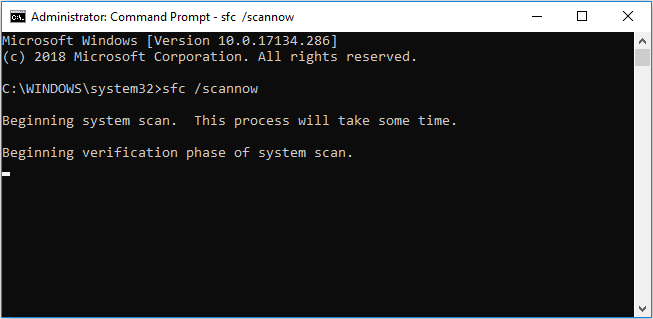
However, once system files are corrupt, disk usage 100 Windows 10 can emerge. In this case, you need repair corrupted system files by following the steps below:
Step 1: Right-click Windows Start menu, select Command Prompt (Admin).
Step 2: In the pop-up window, allow its changes to your PC.
Step 3: Type sfc /scannow and press the Enter key. It may take several minutes for the command operation to be completed.
Solution 3. Set the Paging File Size back to Automatic
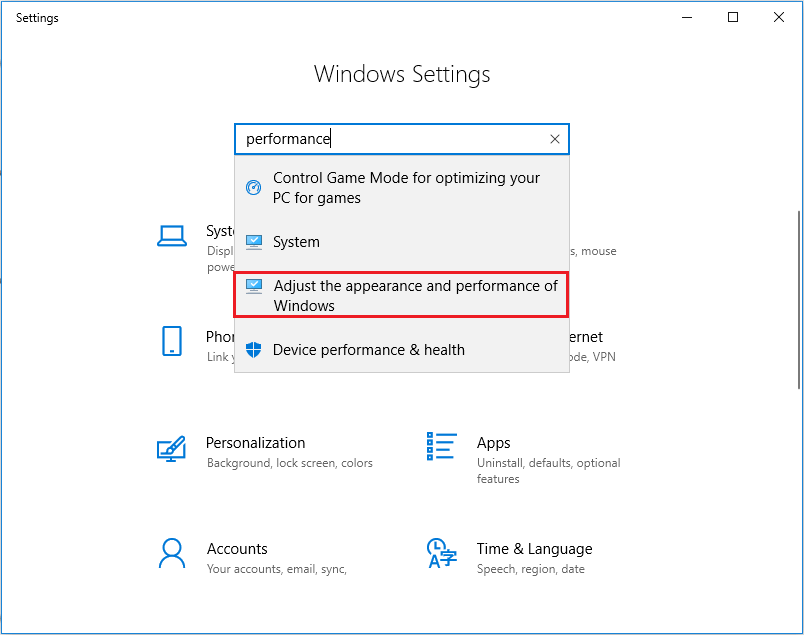
The paging file size for all drives in Windows 10 is, by default, set to allow Windows to automatically manage it. The paging file size can be set to a custom value by the user, but doing can lead to problems with memory compression in Windows 10, ultimately leading to 100 disk usage by the System and compressed memory process. If you customized the paging file size for any of your drives in the past and are suffering from this problem, this solution is the way to go.
Step 1: Open the Start menu, select Settings and then search for performance. Click Adjust the appearance and performance of Windows from the search results.
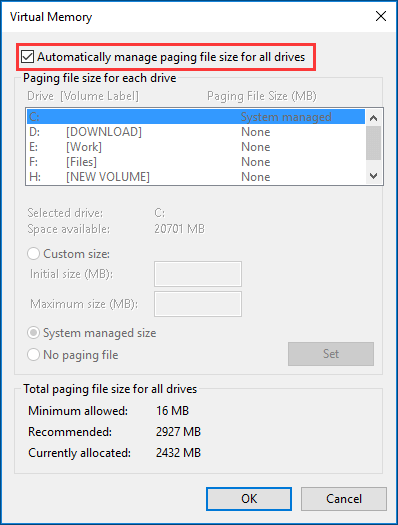
Step 2: When the Performance Options window pops up, navigate to Advanced and then click on the Change button located under the Virtual memory.
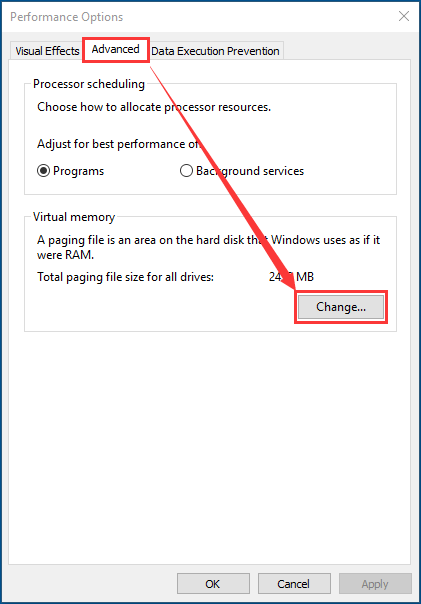
Step 3: The Virtual Memory window will now pop up. In this window, make sure that the box beside Automatically manage paging file size for all drives option is checked, meaning that this option is enabled. Click OK to continue.
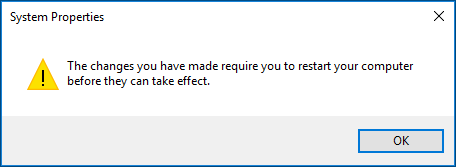
Step 4: In the next pop-up window, press OK to allow the restart. Later you are able to see if the system and compressed memory Windows 10 persists taking up high resources.
Solution 4. Disable System and Compressed Memory Process
If Solution 2 did not work for you or if you managed to get to the Virtual Memory window and saw that the Automatically manage paging file size for all drives option was already enabled, the size of the paging files for your drives is most certainly not the culprit. That being the case, you can still fix this problem by simply disabling the System and compressed memory process. To do so, you need to:
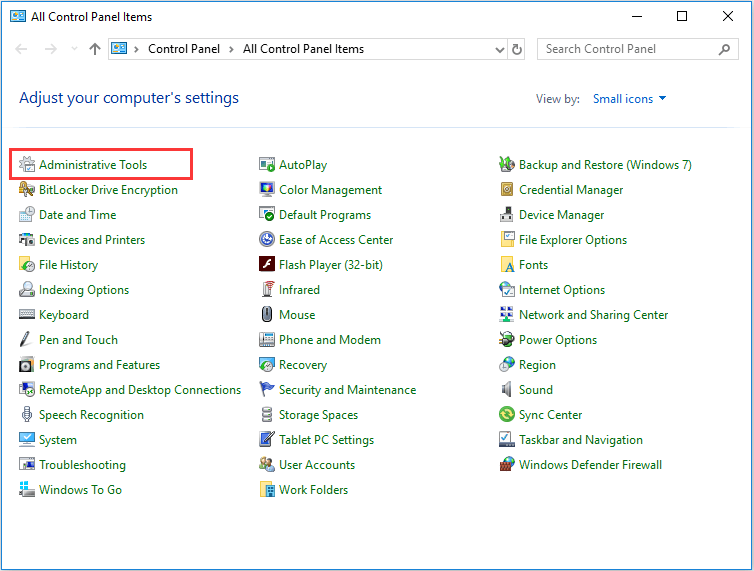
Step 1: Right-click the Start menu and choose Control Panel. Then in the Control Panel window, change the view mode to Small icons and choose Administrative Tools.
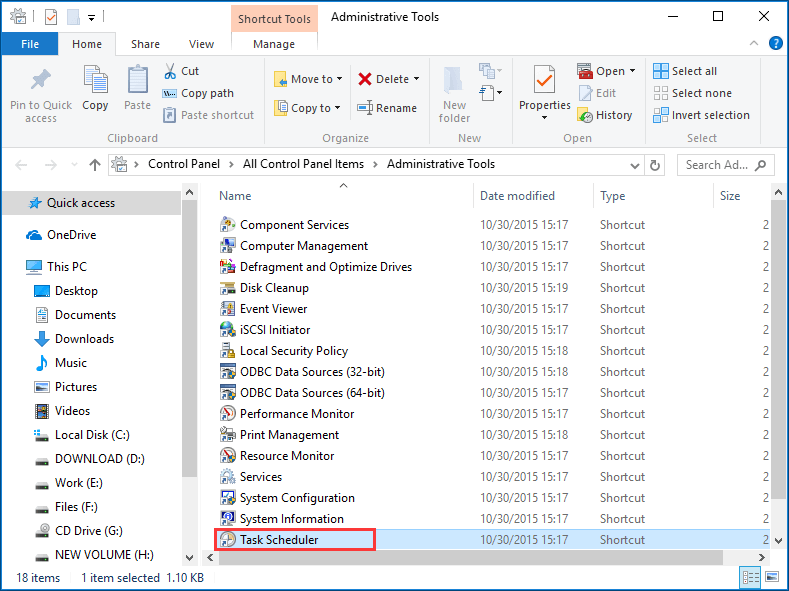
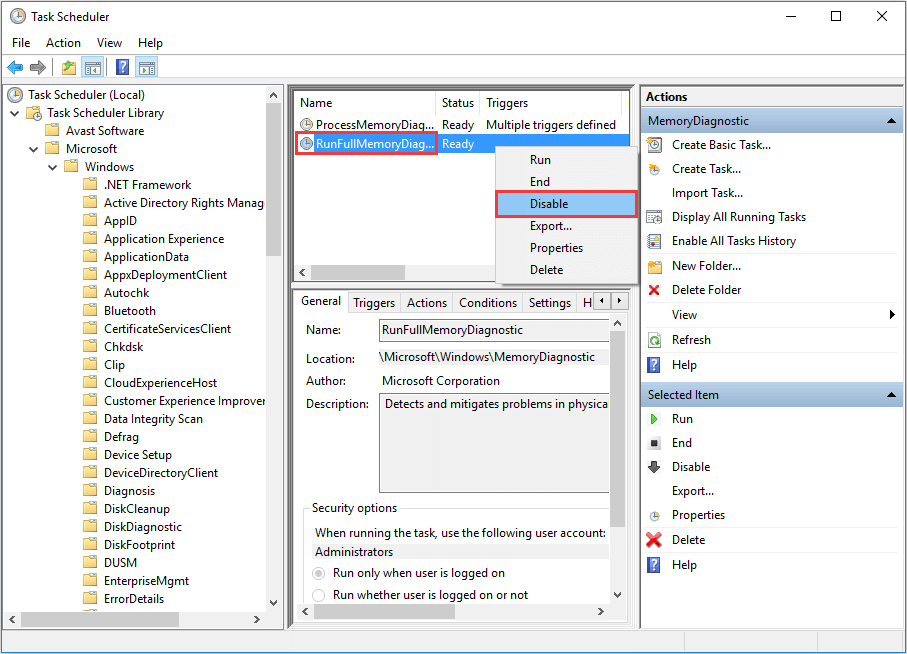
Step 2: In the next window, choose Task Scheduler.
Step 3: In the Task Scheduler window, follow this path: Task Schedule Library > Microsoft > Windows > MemoryDiagnostic.
Step 4: In the right pane, locate and right-click on RunFullMemoryDiagnosticEntry to choose Disable in the contextual menu.
Step 5: Now restart your computer and check to see if disk usage 100 Windows 10 persists once your computer boots up.
Solution 5. Disable Superfetch Service
Superfetch is a Windows service aiming at improving system performance over time. However, Superfetch can cause the System and compressed memory process to bring 100% disk usage issues. Luckily, you are able to disable the Superfetch service within simple steps.
Step 1: Press Win+R to call out the Run box.
Step 2: Typeservices.mscinto the Run box and press the Enter key.
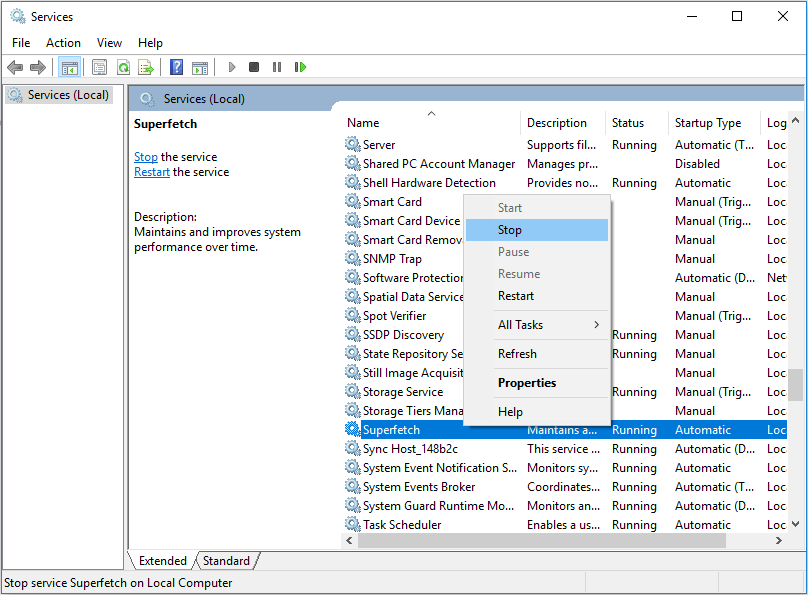
Step 3: In the Superfetch service window, scroll down the services and locate to Superfetch. Right-click on it and click Stop.
Or you can do the same thing by modifying the registry.
Step 1: Press Win+R to call out the Run box.
Step 2: Type regedit into the Run dialog and press Enter.
Step 3: In the left pane of the Registry Editor, navigate to the following directory:
HKEY_LOCAL_MACHINESYSTEMCurrentControlSetControlSession ManagerMemory ManagementPrefetchParameters
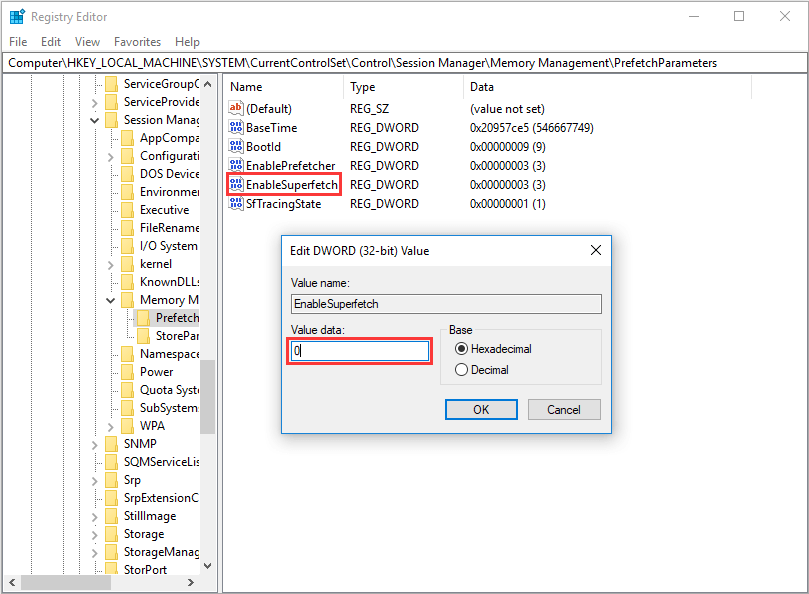
Step 4: In the right pane of the Registry Editor, double-click on the registry value titled EnableSuperfetch to modify it.
Step 5: Replace the Value data field with 0 and then click on OK.
Step 6: Close the Registry Editor and restart your PC. Check to see whether or not the problem has been resolved.
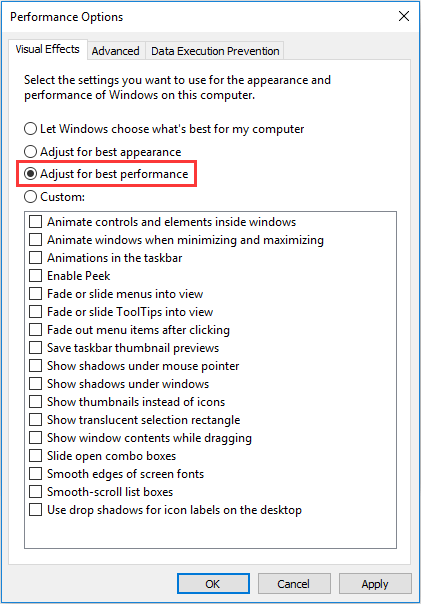
Solution 6. Adjust Your PC for Best Performance
Step 1: Press Win+R to launch the Run box.
Step 2: Type sysdm.cpl and hit the Enter key.
Step 3: In the System Properties window, locate to the Advanced tab and then click on Settings unde Performance.
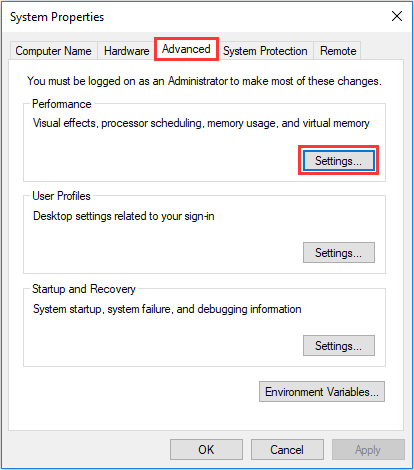
Step 4: Under Visual Effects tab, tick Adjust for best performance. Finally, click Apply followed by OK.
Step 5: Reboot your PC and check if the 100% disk usage caused by system and compressed memory is resolved.
Solution 7. Kill the Speech Runtime Executable process
Some users found that this system and compressed memory high disk usage is caused by a process named Speech Runtime Executable, which has something to do with audio recording. This process sometimes can use obscenely large amounts of their computers’ resources, leading to 100 disk usage further.
If this is your case, you can resolve the issue by simply killing the process. To kill the Speech Runtime Executable process, you need to:
Step 1: Press Ctrl + Shift + Esc to launch Task Manager (or you can right-click on the task bar to load this procedure).
Step 2: In the Processes tab, locate and click on a process named Speech Runtime Executable to select it.
Step 3: Click on the End task button.
However, as the Speech Runtime Executable process is a system process, it can pop up quite often. If doing the above steps does help resolve the 100 disk usage Windows 10 issue, you may have to repeat the process again and again.
Solution 8. Check if RAM Is Failing or Has Failed
In many cases, this system and compressed memory disk usage is caused by failed or failing RAM. To identify, you can replace each stick of RAM one by one and boot the computer again to check. The faulty stick of RAM should be the one without which your PC no longer suffers from system and compressed memory high disk usage.
Kindly remind that if the computer has more than one stick of RAM, only one of the installed sticks may be faulty.
Solution 9. Check for Hard Drive Errors
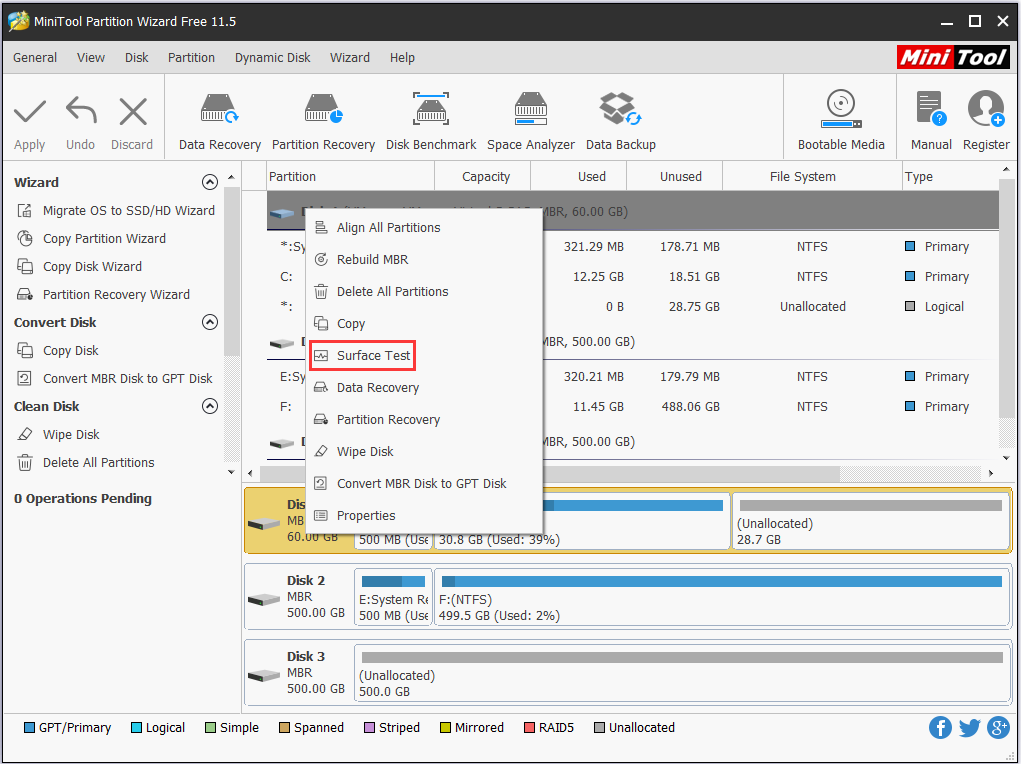
Also, you may suspect if there are some errors on the hard drive. To do this, you need to use partition magic software to help. Here MiniTool Partition Wizard Free is recommended due to its ease-of-use and free features for disk surface test.
MiniTool Partition Wizard FreeClick to Download100%Clean & Safe
Step 1: After downloading and installing this partition manager on computer, and then run it to get the main interface.
Step 2: Now right-click the system disk and choose Surface Test from the context menu.
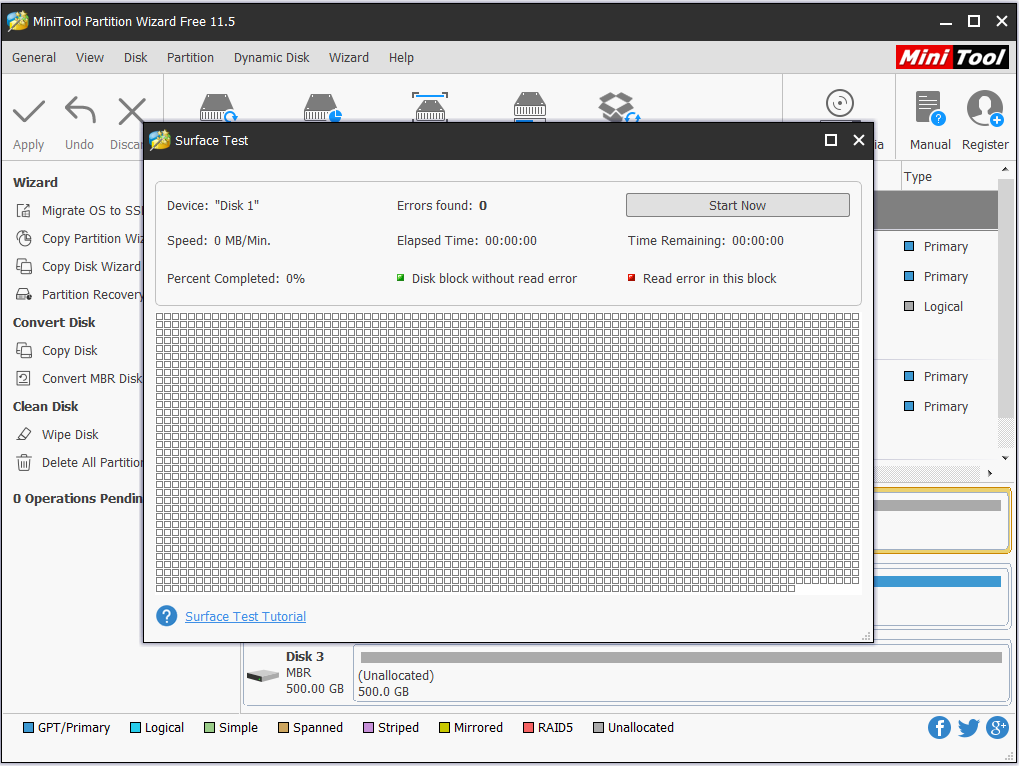
Step 3: In the next window, click Start Now and wait for the process to finish. If some disk errors (red disk blocks) are found, then you may upgrade hard drive to remove the 100 disk usage problem.
Tips & Tricks to Avoid System and Compressed Memory High Disk Usage
Despite that we have several solutions to 100 disk usage Windows 10 caused by system and compressed memory high disk usage, we do need to pay more attention to our computer maintain ace to avoid such an issue. Right here we summarized some tips for you:
- Add more RAM.As this issue is related to RAM functioning, increasing the RAM of your computer will reduce the probability of high disk usage.
- Uninstall useless applications.The more applications you installed, the high disk usage they will occupy. So it is necessary for you to uninstall the applications you seldom use. Please go to Control Panel -> Uninstall a program to uninstall any programs that you don’t need.
- Close applications/windows/tabs currently you don’t need.Once you have finished using an application or browsing the web pages, close them in time for excessive retention procedure will push your memory usage and disk usage to a higher stage.
- Updated all drivers available.Always keep the drivers for your PC to the latest is a good way to avoid various computer hanging issues.
Bottom Line
That’s all for how to resolve system and compressed memory high disk usage in Windows 10. Let us know if any of these methods helped or if you have any other nice suggestions, be sure to leave us comments below.
Should you have any questions when using MiniTool software, don’t hesitate to contact us via [email protected].
About The Author

Position: Columnist
Rodin is an enthusiastic IT writer focusing on Windows trends, disk partition management and data recovery. She loves to write and share her idea about the useful tips and tricks on personal computers' maintenance. If you are looking for methods to improve your computer performance, manage hard drives and recover data from different devices, Rodin can provide reliable solutions for data management.
User Comments :