If you have used Steam for a long time with Steam cloud sync enabled, there might be many unwanted files and backups you need to delete to free up some space for new games. If you don’t know how to delete the Steam cloud saves, you can read this tutorial provided by MiniTool Partition Wizard.
Cloud services are popular storage solutions nowadays.
Steam, one of the best gaming platforms, offers a cloud feature, too. It provides an easy way to save your game data (including game settings, saved games, profile status, and other user-specific bits) on a remote storage system. These data will persist on an account regardless of which machine it is logged into. Therefore, this is particularly useful when you change your computer.
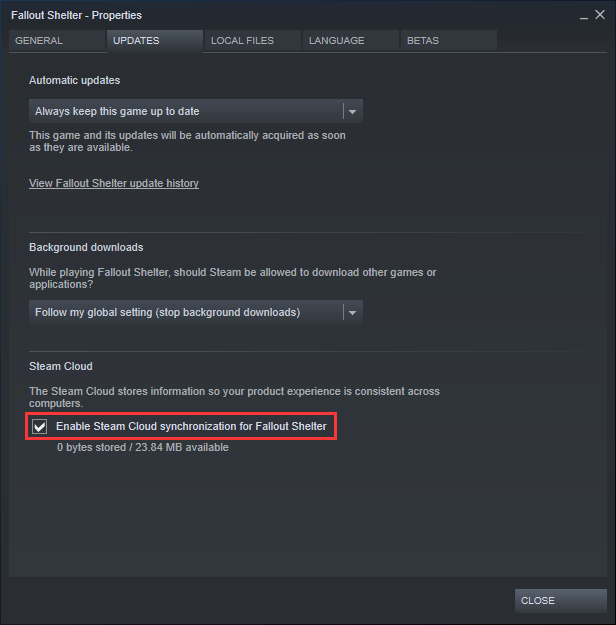
To enable it for a certain game, you just need to go to LIBRARY and right-click the target game, and select Properties. Then select the UPDATES tab and check Enable Steam Cloud synchronization for the game under the Steam Cloud section.
If you have used Steam Cloud for months or even years, there might be a lot of game files or old backups which are not useful anymore. In this case, you can delete them to free up some space for new games.
How to delete Steam cloud saves? Here is the tutorial.
To delete Steam cloud saves, you need to take four moves. Firstly, make sure you have enabled Steam cloud feature. Secondly, delete the AppID folder of Steam. Thirdly, trigger the Steam cloud conflict. Finally, delete the stored cloud files. For more detailed information, refer to the steps below.
Before performing any of these methods on how to delete the Steam cloud saves, make sure to perform a backup of the game. To make a backup, you just follow the guide in this post: Steam Backup Game Files via Steam Backup/Manually/Magic Tool.

Move 1: Make Sure the Steam Cloud Is Enabled
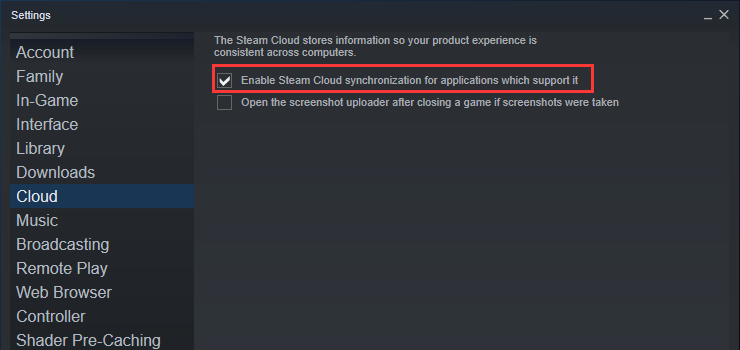
Step 1: Open Steam, and click Steam button on the upper left corner. Then select Settings.
Step 2: Click Cloud tab and make sure the option Enable Steam Cloud synchronization for the applications which support it has been checked.
Step 3: Go to LIBRARY and make sure the Steam cloud feature has been enabled for your game, too. You just need to right-click your game and select Properties. Then click the UPDATE tab and check Enable Steam Cloud synchronization for the game.
If both options are enabled, it indicates the game has been backed up on the Steam cloud. Then you can continue to delete Steam cloud saves.
Move 2: Delete the AppID Folder
The second move to delete Steam cloud saves is to delete the AppID folder of Steam.
Step 1: You need to open File Explorer and navigate to the Steam > userdata directory (the folder where Steam is installed). There should be a folder corresponding to your Steam ID. Open the Steam ID folder and you can find some folders for each game that is identified using the AppID.
Step 2: Look for the AppID folder corresponding to the target game and delete it. Then restart your computer, run Steam, and launch the involved game.
When you log in to Steam with your account and start the game, the folder you deleted just now would be produced again automatically. Please check that in the AppID folder. If the folder is back, it indicates your Steam Cloud is working properly. Then, you can go to Move 3.
Move 3: Trigger the Steam Cloud Conflict Dialogue
Step 1: Make sure Steam and related processes are closed completely in Task Manager.
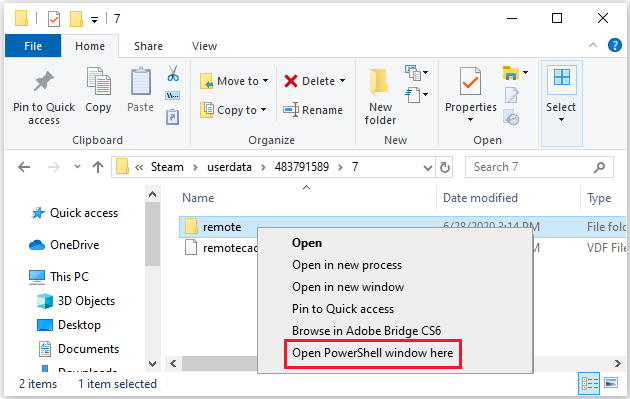
Step 2: Go to Steam > userdata > SteamID> AppID > remote. (Not all games have remote folders. If your game lacks it as well, you should look for it on the Internet to see if any players or official people have pointed it out.)
Disco Elysium lacks a remote folder, its data is always kept in this location: C:UsersUSERAppDataLocalLowZAUM StudioDisco Elysium. You can delete its data here. If you want to delete its data from inside the game, you can go load the game. Click on Save. In the corner under Load, it says Delete selected.
Step 3: Hold Shift and right-click the remote folder. Then select Open PowerShell window here.
Step 4: Input the following command line in PowerShell and press Enter to execute it. Then you will find that all the files in the remote folder become 0 bytes.
clc –path “C:Program Files (x86)SteamuserdataSteamIDAppIDremote*”
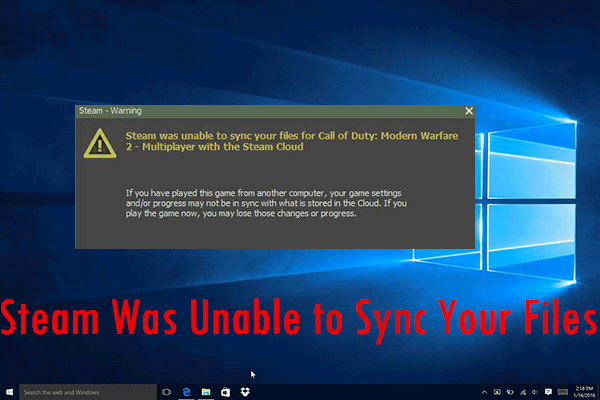
Steam 5: Launch Steam and your game, and you will receive the Steam cloud conflict window. Don’t click any option and just go to the next move.
Move 4: Delete Stored Cloud Files
Step 1: Again, go to Steam > userdata > SteamID> AppID and then delete the remote folder and remotecache.vdf file in it.
Step 2: Go back to the Steam cloud conflict window and select UPLOAD TO THE STEAM CLOUD. Then Steam will sync your AppID folder where includes nothing. So, the previous data on your Steam cloud will be deleted.
Step 3: The target game will start automatically after Step 2. You need to pay attention that the new files will be synced to your Steam cloud when you close the game. So you need to disable the Steam cloud feature. Just press Alt + Tab to go back to the Steam app. Then navigate to Settings > Cloud and uncheck Enable Steam Cloud synchronization for the applications which support it.
Step 4: Close the game and exit Steam. Then delete the AppID folder again.
Move 5: Overwrite Content in the Steam Cloud with Local Files
Step 1: Launch Steam, and make sure it downloads all of the Cloud saves to the respective AppID game folder.
Step 2: Put Steam into Offline Mode.
Step 3: Open the AppID games folder again and delete all saved files, or delete all but the saves you want to keep.
Step 4: Launch the game, and then close the game.
Step 5: Put Steam back into Online Mode.
Step 6: Navigate back to the game’s library page, and you should see a file conflict status. Then click the conflict status and pick the local files to override what is in the Cloud.
Other Methods
If none of the preceding steps help you delete the cloud saves, you can try the two methods listed below. They may work for you. They are:
Method 1. Through Steam Cloud Settings
- Launch Steam.
- Right-click the game you want to delete its cloud saves.
- Select the Properties option, and then go to the General
- Next, uncheck the Keep games saves in the steam cloud option, this will delete any remaining save the file in the cloud.
Method 2. Delete Saved Data in the Installation Folder
- Launch Steam.
- Click the Steam tab in the top-right corner, and then select Settings from the menu.
- Click the Cloud tab and uncheck the Enable Steam Cloud synchronization for applications which support it
- Click OK.
- Go to LIBRARY > Home, and then right-click the game you want to delete its cloud saves.
- Choose the Properties
- Go to the LOCAL FILES tab, and then click the Browse
- Explore the folder where the game is saved, and then select and delete the SavedGames
![[Fixed] Laptop Making High-Pitched Noise from Speakers](https://images.minitool.com/partitionwizard.com/images/uploads/2024/04/laptop-making-high-pitched-noise-from-speakers-thumbnail.png)
About The Author

Position: Columnist
Charlotte is a technology columnist with a strong focus on the Windows operating system, specializing in disk management, backup, and data recovery. She is passionate about analyzing computer errors, identifying root causes, and delivering practical solutions. In her free time, she stays updated on the latest developments in computer systems and hardware while continuously learning new technologies to broaden her expertise. Her writing style is clear and easy to understand, making complex technical topics accessible even to users with limited computer knowledge.
User Comments :