You are allowed to save network bandwidth by playing video at a lower resolution on Windows 11. It is useful especially when you have a bad internet connection. Don’t hastate. Follow this post from MiniTool Partition Wizard to have a try.
You might have experienced the lagging or stuttering issue while watching a movie or stream video, especially when you have a bad internet connection. Sometimes, you can fix the error by lowering the resolution.
Some applications for video playing can adjust the resolution automatically according to your network connection, which can save time for you. Windows 11 has similar settings options.
Windows 11 is a new operating system released by Microsoft a few months ago. It is designed with many new features and a fresh outlook. Today, I’d like to introduce the feature “save network bandwidth by playing video at a lower resolution”. It helps a lot if you want to watch a video when you have a bad internet connection. And here are two methods to enable this feature.
Method 1: Save Network Bandwidth via Windows 11 Settings
An easy way to enable the “save network bandwidth by playing video at a lower resolution” feature is to change the Windows 11 settings.
Step 1: Press Win + I to open Windows 11 Settings quickly.
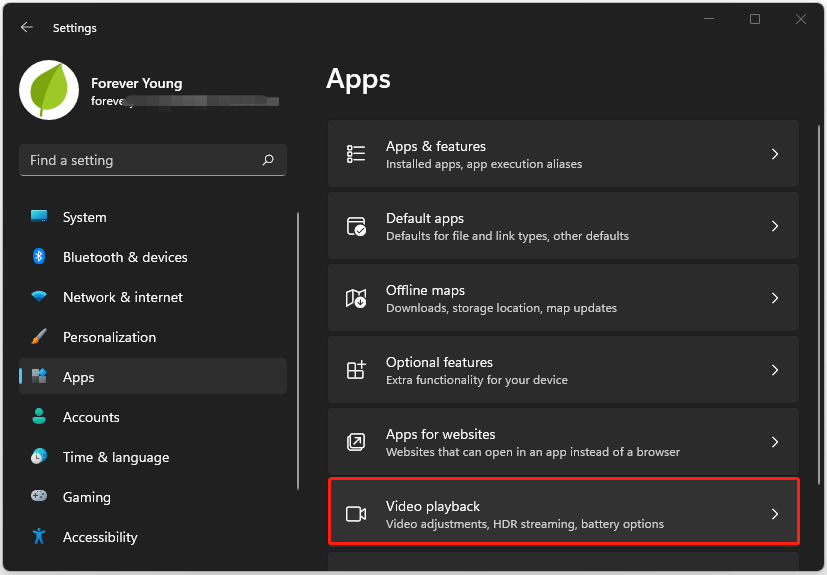
Step 2: In the left pane, select the Apps tab. In the left pane click the Video playback option.
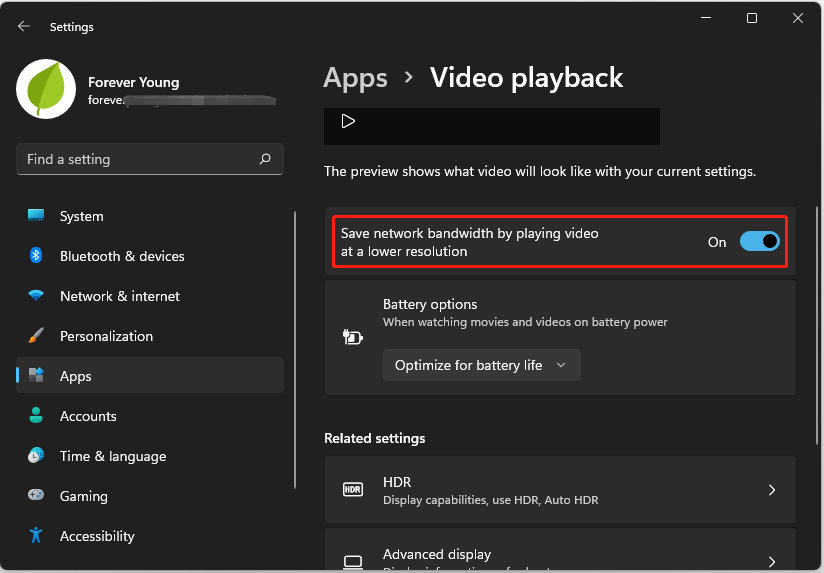
Step 3: On the following page, turn on the button for the feature “save network bandwidth by playing video at a lower resolution”.
Then you should be able to watch your video fluently. If you want to watch your video in a high resolution, you can visit Settings > Apps > Video playback and turn off the feature “save network bandwidth by playing video at a lower resolution”.
Method 2: Save Network Bandwidth via Registry Editor Windows 11
Alternatively, you can modify certain Registry keys to save network bandwidth by playing video at a lower resolution. Please be careful while changing Registry keys and do not modify or delete the keys you are not familiar with, as it might cause damage to your system. Besides, you’d better back up Registry keys before you make any changes.
Now, let’s see how to save network bandwidth via Registry Editor on Windows 11.
Step 1: Press Win + I to invoke the Run window.
Step 2: Type regedit and click OK to open Registry Editor. You will be asked to allow this app to make changes on your PC. Just click Yes to continue.
Step 3: Copy the following path and paste it to the address bar of Registry Editor. Then press Enter to navigate to the path quickly. You can also click each entry one by one to go to the path:
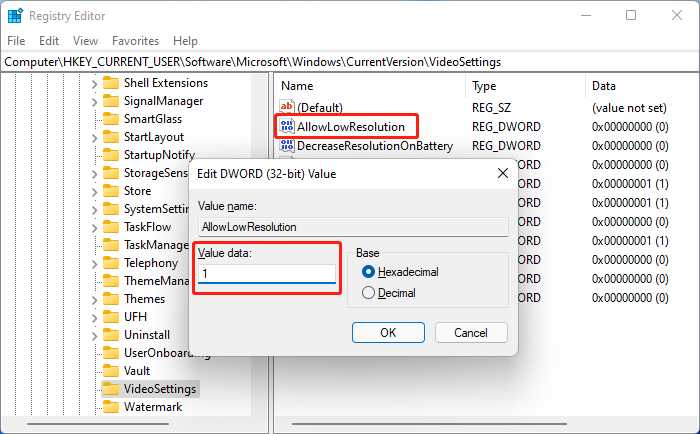
ComputerHKEY_CURRENT_USERSoftwareMicrosoftWindowsCurrentVersionVideoSettings
Step 4: In the right pane, double-click AllowLowResolution to edit it.
Step 5: In the pop-up window, change the Value data to 1 and click OK to save the changes.
After performing all the steps above, restart your computer and the “save network bandwidth by playing video at a lower resolution” feature should be enabled.
User Comments :