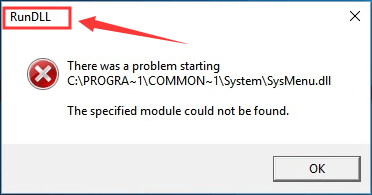
About RunDLL
RunDLL, also known as Rundll32.exe, is a necessary process directly related to your Windows operating system. It is responsible for loading and executing DLL (Dynamic Link Library) modules which work closely with Windows Registry to improve response speed and memory efficiency.
Generally, RunDll error occurs when the Rundll32.exe becomes inaccessible by your Windows and this error will interrupt your system startup.
The reasons for the RunDLL error are various, and some of them are listed below.
- A DLL file is deleted improperly.
- DLL files get corrupted.
- A shared DLL file is infected by a virus or Trojan.
- A shared DLL file is deleted when an application is uninstalled.
- DLL entries are invalid or incorrect in the Windows registry.
Now that you are already acquainted with the RunDLL error, let’s see how to fix it in your Windows PC.
Fix 1: Replace the Corrupted RunDLL File
The RunDLL file is stored in the path of C:WindowsSystem32. Once the file is corrupted and RunDLL error appears, replacing the corrupted RunDLL file should be the easiest method to fix the error.
You just need to copy the Rundll32.exe file from another working computer with the same operating system as yours to a storage device. Then, connect the device to your computer and replace the original Rundll32.exe file with the new one.
After that, restart your computer to check if the error has been removed.
Fix 2: Run SFC Scan
System File Checker (SFC) scan is a great solution to most errors related to system files. Thus, you can try running SFC scan to fix RunDLL error.
Step 1: Press Windows + R to open Run window.
Step 2: Type cmd in the empty box and press Ctrl + Shift + Enter to run Command Prompt as administrator.
Step 3: Input the command sfc /scannnow and press Enter.
Wait patiently until the scanning process is completed. Then, restart your computer to see if this method works.
Fix 3: Clear All Your Browser’s Cache and Close All the Tabs
If you receive RunDLL error while browsing web pages, you might have opened the scam website. To fix the error in browsers, you need to close all the tabs and clear cache.
You can close all the tabs of the current browser and open another browser. If the error still exists, you need to try other solutions; if the error doesn’t appear again, you must have opened the scam website and you need to clear all the browsing history or cache.
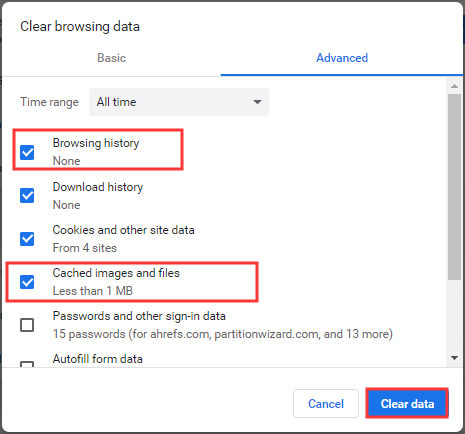
Take Google Chrome for an example to help you clear browsing cache.
After opening Chrome, expand the three-dot menu and go to More tools > Clear browsing data to get the following window. Then, choose All time for Time range and check Browsing history and Cached images and files, and then click Clear data.
Fix 4: Keep Your Windows Up to Date
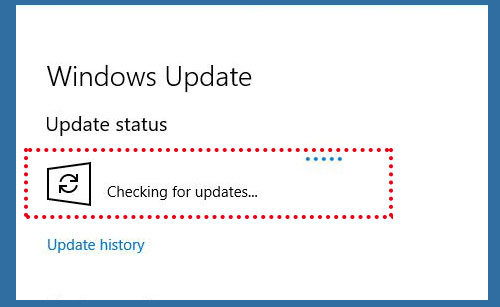
As RunDLL error might occur due to some bugs on the system, you can try updating your Windows. Although Windows 10 can download and install the latest updated automatically, you need to check for updates manually sometimes.
To do that, just open Windows Settings and go to Update & Security > Windows Update. Then, click Check for updates in the right pane. Now, your Windows will check for available updates and install them automatically.
After Windows updates are installed successfully, restart your computer to verify whether the error is removed or not.
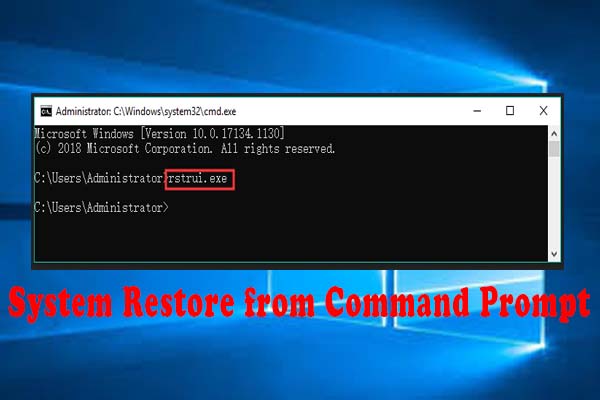
Fix 5: Perform System Restore
Finally, you can perform system restore to roll your computer to an earlier stage to fix RunDLL error. Just follow the steps below.
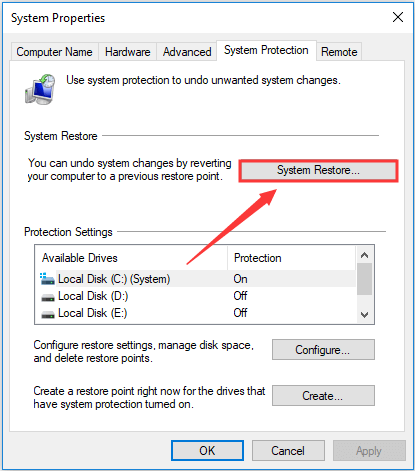
Step 1: Press Windows + S and input restore in the Search bar. Then select Create a system restore point from the results.
Step 2: In the System Properties window, click System Restore under System Protection tab.
Step 3: Click Next in the welcome page.
Step 4: Choose your desired restore point and click Next to continue.
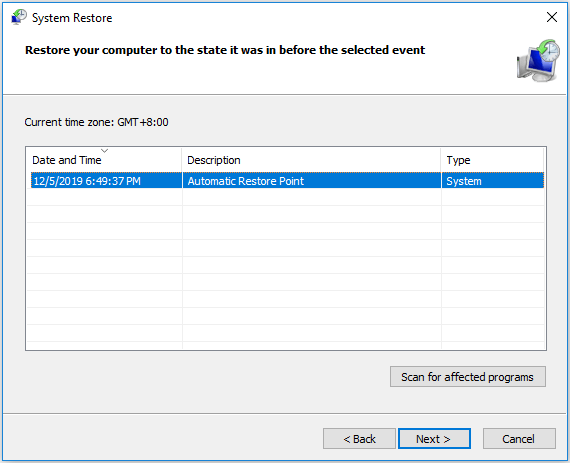
Step 5: Follow the onscreen instructions to complete the restoration process.
After that, the RunDLL error should be removed successfully.
About The Author

Position: Columnist
Linda has been an editor at MiniTool for seven years. She continuously learns about computers and puts her knowledge into practice. Moreover, she is particularly knowledgeable in disk management, data recovery, system installation, and PDF editing. Her articles typically reference multiple examples or are based on her own experience, providing users with the most suitable solutions.
User Comments :