You can get ways to rename your computer in Windows 10 in this post, which enables you to recognize your device within a network of hundreds and thousands of devices. What’s more, you are able to manage your PC with a partition manager, MiniTool Partition Wizard.
Can You Rename Your Computer in Windows 10?
When you buy a new computer, it is probably given a randomly-assigned name from the manufacturer, such as “DESKTOP-F0KDIH2”. That is something too generic to recognize.
If you want to connect computers through a home group, or quickly find your own PC from a network of hundreds and thousands of devices, changing your computer’s name to something more descriptive is definitely helpful.
And if you upgraded to Windows 10 from Windows 7 or upgraded from 8.1 to Win 10, the name you had will not change and come along during the update.
Related article: Windows 10 April 2018 Update – Everything You Need to Know.
Or if you want to rename your computer with something cool and add personal touch, this post can help you.
How to Rename Your Computer
1. With Windows Settings
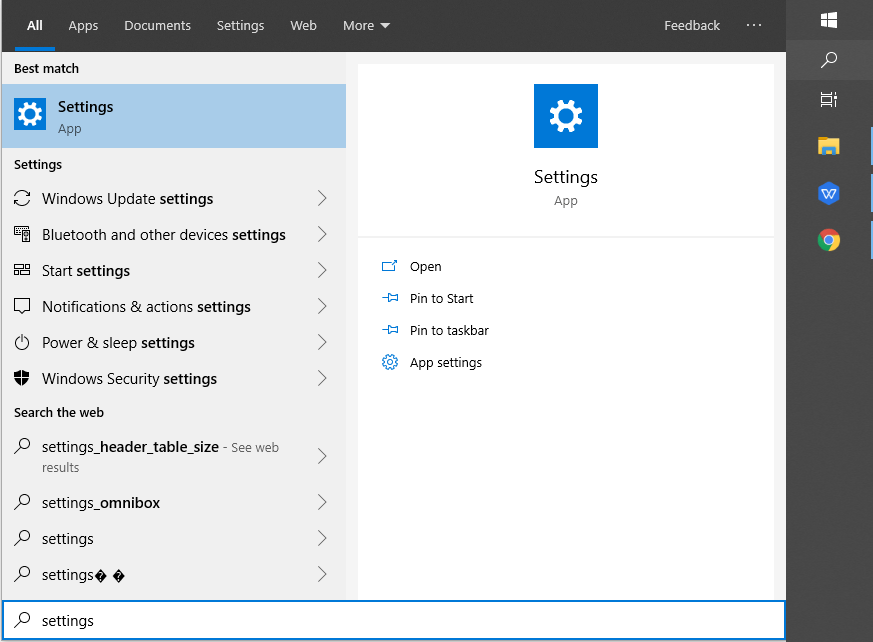
Step 1: Launch the Settings window by typing “settings” in the search section of your task bar and click the search result Settings.
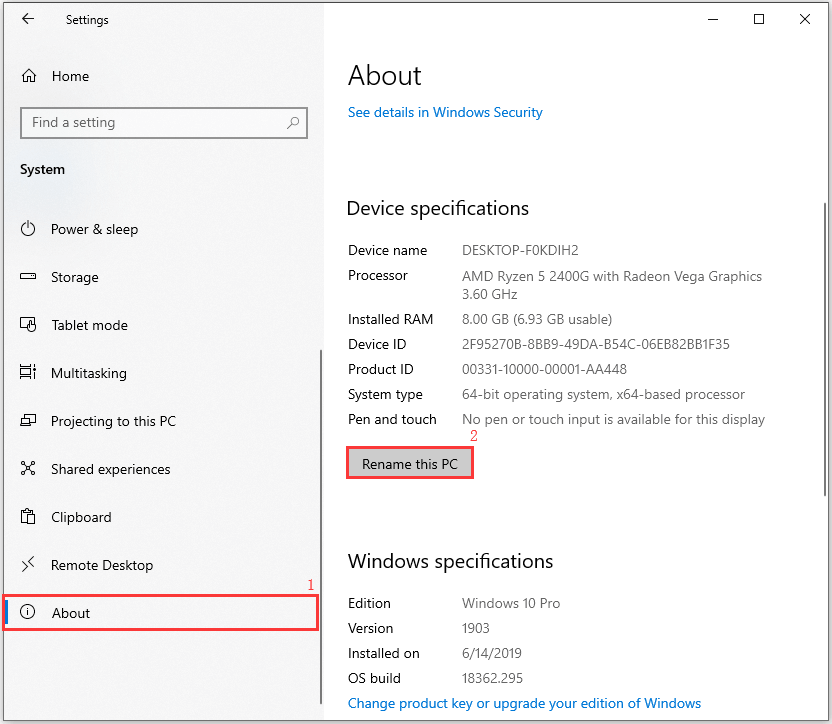
Step 2: Choose System in Settings, and go to About from the action panel. Then click Rename this PC to continue.
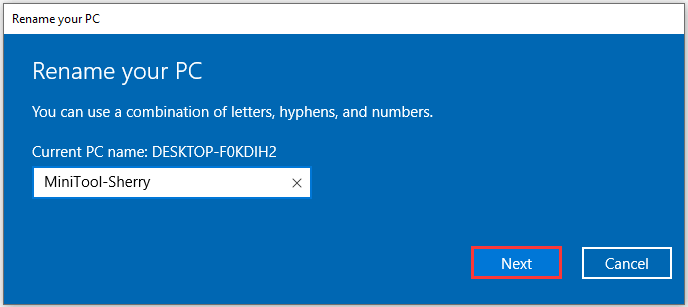
Step 3: Type the name you want to use in the box and click Next. (You can also review your current PC name here)
Attention:
You can use a combination of letters, hyphens and numbers to rename your computer in Windows 10. But if spaces and certain other characters appear, you’ll get the error message shown below.

After restarting, you’ll see the name has been changed.
Related article: Your PC Ran into a Problem and Needs to Restart.
2. With System Properties
Besides Settings, you can also change your computer name with system properties.
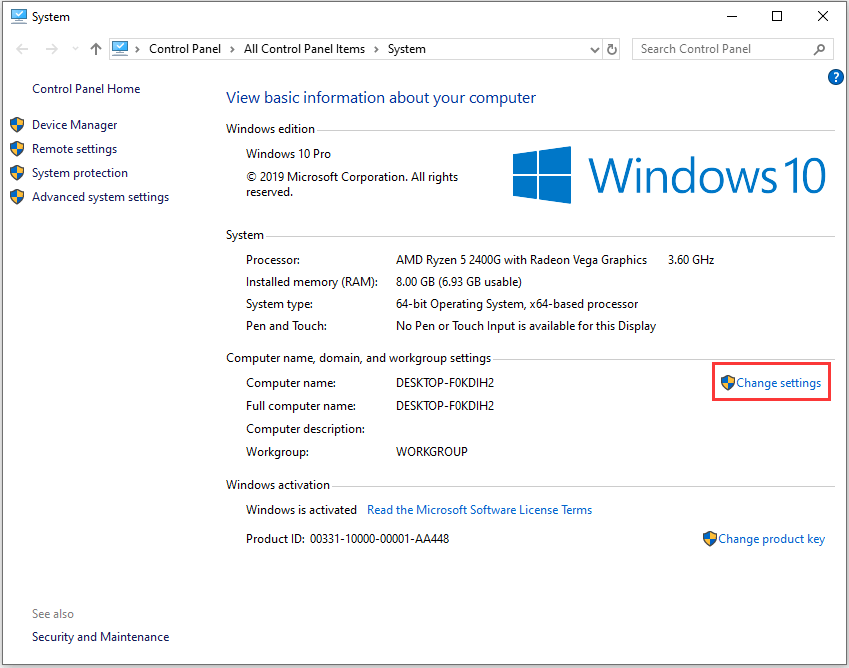
Step 1: Go to Control Panel by pressing Win + Pause Break. Then select Change settings under the Computer name, domain, and workgroup section.
Tip: You can also right-click This PC and choose Properties to open Control Panel.
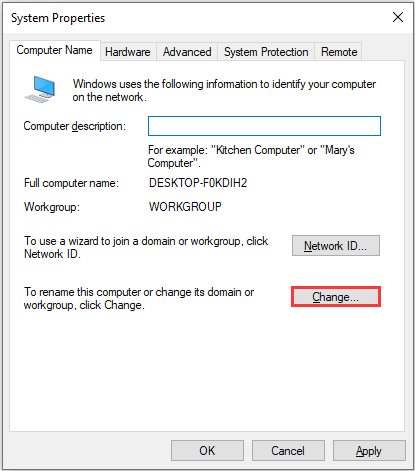
Step 2: Click the button Change to rename your computer.
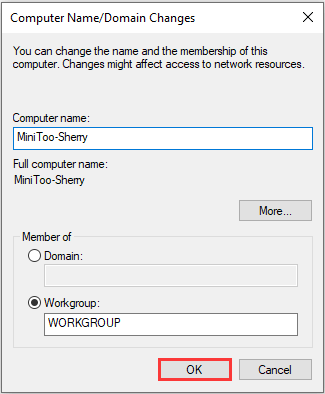
Step 3: Type the new name of your computer in the box and click OK to confirm this operation.
Tip: A restart will be required to complete the name change.
3. With Command Prompt
To rename your computer in Windows 10 with command prompt, you need to follow these steps:
Step 1: Open Run window by pressing Win + R. Then type “cmd” and click OK to go command prompt.
Step 2: Type the following commands. Remember that you need to press Enter after every command.
- Hostname (to check the current PC name)
- WMIC computersystem where caption=’X’ rename Y
Step 3: Now you will get the massage “method execution successful from Windows 10”. You just need to restart your computer for saving these changes.
Related article: Command Prompt Windows 10: Tell Your Windows to Take Actions.
There are three ways for you to change your computer name. Which one do you prefer? Try it now!
User Comments :