Some installed applications on your computer have the access to your Microsoft account information, but you might want to disable the access for certain reasons. In this article, MiniTool Partition Wizard will show you how to prevent apps from getting account information on Windows in 3 different ways.
Some applications, especially certain Windows software, require access to your Microsoft account information to work properly. If you allow the access, the involved application will be able to use your account name, picture, and other information to ensure you a customized experience.
However, some users concern much about the privacy and they are not willing to allow apps to get the account information. If you have the same concerns, don’t worry. You can disable access to account info via Windows Settings, Registry Editor, or Group Policy Editor. Now, let’s check out these methods one by one.
Method 1: Via Windows Settings
The easiest way to disable account information access for apps is changing the privacy settings. Here’s how to do that.
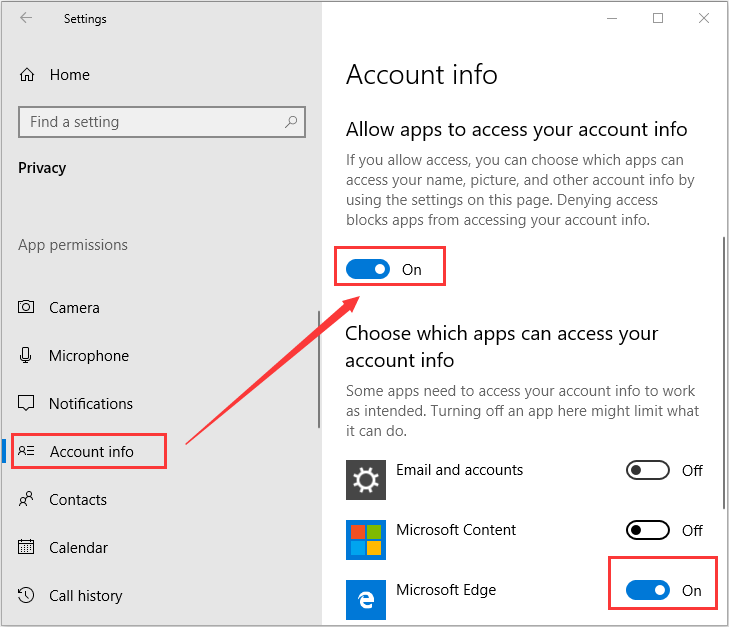
Step 1: Right-click the Start button and choose Settings from the pop-up menu to open it.
Step 2: Choose Privacy category. In the left pane of the new page, scroll down to locate Account info and select it.
Step 3: In the right pane, toggle off the button under Allow apps to access your account info to prevent apps from getting account information.
Method 2: Via Local Group Policy Editor
Besides, you can also configure account information access in Local Group Policy Editor, a Windows built-in utility that can help you manage almost all your Windows settings. Just follow the steps below.
Step 1: Press Windows + R to invoke Run window. Input gpedit.msc and press Enter to open Local Group Policy Editor.
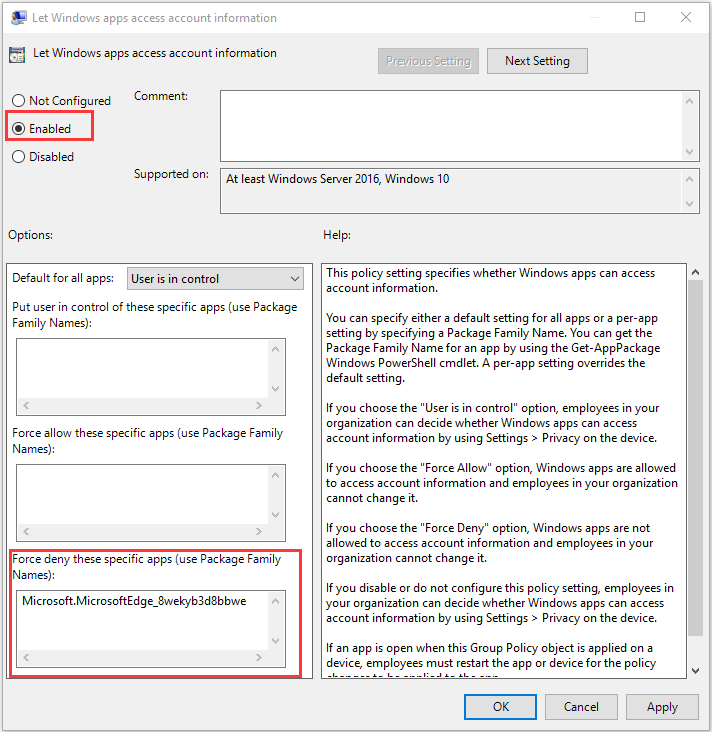
Step 2: Navigate to Computer Configuration > Administrative Templates > Windows Components > App Privacy and then double-click Let Windows apps access account information to open the setting.

Step 3: In the new window, choose Enabled option, input the Package Family Name of apps you want to disable account information access for in the box under Force deny these specific apps. Then, click Apply and OK to save changes.
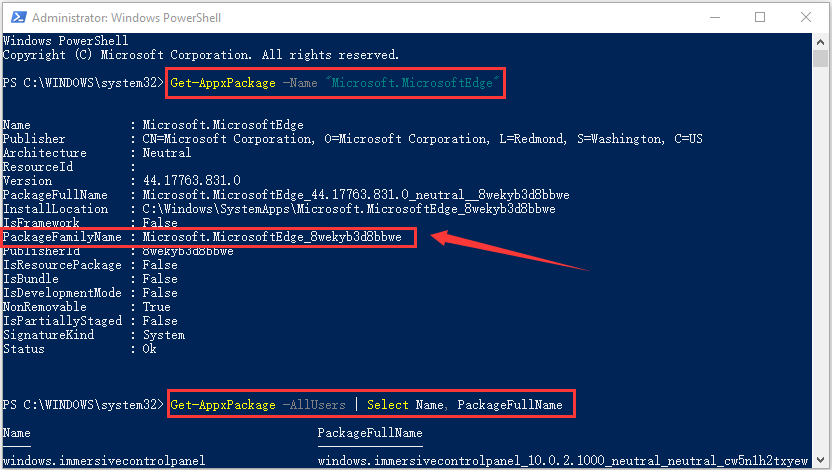
To find the Package Family Name of an app, you need to right-click the Start button and choose Windows PowerShell (Admin) to open it. Then, input the command line Get-AppxPackage -Name “Microsoft.MicrosoftEdge” in the console and press Enter. You will see the desired item in the list.

Method 3: Via Windows Registry Editor
If Local Group Policy Editor is not available on your Windows, you can make the same configuration in Windows Registry Editor instead. The steps might be a little more complicated, but here’s a detailed guide you can refer to.
Step 1: Invoke Run dialog, input regedit, and click OK to open Registry Editor.
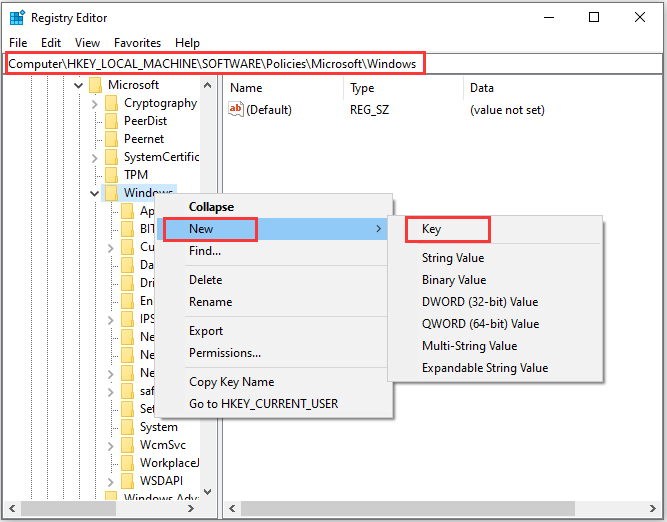
Step 2: Navigate to the following path:
ComputerHKEY_LOCAL_MACHINESOFTWAREPoliciesMicrosoftWindows
Locate the AppPrivacy key under the Windows folder. If the key doesn’t exist, you need to right-click Windows and choose New > Key to create a key named AppPrivacy.
Step 3: Right-click the AppPrivacy key and choose New > DWORD (32-bit) Value. Name the DWORD as LetAppsAccessAccountInfo and open it to set its value data to 2 which means the force deny option of the mentioned setting in Local Group Policy Editor.
User Comments :