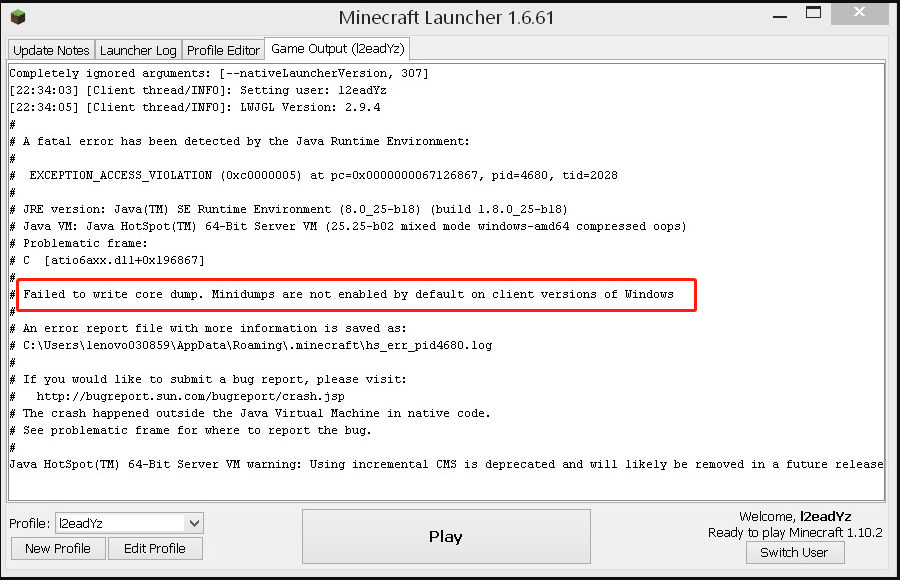
When trying to join or create a server on Minecraft, many Windows 10 users received “Failed to write core dump. Minidumps are not enabled by default on client versions of Windows” error. Don’t worry. This post of MiniTool summarizes several tested solutions.
What causes Minecraft failed to write core dump error? According to user reports, this error is often related to an integrated Intel graphics card. In addition, improper graphic card settings, a missing dump file, and corrupt AMD installation are responsible for Minecraft failed to write core dump Windows 10.
Fix 1. Install the Latest Intel Graphics Card Driver
If you are using an integrated Intel graphics card, you may encounter the “Failed to write core dump. Minidumps are not enabled by default on client versions of Windows” error due to a Dynamic Link Library file. To fix the issue, you can try updating the Intel graphics card driver.
Step 1. Press the Win + R key to open the Run dialog box, and then type devmgmt.msc in the box and hit Enter to open Device Manager.
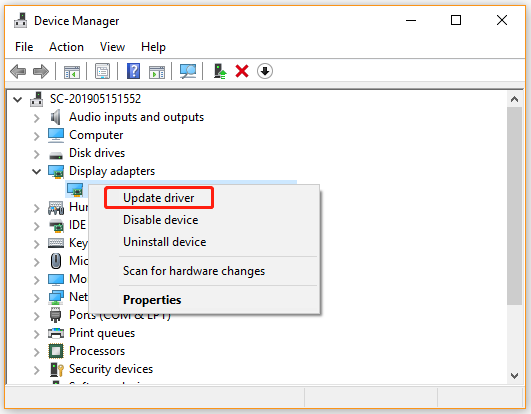
Step 2. Expand the Display adapters category, and then right-click the Intel graphics card driver and select Update driver.
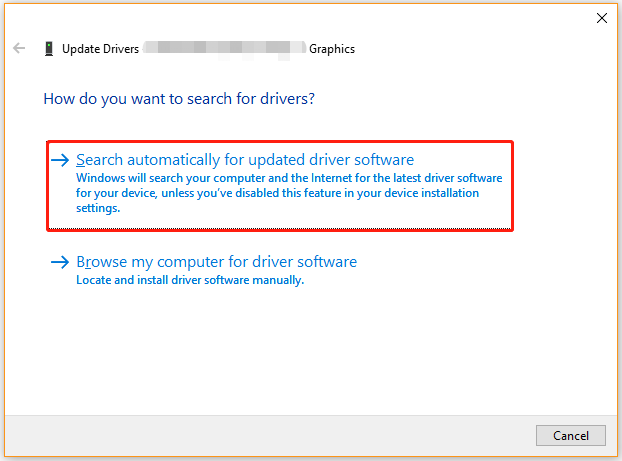
Step 3.Select the Search automatically for updated driver software option and follow the on-screen instruction to update the driver automatically.
Once installed, you can restart the computer and check if the “Failed to write core dump Minecraft” error persists.
![[Easy Fix] Can’t Find the Name of Intel ICD OpenGL Driver](https://images.minitool.com/partitionwizard.com/images/uploads/2021/04/cant-find-the-name-of-intel-icd-opengl-driver-thumbnail.jpg)
Fix 2. Enable VSync and Triple Buffering from NVidia Control Panel
Some users reported that they can’t be unable to update the Minecraft runtime environment on a medium to high-end NVidia GPU. This may be caused by improper graphics card settings. To fix the issue, you can follow the steps below to enable the VSync and Triple Buffering settings.
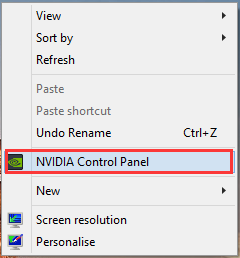
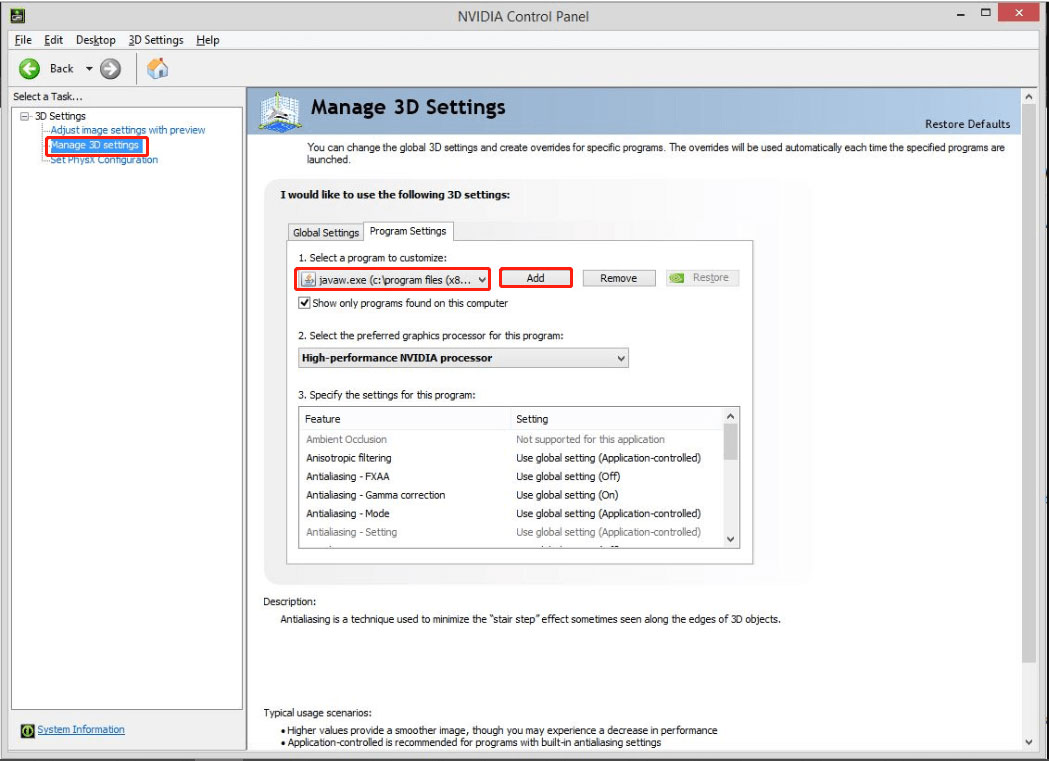
Step 1. Right-click on your desktop and select the NVidia Control Panel from the context menu. Also, you can find the control panel from the Taskbar.
Step 2. Select Manage 3D settings from the left pane and navigate to the Program Settings tab.
Step 3. Click on the Add > Browse buttons, and then navigate to the directory folder of your Java installation and select the javaw.exe file, and click on Open.
Step 4. Once the Java file is loaded, select the Vertical Sync and Triple Buffering options from the list of Features, and then change their default setting to On from the Setting pane.
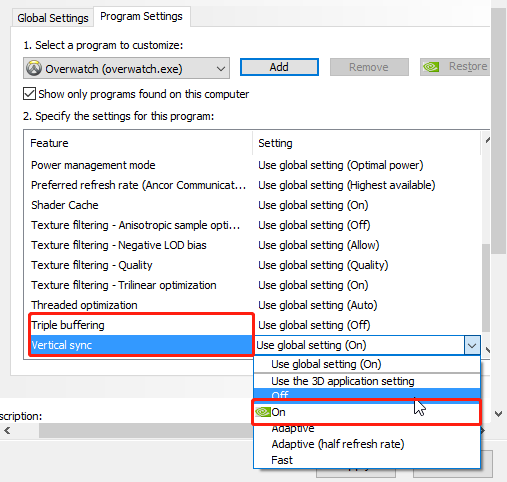
Step 5. Click on Apply to execute the changes. After that, the 2 features will be used by every program that utilizes Javaw.exe including Minecraft.
Now, you can try joining a server again and see if the “Failed to write core dump. Minidumps are not enabled by default on client versions of Windows” error disappears.
Fix 3. Enforce Windows to Create a Dump File
As mentioned above, the “Failed to write core dump Minecraft” error can occur if a dump file is missing or get corrupted. In this case, you can force Windows to create a dump file. Here’s how:
Step 1. Open you Minecraft Launcher.
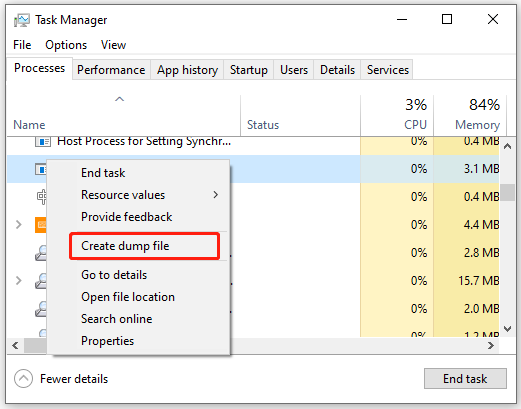
Step 2. Press Ctrl + Shift + Esc keys together to open Task Manager. Also, you can right click the Taskbar at the bottom of your computer screen and select Task Manager.
Step 3. Right click the Java(TM) Platform SE Binary process and select Create Dump File. If you can’t find it, expand the Minecraft Launcher category.
Wait for Windows to create a Dump file. After that, restart your computer and see if the “Failed to write core dump. Minidumps are not enabled by default on client versions of Windows” error is fixed.
Fix 4. Reinstall the AMD Software or AMD Catalyst Utility
Some AMD GPU users encounter the Minecraft failed to write core dump Windows 10 error. This can be caused by a partially corrupted AMD software installation. For that, you can try reinstalling the ADM program or AMD Catalyst utility.
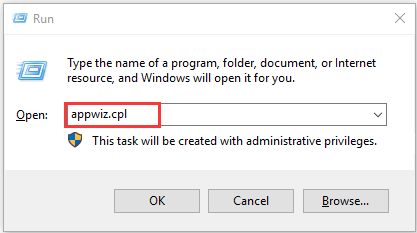
Step 1. Press Win + R keys to open the Run dialog box, and then type appwiz.cpl in the box and hit Enter.
Step 2. Inside the Programs and Features window, scroll down the list of installed programs to the AMD software/AMD Catalyst, and then right-click it and select Uninstall.
Step 3. Click on OK to confirm this uninstallation and wait for it to complete.
Step 4. Once uninstalled, re-download it from the official website of the AMD software and follow the on-screen prompts to complete the reinstallation.
Now, you can reboot your computer and join a server to check if the “Failed to write core dump. Minidumps are not enabled by default on client versions of Windows” error is resolved.

User Comments :