A lot of Windows 10 users complain that the microphone keeps muting itself. It is annoying to encounter the mute microphone Windows 10 issue. Are you still struggling to fix the issue? This post of MiniTool explores the top 5 troubleshooting methods.
The microphone is very important especially for those who want to play games, attend online interviews and webinars. However, you may encounter various issues like Microphone Auto Adjusting, Astro A10 Mic not working, Rainbow Six Siege Voice chat not working, and the one discussed here.
Why microphone keeps muting itself? According to a survey, the mute microphone Windows 10 might occur due to the improper sound settings or outdated audio device driver. In addition, the third-party apps and services can conflict with your microphone.
Now, let’s see how to fix Windows 10 mute microphone.
![Volume Mixer Won’t Open Windows 10 [Full Fix]](https://images.minitool.com/partitionwizard.com/images/uploads/2020/09/volume-mixer-wont-open-thumbnail.jpg)
Solution 1. Modify the Advanced Settings of Your Microphone
The microphone keeps muting itself if the sound settings are configured improperly. To fix the issue, follow the steps below to modify the settings:
Step 1. Right-click the Speaker icon at the bottom of the notification screen and select Sound from the elevated menu.
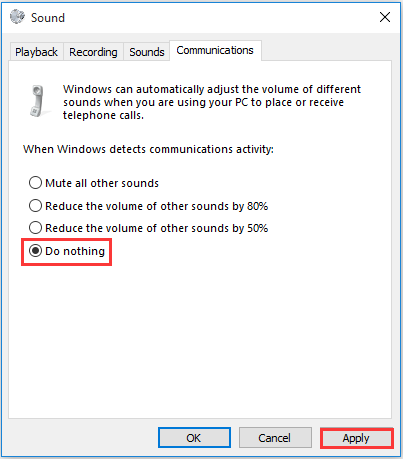
Step 2. Navigate to the Communications tab inside the Sound control panel window. Then select the Do nothing option When Windows detects communication activity.
Step 3. Click on Apply to execute these changes. After that, you can check if the microphone keeps muting itself. If the problem still persists, keep reading the steps below.
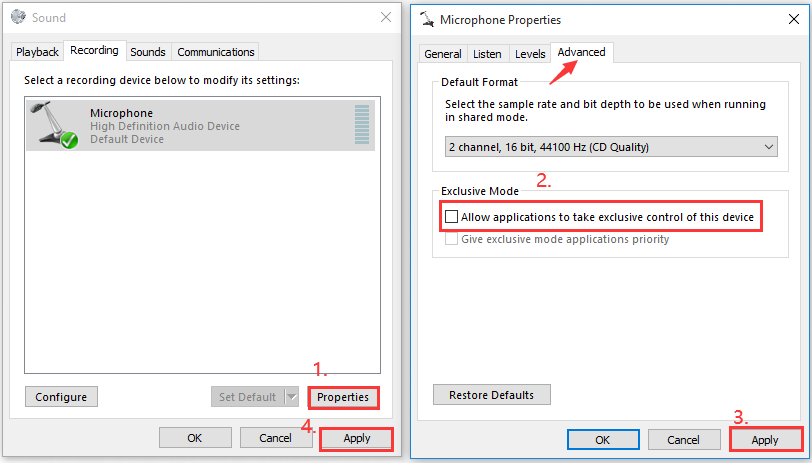
Step 4. Navigate to the Recording tab inside the Sound control panel again, and then select the microphone and click on the Properties button.
Step 5. Go to the Advanced tab and untick the checkbox next to Allow applications to take exclusive control of this device.
Step 6. Click on Apply to execute the operation.
Now, check if the Windows 10 mute microphone issue is fixed. If the method fails to work, move on to the following methods.
Solution 2. Change the Format of Your Microphone
Some users reported that changing the format of your microphone can fix the issue. You may have a try. For that:
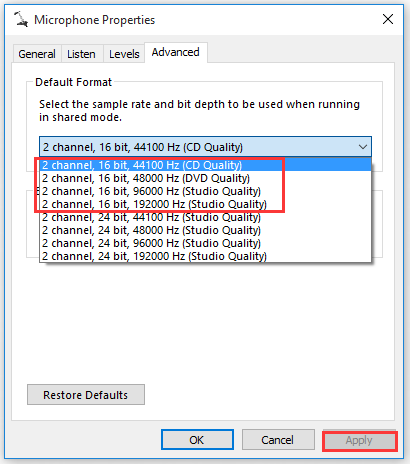
Step 1. Open the Sound control panel again though the above method, and then select the mute microphone and click on Properties.
Step 2. Go to the Advanced tab and select the format of other 16-bit options from the drop-down list.
Step 3. Click on Apply to save the changes.
Solution 3. Stop the Svchost.exe Processes
Microphone keeps muting itself when malicious software is inferring with your microphone. Svchost.exe is one of the most common processes that can lead to microphone mutes. If the svchost.exe is consuming more than 30% CPU or memory, it is very likely that the process throws the problem.
Here’s a quick guide to stop the process.
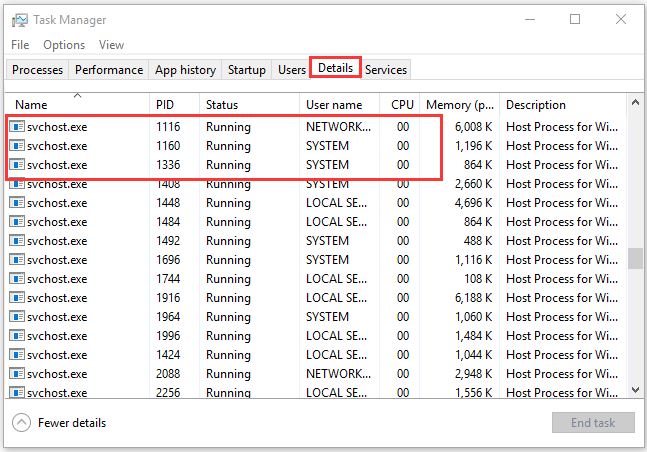
Step 1. Press Ctrl + Shift + Esc keys to open Task Manager, and then navigate to the Details tab and align your processes in alphabetical order.
Step 2. Check if the svchost.exe processes are consuming high CPU usage. If it is, you need to kill these processes.
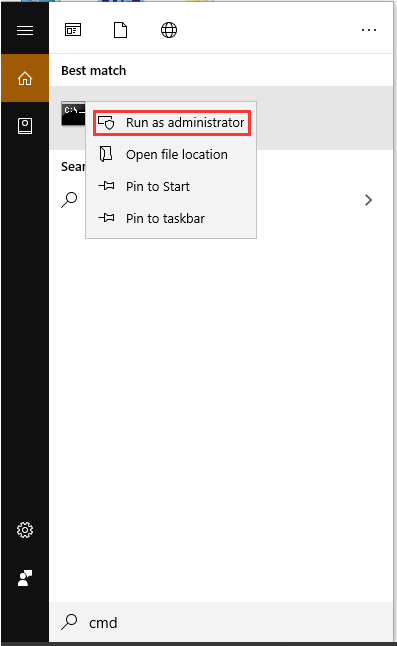
Step 3. Type cmd in the search bar, and then right-click the Command Prompt app and select Run as administrator.
Step 4. In the elevated window, type the following command and hit Enter to kill all these svchost.exe processes.
taskkill /F /PID #### (Replace the #### with the four numbers under the PID column in Task Manager)
Now, check if the mic keeps muting itself or not.
Solution 4. Update the Microphone Device Driver
As pointed out in the above, an outdated sound driver is also responsible for mute microphone Windows 10. To fix the issue, you can try updating the driver by following the steps below:
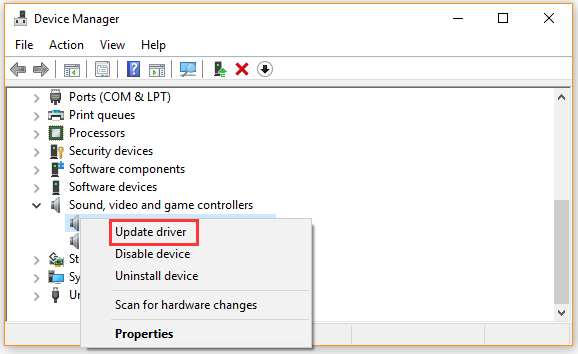
Step 1. Right-click the Start button and select Device Manager from the context menu.
Step 2. Expand the Sound, video and game controllers category, and then right-click the audio device that needs to update and select Update Driver.
Step 3. Select the Search automatically for updated driver software option. Then follow the on-screen prompts to complete this update. After that, Windows will automatically any available updated driver and install it for you.
Tip: Alternatively, you can download the sound device driver from the manufacturer’s website and install it on your computer
Solution 5. Perform a Clean Boot
It is very possible that your third-party applications or services are conflict with the microphone driver. In this case, you can perform a clean boot to check if there are any conflicting programs and uninstall them. Here you can refer to this post “How to Clean Boot Windows 10 and Why You Need to Do So”.
User Comments :