Facial recognition is an advanced biometric identification technique, which can be used to identify through the face. For many users, Windows 11 facial recognition is convenient, fast and the anti-counterfeiting ability is strong. Well, how to set up facial login in Windows 11? This post from MiniTool Partition Wizard tells you that.
Log in to Windows 11 with Facial Recognition
Using Windows 11 facial recognition helps you to open your computer fast and safely. You just need to sit in front of the computer and open it without touching it. It is more convenient.
To log in to Windows 11 with facial recognition, you firstly need to enable camera in Windows 11 and then set up login facial recognition.
How to Enable Camera in Windows 11
Here are some steps to enable the camera:
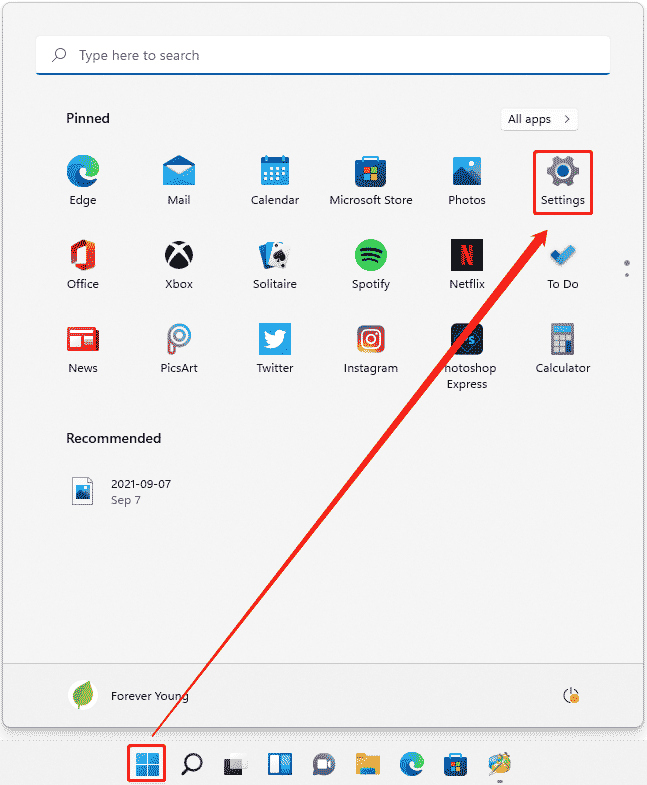
Step 1: Click the Windows icon and then choose the Settings option from the menu.
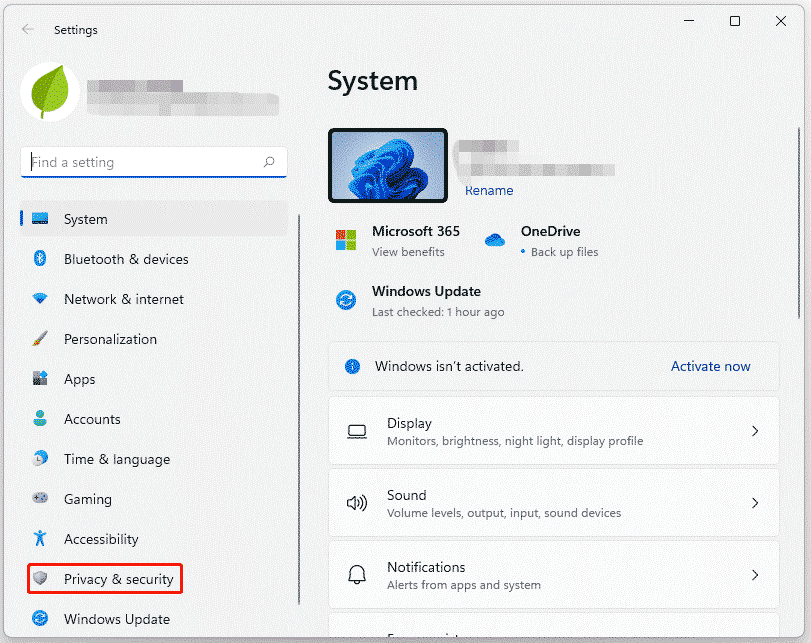
Step 2: On the Windows 11 Settings window, choose the Privacy & security setting on the left side.
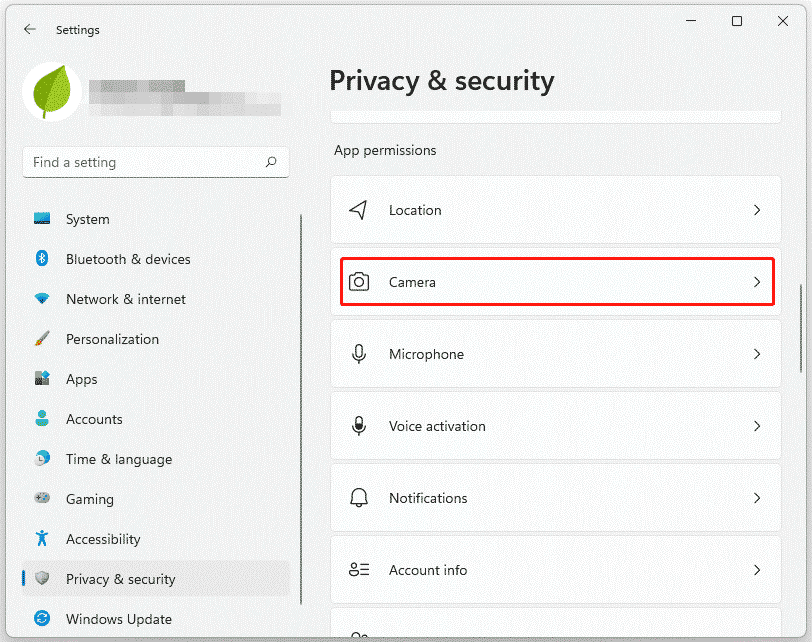
Step 3: Scroll down the right side of the window to the App permissions part. Then, find the Camera option and click it.
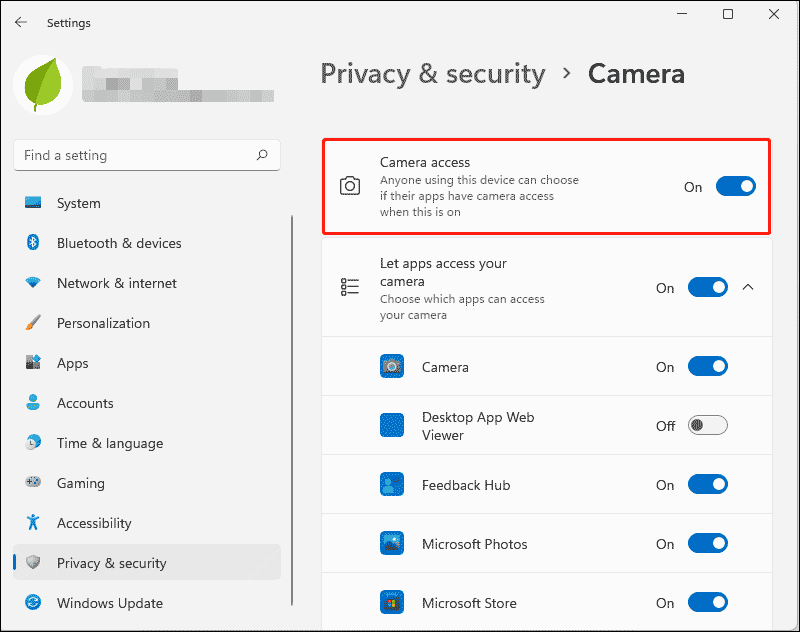
Step 4: Find the option Camera access on the right side of the window. Then toggle it on.
After that, you can use your camera to log in to Windows 11 with facial recognition.
How to Set up Facial Recognition Login in Windows 11
Some steps are as follows:
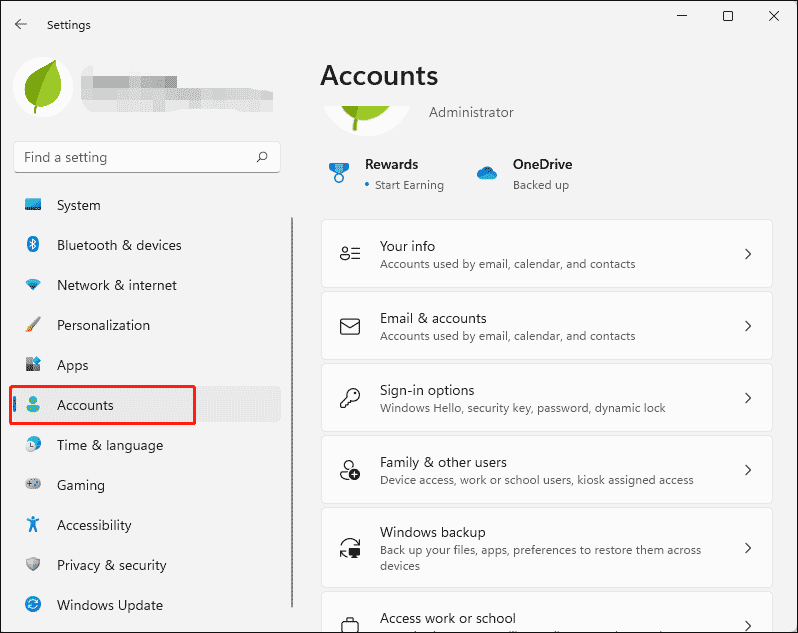
Step 1: Open Settings and choose Accounts from the left side.
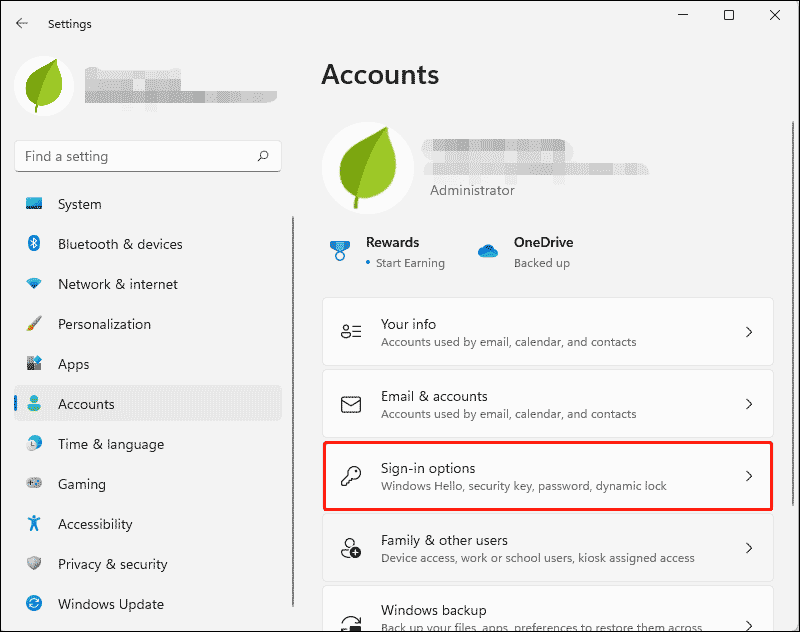
Step 2: Click Sign-in options. In this option, there are many ways to sign in to Windows.
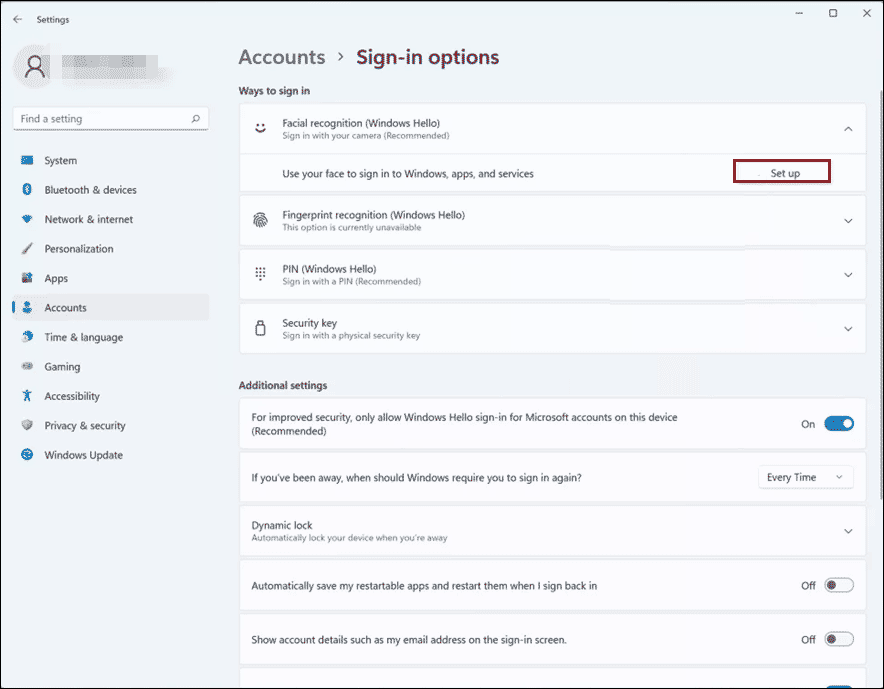
Step 3: Click Facial recognition Windows Hello and click Set up, which allows you to use your face to sign in to Windows, apps, and services.
Step 4: A Windows Hello setup window will appear. And then click Get started.
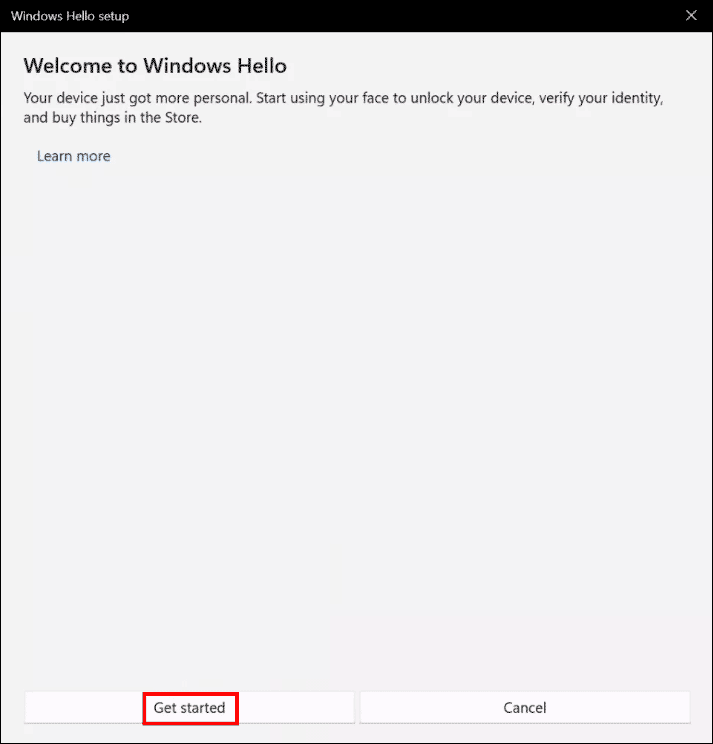
Step 5: Look at the camera, and the camera will scan your face and save it.
Step 6: Click Close.
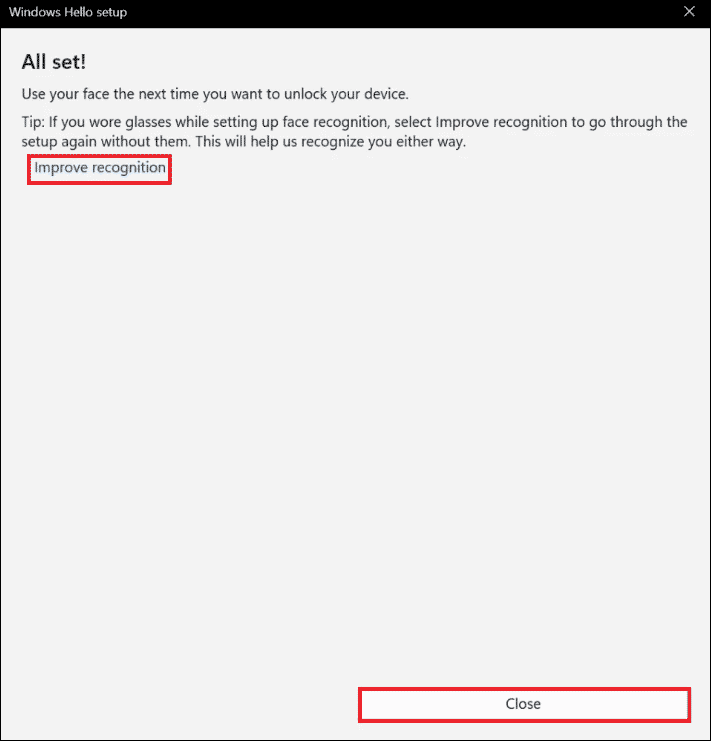
In this way, you have set up login in Windows 11 with facial recognition. The next time you turn on the computer, let your computer camera scan your face to log in to Windows 11, which is very convenient and safe.

Bottom Line
The above content is all about how to log in to Windows 11 with facial recognition. Do you have any questions about this content? If you have any questions, please leave them in the comment zone and we will try to answer them as soon as possible.
About The Author

Position: Columnist
Vega enjoys helping people with computer problems, including disk management, data recovery, data backup, and more. She is constantly expanding her knowledge in related fields. And she will continue to bring more easy-to-understand professional articles to help people solve various problems on the PC.
User Comments :