Norton Antivirus is an anti-virus software product and can protect computers from external threats like viruses, and malware. This article from MiniTool Partition Wizard introduces how to uninstall Norton completely on Windows 10/11 and Mac. You can have a try when you don’t need this tool.
Norton Antivirus is an antivirus or antimalware software product and is available on various platforms, such as Windows, MacOS, and Linux. However, if you don’t need this tool or want to use another protection application, you can uninstall the program from your device to free up disk space.
If you want to uninstall Norton on Windows 10/11 and Mac, here are several methods that you can try.
How to Uninstall Norton on Windows 10/11?
To uninstall Norton on Windows 10/11, there are 3 ways to do it. You can try one of them.
Way 1: Uninstall Norton via Control Panel
Control Panel is a built-in tool in Windows that allows you to access, view, and change a variety of settings. So, you can uninstall a certain program via it. Here is the detailed guide:
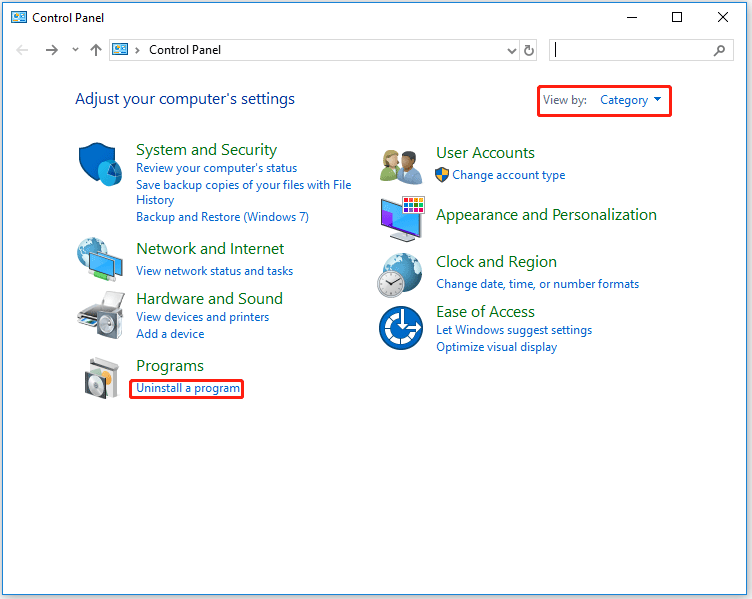
Step 1: Press the Win + S key to open the Windows Search utility. Then search for Control Panel and open it.
Step 2: Select View by Category from the Upper right corner of the Control Panel. Then click Uninstall a program.
Step 3: Right-click Norton and select Uninstall. Then follow the on-screen instructions to finish the operation.
Uninstalling Norton Antivirus via Control Panel may leave some leftover files behind. Therefore, use File Explorer to check the remaining Norton folders. Here are some remaining folders that users may find: Norton Antivirus, Norton Personal Firewall, Norton Internet Security, and Norton SystemWorks.
Way 2: Uninstall Norton via Norton Remove and Reinstall Tool
This is a tool specially created by Norton to help you when you want to remove the software. It will uninstall the currently installed Norton and restart your computer.
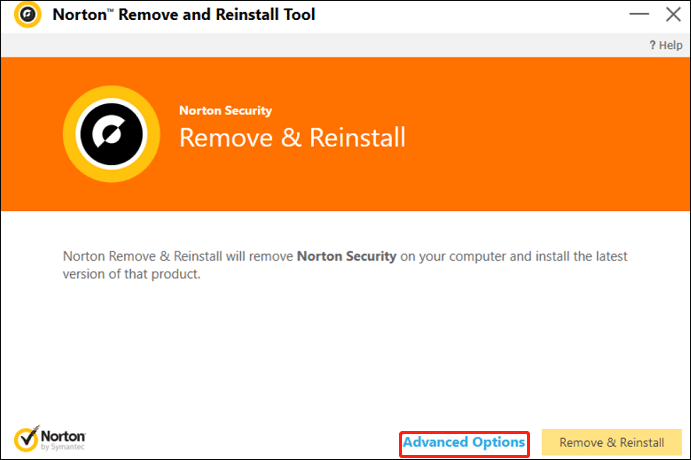
Step 1: Get the Norton Removal and Reinstallation tool. Then right-click NrnR.exe and select Run as administrator to open Norton Antivirus. If you see a security warning, click Yes to continue.
Step 2: Click Advanced Options to select the Remove Only option.
Step 3: Click the Remove button to confirm. Then the utility will prompt the user to reboot and click the Restart Now button to do this.
Way 3: Uninstall Norton via a Third-Party Program
Another way to uninstall Norton for Windows is to use a professional third-party program such as IObit Uninstaller, Revo Uninstaller Freeware, Wise Program Uninstaller, etc. Such programs can often delete associated temporary files and registry entries when Zoom is uninstalled.
Note that you’d better download a reliable software uninstaller from its official website. Otherwise, you may be at risk of being attacked by viruses or malware.
How to Uninstall Norton on Mac?
To uninstall Norton products for Mac (7.x or later), follow these steps:
Step 1: In the applications folder, double-click Norton product.
Step 2: Next to the Apple icon on the menu bar, click Norton Security and then select Uninstall Norton product. You need to be in the Norton product window to access the menu options.
Step 3: In the Uninstall Norton product confirmation window, click Uninstall.
Step 4: Type your administrator account name and password, then click Install Helper. Then in the Uninstall a program window, click Restart now.

Bottom Line
To sum up, this article has introduced how to uninstall Norton on Windows and Mac. If you have any questions to this article, you can share it in the following comment zone.
About The Author

Position: Columnist
Vega enjoys helping people with computer problems, including disk management, data recovery, data backup, and more. She is constantly expanding her knowledge in related fields. And she will continue to bring more easy-to-understand professional articles to help people solve various problems on the PC.
User Comments :