How to record with NVIDIA GeForce Experience? How to record highlights with GeForce Experience? Both missions can be completed with the utility of the ShadowPlay. For more information, it is recommended to visit MiniTool Partition Wizard.
What Is GeForce?
NVIDIA GeForce Experience is the software for optimizing game performance and upgrading video drivers. Also, game players can rely on GeForce’s ShadowPlay feature, now called Share, to record, stream a game and even count the FPS of a game. And, GeForece Experience ShadowPlay is like a mini toolbar for the program.
Compared with the Game DVR in Windows 10/11, NVIDIA ShadowPlay has more features and it applies to Windows 7 operating system. Only if your PC is equipped with the modern NVIDIA graphics card, you own the toolkit.
How to Record with GeForce Experience ShadowPlay?
On the Xbox One or PS4, the GeForce ShadowPlay can automatically record gameplay in the background. For other situations, you can record with NVIDIA GeForce manually.
![[Solved] How to Record Gameplay on Xbox One in 4 Ways?](https://images.minitool.com/partitionwizard.com/images/uploads/2020/06/how-to-record-gameplay-on-xbox-one-thumbnail.png)
Step 1. Open NVIDIA ShadowPlay. Use the hotkey “Alt + Z” to launch the NVIDIA ShadowPlay overlay. Or, you can just click the Share (triangle) icon on the top-right menu in GeForce Experience application UI.
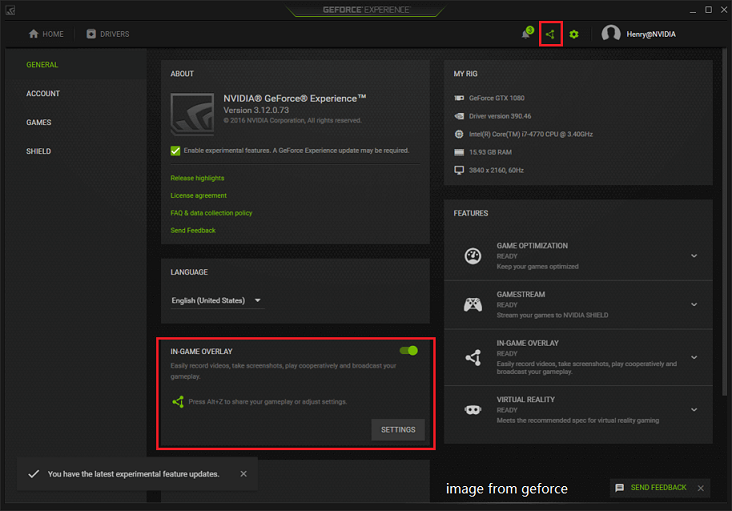
If you can’t find the Share icon in GeForce, just go to the general settings to enable it.
Step 2. Turn on Instant Replay. In the ShadowPlay overlay, click on Instant Replay and select Turn on. Or, you can make use of the “Alt + Shift + F10” shortcut to enable the instant replay.
With the Instant Replay feature on, you are able to save the last 5 minutes of gameplay by using “Alt + F10” keys. If you give up the manual saving, it will delete the recorded clip.
Step 3. Start manually recording. Click on the Record option on the overlay and choose Start in the pop-out menu to start recording. Or, you can just press “Alt + F9” to begin to record.
From the above two steps, you can access the settings of GeForce gameplay recording. There, you can customize the length, bitrate, quality, resolution as well as FPS of the video that is to be recorded.
Step 4. Stop recording. When you want to end your recording process, just click the Record button again and select Stop and Save. Or, press “Alt + F9” once more to end the recording task.
Usually, there are both video and audio in a recorded clip. Yet, you can also specify whether to include them in the clip through the microphone and camera settings on the lower right of the overlay.
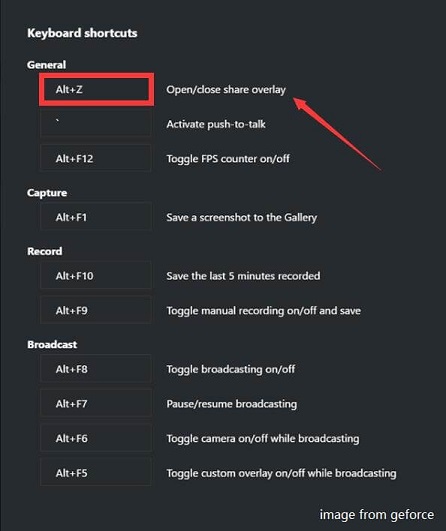
Also, you are allowed to personalize the NVIDIA ShadowPlay hotkeys for the features of the GeForce Share overlay. Click on the Settings icon (the gear) on the bottom right corner on the overlay and select Keyboard shortcuts. Then, you can change the shortcuts for capture, record, broadcast and general functions.
Where is your recorded video saved? In default, it will be stored in this address C:Users<username>Videos. You can change the path in recording settings.
The End of the Article
This is all about how to record with GeForce ShadowPlay. It is very easy to make use of this graphics card built-in tool to record the highlights of your gameplay. After recording, you can further share the videos with people you know and also share your happiness.
About The Author

Position: Columnist
Helen is a tech writer with over 10 years of experience. She specializes in creating easy-to-follow guides for video editing, media file conversion, and computer performance. Helen doesn't just write—she tests every software herself and listens to feedback from users and experts. Her goal is to make complex programs simple so that everyone can solve their tech problems with confidence.
User Comments :