A lot of people are not accustomed to using the new context menus in Windows 11. How to get full context menus in Windows 11? In this post, MiniTool provides a full guide to get right-click Context Menus in Windows 11.
Since the release of Windows 11, a great many people upgrade their Windows version to the new system. Windows 11 bring many new features and improvements, but some issues and inconveniences also come into being such as Valorant FPS Drops, Go Back button not working, Windows 11 flickering screen, and so on.
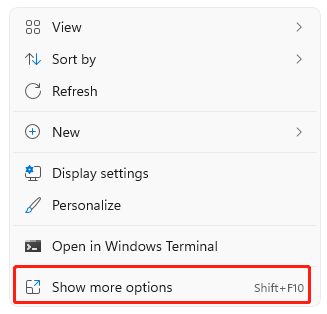
Compared with Windows 10, Windows 11 has a fully new right-click context menu. When right-clicking an item in File Explorer Windows 11, you will find a modern condensed context menu with Show more options. It is inconvenient that you have to click the button each time you need more options.
So, how to get full context menus in Windows 11? Although Microsoft doesn’t provide an official method to enable the old full context menus, there is still a native way to do that. Let’s start following the full guide below.
![How to Map a Network Drive in Windows 11? [Step-by-Step Guide]](https://images.minitool.com/partitionwizard.com/images/uploads/2021/10/how-to-map-a-network-drive-in-windows-11-thumbnail.jpg)
How to Get Full Context Menus in Windows 11
There are 2 options to get the old full context menus back in Windows 11. Here you can choose one based on your needs.
Option 1. Use Registry Editor
The first way on how to get right-click context menus in Windows 11 is to use the Registry Editor. To do so, follow the tutorial below:
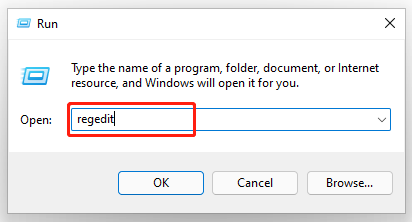
Step 1. Press Win + R keys to open the Run dialog box, and then type regedit in it and hit Enter. Click on Yes in the pop-up UAC window to confirm the operation.
Step 2. In the Registry Editor window, locate the following path via the left navigation bar.
HKEY_CURRENT_USERSOFTWARECLASSESCLSID and create a new registry key called {86ca1aa0-34aa-4e8b-a509-50c905bae2a2}
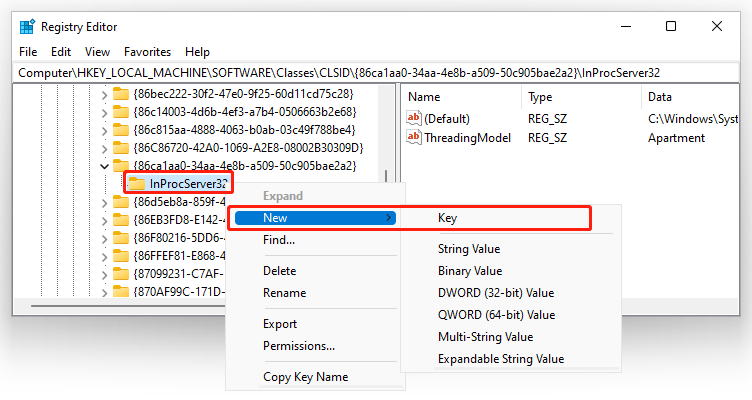
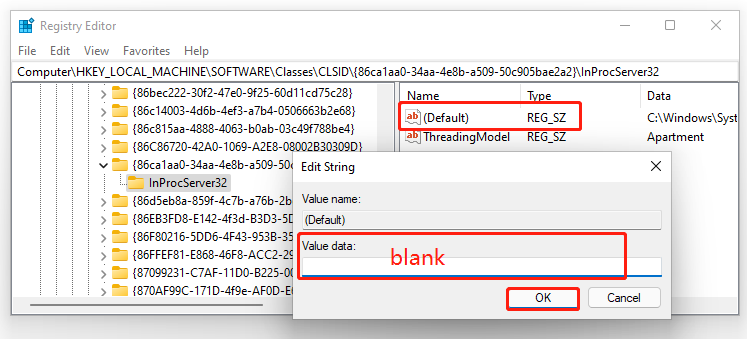
Step 3. Right click the 86ca1aa0-34aa-4e8b-a509-50c905bae2a2 key and select New > Key, and then name the new registry key InprocServer32.
Step 4. With the InprocServer32 key selected, double click the Default DWORD from the right pane and set its Value data to blank, and click on OK.
Step 5. Close the Registry Editor and reboot your computer.
Now, you can right-click an item in File Explorer and check if you get full context menus Windows 11.
Option 2. Use Windows Terminal
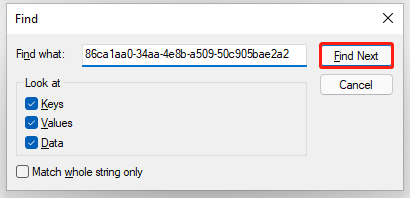
Another way to get full context menus Windows 11 is to directly remove the {86ca1aa0-34aa-4e8b-a509-50c905bae2a2} key containing the InprocServer32 subkey from Registry Editor. Here’s how to delete the key via Windows Terminal.
Step 1. Open the Run box, and then type wt in it and press Ctrl + Shift + Enter to access the Windows Terminal window with admin rights.
Step 2. In the elevated Windows Terminal window, type the following command and hit Enter.
reg delete “HKCUSoftwareClassesCLSID{86ca1aa0-34aa-4e8b-a509-50c905bae2a2}” /f /ve

Step 3. Reboot your computer and see if you get Windows 11 right-click full context menus back.
User Comments :