.NET Framework is a software development framework for building and running applications on Windows. How to check .NET Framework version on your PC? Here, MiniTool Partition Wizard provides 3 methods for you, and you can choose one you prefer to have a try.
.NET Framework is a software developed by Microsoft that runs primarily on Microsoft Windows. It is a part of the .NET platform, a collection of technologies for building and running applications for Linux, macOS, Windows, iOS, Android and more.
In most cases, you don’t need to worry about the version of .NET installed on your computer, but some applications require a specific version of it to run properly.
How to check which .NET Framework is installed on Windows 10? Here are three methods.
Method 1: Check Your .NET Framework Version via Registry Editor
An easy way to figure out which .NET Framework is installed on your PC is to check it in Registry Editor. Without further ado, let’s see how to do it.
Step 1: Press Win + R to invoke Run window. Then input regedit in the box and click OK to open Registry Editor.
Step 2: Copy the following path and paste it to the address bar to navigate to it quickly:
HKEY_LOCAL_MACHINESOFTWAREMicrosoftNET Framework SetupNDP
Step 3: In the left pane, double-click the main version key to expand it, such as v4. Then select Client key.
Step 4: Now you can check the information you need in Version string in the right pane.
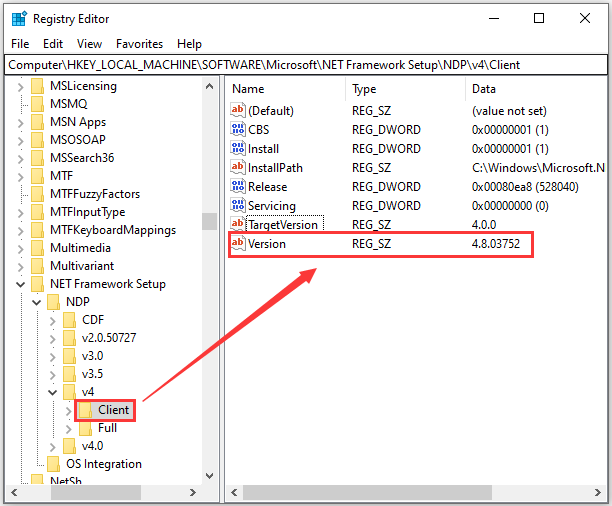
That’s how to check .NET Framework version using Registry Editor.
Method 2: Check Your .NET Framework Version via Command Prompt
You can also check .NET Framework on Windows 10 with Command Prompt. You just need to:
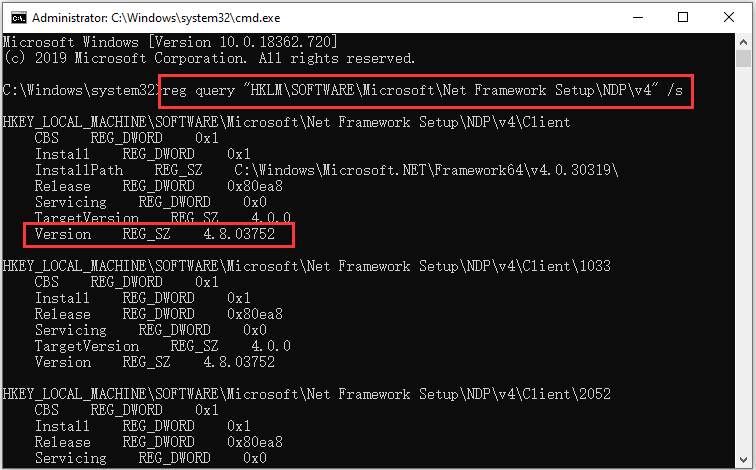
Step 1: Press Win + S to open Search utility. Then type cmd in the search box, right-click Command Prompt from the search results and select Run as administrator.
Step 2: In Command Prompt, input reg query “HKLMSOFTWAREMicrosoftNet Framework SetupNDP” /s and press Enter. Then you can see the basic version of your .NET Framework. For example, v4.
Step 3: If you want to check more specific version number, you can continue to input the following command and press Enter to execute it:
reg query “HKLMSOFTWAREMicrosoftNet Framework SetupNDPv4” /s
Now you must know which .NET Framework is installed on your Windows 10. If you’re not familiar with Command Prompt or you don’t want to remember the commands, you can try the next method.
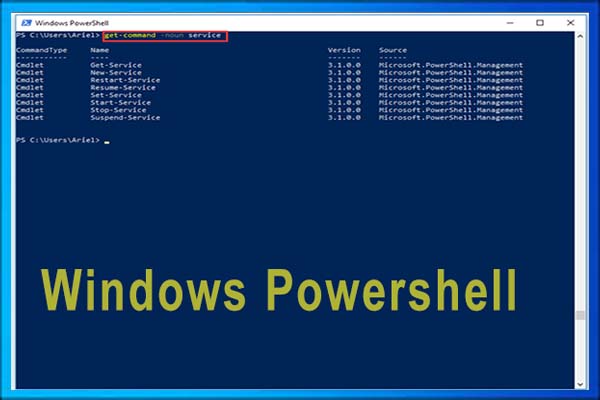
Method 3: Check Your .NET Framework Version via PowerShell
Another way to check .NET Framework version is to use Windows PowerShell, a cross-platform task automation and configuration management framework. The detailed steps are listed below.
Step 1: Search for PowerShell in the Search utility. Then right-click the top result and select Run as administrator.
Step 2: In PowerShell, copy and paste the following command line and press Enter to execute it.
Get-ChildItem ‘HKLM:SOFTWAREMicrosoftNET Framework SetupNDP’ -Recurse | Get-ItemProperty -Name version -EA 0 | Where { $_.PSChildName -Match ‘^(?!S)p{L}’} | Select PSChildName, version
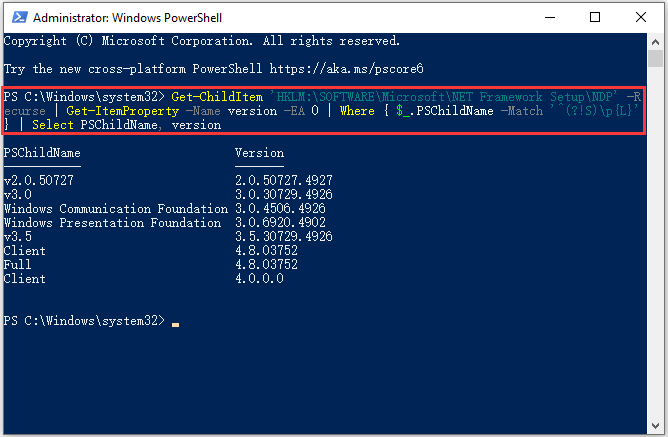
Then you should be able to check the information you need on the screen. That’s all about how to check .NET Framework version on Windows 10. Hope it’s helpful for you.
User Comments :