In this post from the MiniTool Partition Wizard website, you can learn how to hide specific files and folders in Windows 11. There are 4 methods and you can choose the one you prefer to have a try.
Windows 11 is the latest operating system released by Microsoft in 2021. It is based on Windows 10 but is different from Windows 10 in many aspects. To help you get familiar with this new operating system, we keep releasing tutorials. In this tutorial, you can figure out how to hide specific files and folders in Windows 11.
Method 1: Configure Folder Properties in File Explorer
To hide specific files and folders in Windows 11, File Explorer can help. It is a built-in tool for managing files and folders. Now, let’s see the detailed steps.
Step 1: Press Windows + E to open File Explorer.
Step 2: Navigate to the folder you want to hide and right-click it. Select Properties from the pop-up menu.
Step 3: Under the General tab, check the Hidden option in the Attributes section. Then click Apply and OK for confirmation.
Step 4: In the pop-up window, check Apply changes to this folder, subfolders, and files. Then click OK.
Step 5: Click View on the File Explorer toolbar and select Options. In the pop-up window, switch to the View tab and make sure you have checked the “Don’t show hidden files, folders, or drives” option. Then Click Apply and OK.
Then you will be unable to view the hidden folder in File Explorer.
Method 2: Hide Files via Command Prompt
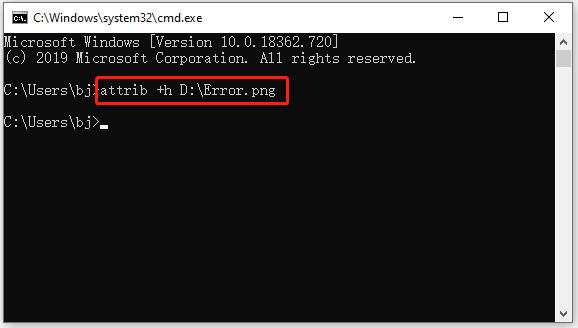
Command Prompt is a command-line interpreter available on Windows operating systems. If you want to use Command Prompt to hide specific files and folders in Windows 11, you should make sure you input the correct command.
Step 1: Press Win + R to invoke the Run window. Then type cmd and press Enter to access Command Prompt.
Step 2: Input attrib +h * (replace * with the target file or folder path and name) and press Enter.

Method 3: Use a Reliable Third-party Program
Alternatively, you can choose a reliable and professional third-party program to hide a specific folder or file in Windows 11.
There are many programs on the market and you can choose one according to your preferences. Some of them are listed below.
- Folder Lock
- Gilisoft File Lock Pro
- Wise Folder Hider
- IObit Protected Folder
- Easy Folder Guard
- My Lockbox
- …
Method 4: Change Settings to Stop Files from Showing up in Search
If you want to hide files and folders in Search, you can try this method. And the detailed steps are as below.
Step 1: Press Win + I to open Windows Settings.
Step 2: Select Privacy & Security in the left pane. In the right pane, click Searching Windows.
Step 3: Under the Exclude folders from enhanced search section, click the Add an excluded folder button.
Step 4: In the pop-up window, select the folder you want to hide and click Select Folder.
Then you won’t see this folder in the search results when you search for something in the Windows Search tool.
If you want to hide certain types of files from the search results, you can change the indexing options. And you just need to open Control Panel and select Indexing Options. In the pop-up window, click the Advanced button and select the File Types tab. Then uncheck the file types you want to hide and save changed settings.

User Comments :