Printing a document on double sides save paper, which is environment-friendly, but how to print double-sided on Windows? This post from MiniTool Partition Wizard shows how to make double-sided printing and how to print double-sided automatically on Windows 10/11.
It is easy to make double-sided printing on Windows, and scroll down to see how easy it is!
How to Print Double-Sided on Windows?
A few steps are required to make double-sided printing on Windows 10/11, and here I show the process of printing a document on double sides from Microsoft Word:
Step 1: Open a document with Microsoft Word.
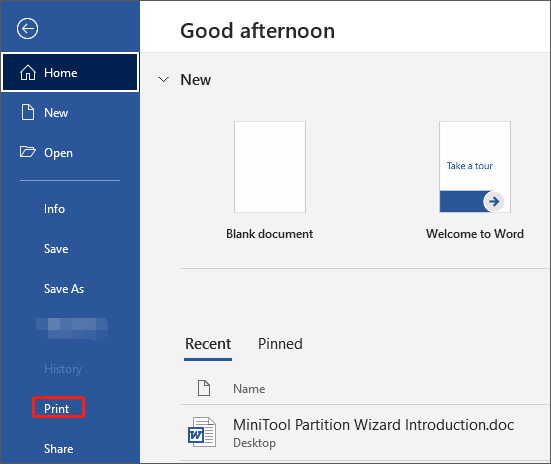
Step 2: Access the Print option by using the Ctrl + P shortcut keys or clicking the File tab.
Step 3: Click the Print option on the left side.
Step 4: On the Print page, select a printer from the drop-down menu of Printer and then choose the option like Manually Print on Both Sides or Print on Both Sides.
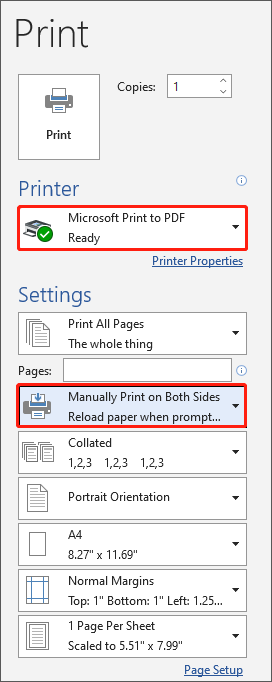
Step 5: Click the Print button to start double-sided printing.
This is how to print double-sided from Microsoft Word. Note that the process of printing double-sided from Notepad or WordPad is a little different. For that, you need to:
- Click the File tab on the program’s window.
- Choose the Print option from the menu.
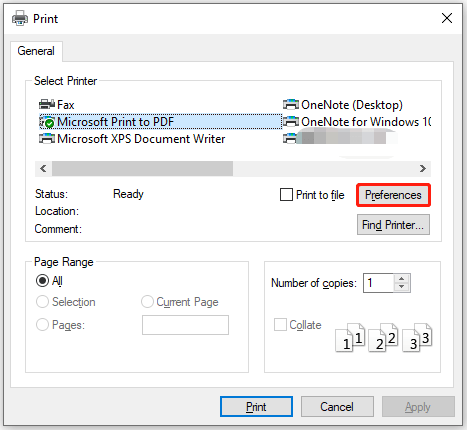
- Select a printer and then click the Preferences
- On the new window, tick the checkbox for the option Duplex Printing (Manual) and click the OK button to save the change.
- Click the Print button to start double-sided printing.
Setting double-sided printing default is more convenient. The following shows you how to make double-sided printing default.
How to Set Double-Sided Printing Default on Windows?
The process of setting double-sided printing default is a bit different on Windows 10 and Windows 11 (you might be interested in Windows 10 vs Windows 11).
On Windows 10, you need to:
- Click the Windows icon on the taskbar.
- Click the gear icon to open Windows Settings.
- Choose the Devices option on the Settings window.
- Switch to the Printers & scanners tab on the left side of the window.
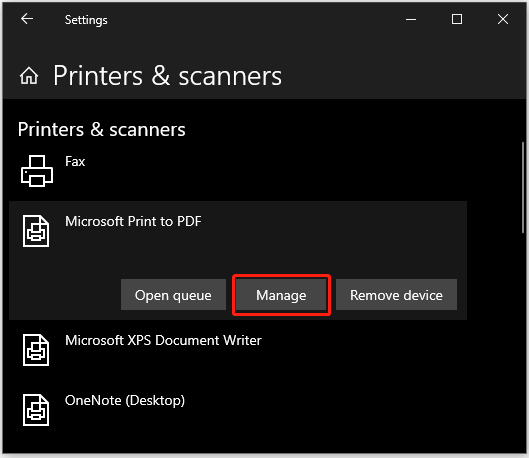
- Select the printer and then click the Manage
- Click the Printing preferences
- Head over to the Printing Shortcut
- Select the Two-sided Duplex Printing option if your printer has a duplexing unit and can automatically print double-sided.
- Save the change.
On Windows 11, you need to:
- Click the Windows 11 icon on the taskbar.
- Choose the Settings option from the pop-up menu.
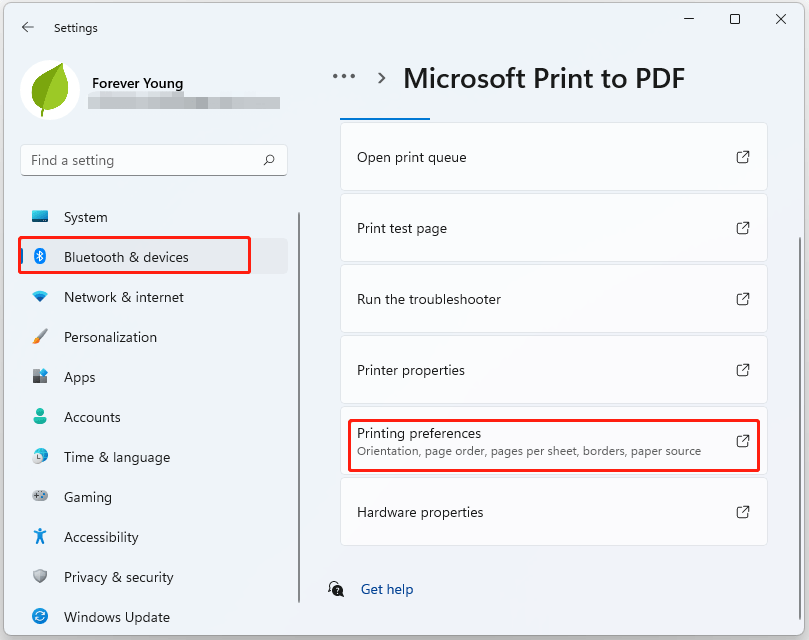
- Switch to the Bluetooth & devices tab on the left side of the Settings window.
- Choose the Printers & scanners option on the right side of the window.
- Select a printer and click the Printing preferences option under Printer settings.
- Tick the checkbox for the Duplex Printing (Manual) Then, click the Apply button and then click the OK button.
Through the above steps, your Windows 10/11 computer will print your documents on both sides automatically when you click the Print option.
User Comments :