Have you come across the Destiny 2 error code bee? A large number of users are troubled by this error. If you are trying to figure it out, you come to the right place. This post of MiniTool summarizes many solutions to fix the issue.
Destiny 2 is a fantastic online-only multiplayer shooter video game released by Bungie. You can play this game on Xbox One, PlayStation 4, and Microsoft Windows. Sometimes, however, you may encounter various error codes like Destiny 2 error code Anteater, Destiny crashing, error code weasel, and the one discussed here.
According to the official statement from Bungie, the main reason behind Destiny 2 error code bee is a faulty communication between your modem and Bungie servers. After analyzing several user reports and articles, we summarize the most effective troubleshooting methods as follows.
Fix 1. Restart Your Console and Clear the Cache
As you might know, the files cache of the game is stored in the console’s memory. Once the temporary files become corrupted, it can prevent the game from accessing the Bungie and cause Destiny 2 error code bee. To fix this issue, you can try rebooting the console and deleting the cache.
Step 1. Hold the Power button on the Xbox console until the system is turned off completely.
Step 2. Disconnect the power cable from your console, and then hold the Power button again to release the power. By doing so, it will clear the cache and format the Xbox memory.
Step 3. Reconnect the power cable and wait for the light on console changes from white to orange.
Step 4. Turn your Xbox One on again and see if the Destiny 2 error code bee still persists.
If you encounter the error code bee Destiny 2 when playing the game on PS4, you can hard reset the PS4 to clear the cache. Here’s how to do that:
Step 1. Hold the power button for 7 seconds until you hear the beeps.
Step 2. Unplug all power supply cables.
Step 3. Hold the power button again to discharge the internal power supply.
Step 4. Reconnect the supply cables and start your PS4 normally. Now, you can see if the Destiny error code bee is fixed or not.
Fix 2. Troubleshoot the Internet Connection
The internet connection issue is one of the main causes that lead to Destiny 2 bee error. So, you need to take some measures to troubleshoot network issues. If you are using a wireless internet connection like Wi-Fi or mobile hotspot, we recommend using a wired internet connection to play the game.
In addition, you can follow the tips below to check the internet connection:
- Check if your router/modem is faulty. To do so, you can run the Internet Connections Troubleshooter or switch to another wireless connection.
- Contact your ISP provider to diagnose the potential network stability, traffic, and packet loss issue.
- You can replace the old equipment that you have used for a long time.
After that, you can replay the game and see if error code bee Destiny 2 has been resolved.
Fix 3. Port Forwarding
In order to get better connectivity to Bungie servers, you can port forwarding on your router for Destiny 2. First of all, you need to know which port the Destiny 2 uses.
Destiny 2 for PlayStation 4:
- TCP: 1935,3478-3480
- UDP: 3074,3478-3479
Destiny 2 for Xbox One:
- TCP: 3074
- UDP: 88,500,1200,3074,3544,4500
Destiny 2 for Steam:
- TCP: 27015-27030,27036-27037
- UDP: 3074,3097,4380,27000-27031,27036
Here we take for PS4 users for example. You can follow this simple guide to port forwarding:
Step 1. Find the IP address and then turn on your PS4 system.
Step 2. Open the Setting menu from the PS4 dashboard, and then navigate to Network > View Connection Status.
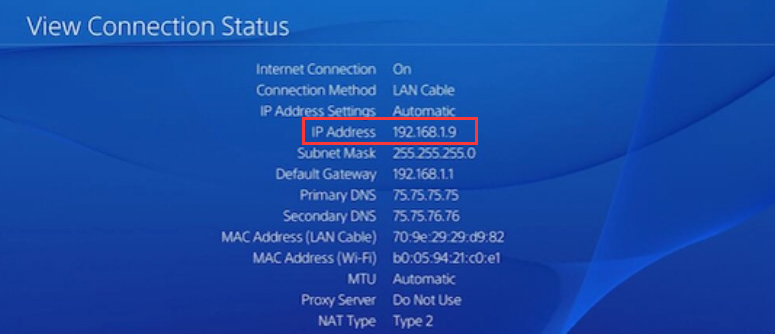
–image from https://www.hkbn.net/
Step 3. Go to the IP Address on the screen and write it down. You need to use this PS4 IP address to enable port forwarding. Besides, you need to write down the MAC address of your PS4.
Step 4. Now, you can use the IP address that you just found on PS4 to port forwarding.
User Comments :