What is Exchange Online PowerShell? How to connect to Exchange Online PowerShell? If you are still trying to figure them out, you come to the right place. This post of MiniTool will explain these questions in detail.
What Is Exchange Online PowerShell
Exchange Online PowerShell refers to an administrative interface that allows you to manage Microsoft Exchange Online organization with the PowerShell (command line). With this tool, you can do many daily tasks easily and quickly. For instance, you can this interface to configure mail flow/transport rules and connectors.
However, some settings in Exchange Online (like Azure and Office 365) are only available through standard PowerShell. To use all of the features in Exchange Online, you need to install special PowerShell modules and connect to Exchange Online PowerShell. So how to do that? Let’s keep reading.
Before You Connect to Exchange Online PowerShell
To connect to Exchange Online PowerShell smoothly, make sure you meet the basic system requirements and install the Exchange Online PowerShell V2 module (EXO V2 module) in advance.
System Requirements
Here we summarize some basic system requirements that need to be met to connect to Exchange Online. To know more details, you can also click on this hyperlink.
- The latest version of the EXO V2 module is officially supported in PowerShell on Windows 10/8.1/7 SP1, Windows Server 2012/2016/2019, Windows Server R2 SP1. (EXO V2.0.4 or later is supported for PowerShell 7.0.3 or later.)
- In addition to Framework 3.0/3.5/4.0, you need to install .NET Framework 4.5 or later.
- Make sure you have a stable and fast internet connection.
- Access to Exchange Online PowerShell must be enabled for a current user. (For administrators, such access is enabled by default.)
If you have confirmed that the system requirements are met, follow the guide below to install the EXO V2 module in PowerShell.
Install Exchange Online PowerShell V2 Module
Exchange Online PowerShell V2 module is a modern authentication that can work with multi-factor authentication (MFA) for connecting to all Exchange-related PowerShell environments in Microsoft 65, such as Exchange Online PowerShell, Exchange Online Protection (EPO) PowerShell.
Here’s how to install the EXO V2 module in PowerShell.
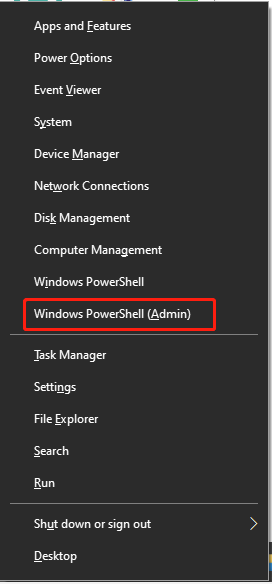
Step 1. Press Win + X keys to open the Start menu and select Windows PowerShell (Admin). Click on Yes in the UAC confirmation window to grant admin rights for PowerShell.
Step 2. In the elevated Windows PowerShell window, copy and paste the following text in it and hit Enter. This command will enable your PowerShell to be able to run remote scripts.
Set-ExecutionPolicy RemoteSigned
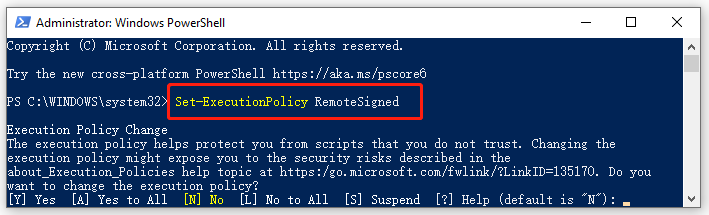
Step 3. Type Y and press Enter to set the Execution policy.
Step 4. Open the elevated Windows PowerShell window again, and then type the following command and hit Enter to install PowerShellGet before you can install the EXO V2 Module. Then type Y to confirm it.
Install-Module -Name PowerShellGet -Force

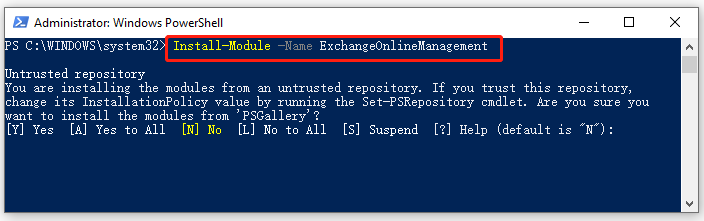
Step 5. Now, you can install the latest Exchange Online PowerShell Module with the Install-Module cmdlet. To do so, copy and paste one of the following commands in the elevated PowerShell window and press Enter. Then type Y to accept the license term.
Install-Module -Name ExchangeOnlineManagement (for all users)
Install-Module -Name ExchangeOnlineManagement -Scope CurrentUser (only for a current user account)
Now, you should install Exchange Online PowerShell Module successfully. Let’s keep reading the following part.
How to Connect to Exchange Online PowerShell
With the EXO V2 module installed on your PC, you can connect Exchange Online PowerShell easily with a single cmd in PowerShell.
Step 1. Open the elevated PowerShell window again, and then copy and paste the following command and press Enter to load the EXO V2 module.
Import-Module ExchangeOnlineManagement
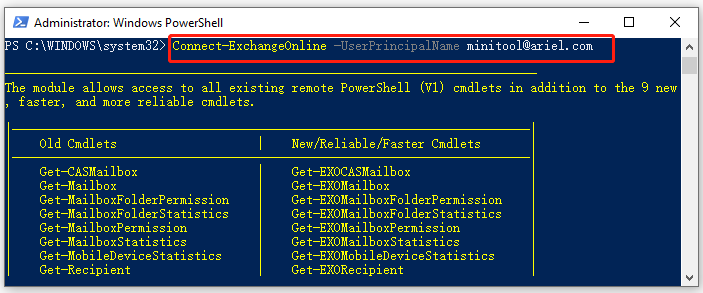
Step 2. Now, you can make PowerShell connect to Exchange Online based on your needs. For example, if you want to connect Exchange Online PowerShell in a Microsoft 365 or 365 GCC organization, you can run the command below. Here you need to replace the [email protected] with your account in user principal name format.
Connect-ExchangeOnline -UserPrincipalName [email protected]
Step 3. Then a Microsoft sign-in window should pop up, enter your password and click on Sign-in. After that, you can enter the verification code and click on Verify.
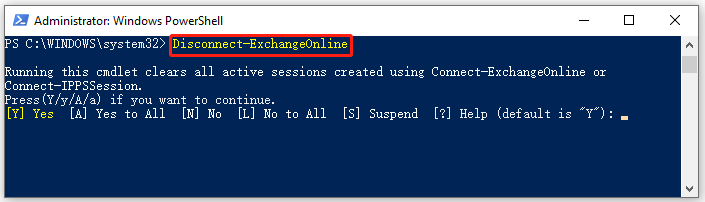
Step 4. When you are finished, make sure you disconnect the remote PowerShell by running the command below.
Disconnect-ExchangeOnline
User Comments :