Do you want to try Chrome OS before buying a Chromebook? Then, you can use the CloudReady image file to create a Chrome OS VM on VMWare. This post from MiniTool Partition Wizard shows you how to do that step by step.
Some Things You Should Know about the Chrome OS VM
1. Official Chrome OS ISO Is Unavailable
Chrome OS is a Linux-based operating system developed by Google for Chromebooks. Only Chromebooks will provide the full version of Chrome OS.
You can’t get an official version of Chrome OS without buying a Chromebook. Google doesn’t offer a version of Chrome OS that you can install on existing hardware, whether in a virtual machine or on a full laptop or desktop PC.
2. Chrome OS Is Different from Chromium OS
Although the Chrome OS is based on an open-source project — Chromium OS, they have some differences. The main difference is that Chromium OS lacks many features compared to Chrome OS. For example:
- Adobe Flash
- Widevine CDM plugin (to support HTML5 EME)
- 3G Cellular support (but work is ongoing to address this)
- DisplayLink Manager for video over USB (some systems)
- Android (ARC++) container for running Android apps
3. Google Only Offers the Source Codes of Chromium OS
It means that there is no ready-made Chromium OS ISO file. You need to download the source codes of Chromium OS and compile them yourself. Then, you can get an ISO file and install it. Undoubtedly, this is a tough job.
Fortunately, some people have done this job for you. The Neverware company released an operating system named CloudReady, which is based on Chromium OS. Neverware CloudReady can provide basic functions similar to Google’s official Chrome OS on Chromebooks. Currently, it provides a free version for individuals and a paid version for educational institutions.
Preparatory Work
Before starting to create a Chrome OS VM, you should do some preparations.
- Prepare the image file.
- Prepare the space for VM.
- Install VM software.
Prepare the Image File
Which image file should you use? Because the real Chrome OS image file is unavailable and the Chromium OS image file requires manual compiling, I recommend you use the CloudReady image file.
Where to download the CloudReady image file? The CloudReady official website is not the correct choice, because the CloudReady image file downloaded from the official website is a BIN file, which is unusable on most VM software, including VMWare and VirtualBox.
Fortunately, Neverware has offered a CloudReady image file for VMware. This image file is an OVA file. Download this file and import it into VMWare. You can use the Chrome OS VM directly.
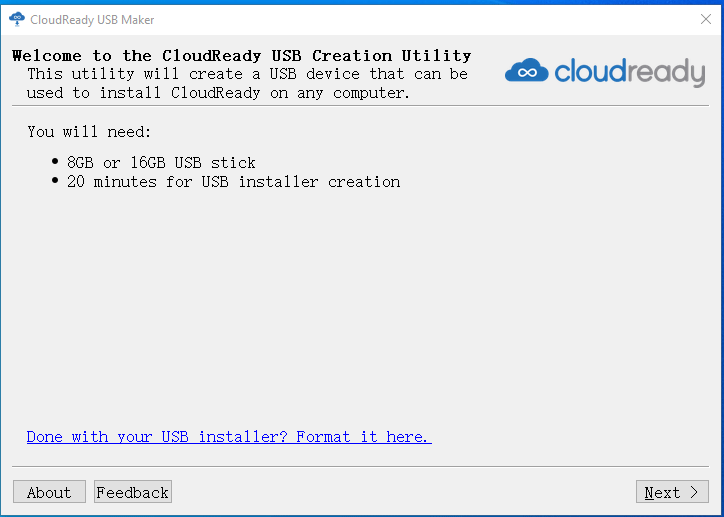
If you want to create a Chrome OS VM from scratch, please go to the Neverware CloudReady official website and scroll down to find the Download USB Maker button. Click this button to download the CloudReady USB Maker tool.
Insert a USB drive of at least 8GB to your PC and launch this USB Maker tool. Follow the on-screen instructions to create a CloudReady USB installer. Then, you can use this USB installer to create a Chrome OS on VMWare.
Detailed Steps to Turn Your Old Laptop into a Chromebook
Prepare the Space for VM
In general, to manage VMs better, a separate partition for VMs is necessary. If you can take enough unallocated space from one partition, you can shrink that partition in the Windows Disk Management tool. If you need to take enough unallocated space from multiple partitions, I recommend you use MiniTool Partition Wizard. Here is the guide:
MiniTool Partition Wizard FreeClick to Download100%Clean & Safe
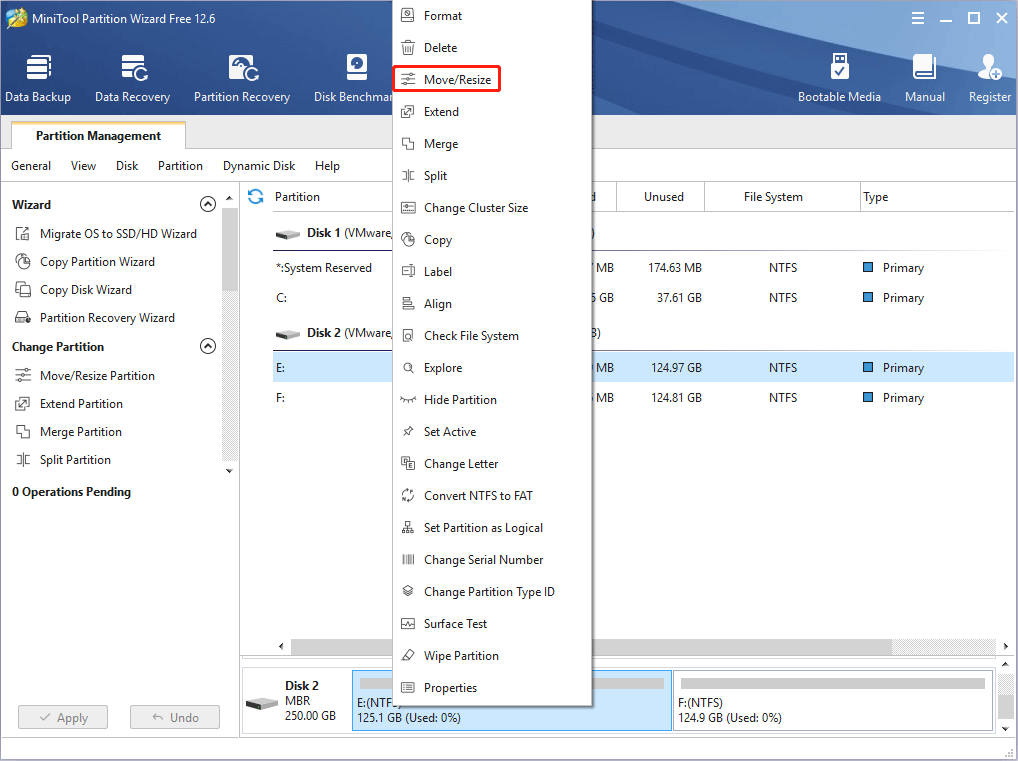
Step 1: Launch MiniTool Partition Wizard and go to its main interface. Right-click a partition and choose Move/Resize.
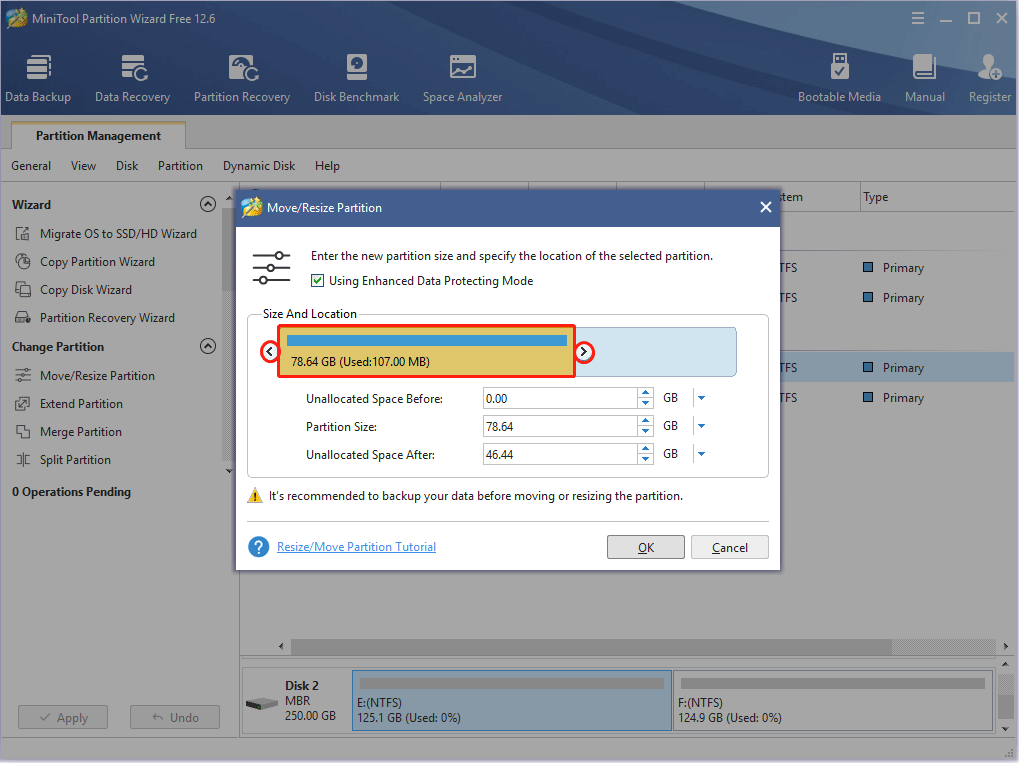
Step 2: Drag the arrow icon to decide how much space you want to shrink. Click the partition block and drag it to decide the location of the unallocated space. Then, click the OK button. In the same way, you can take unallocated space from multiple partitions and then put the unallocated space together by moving the location of partitions.
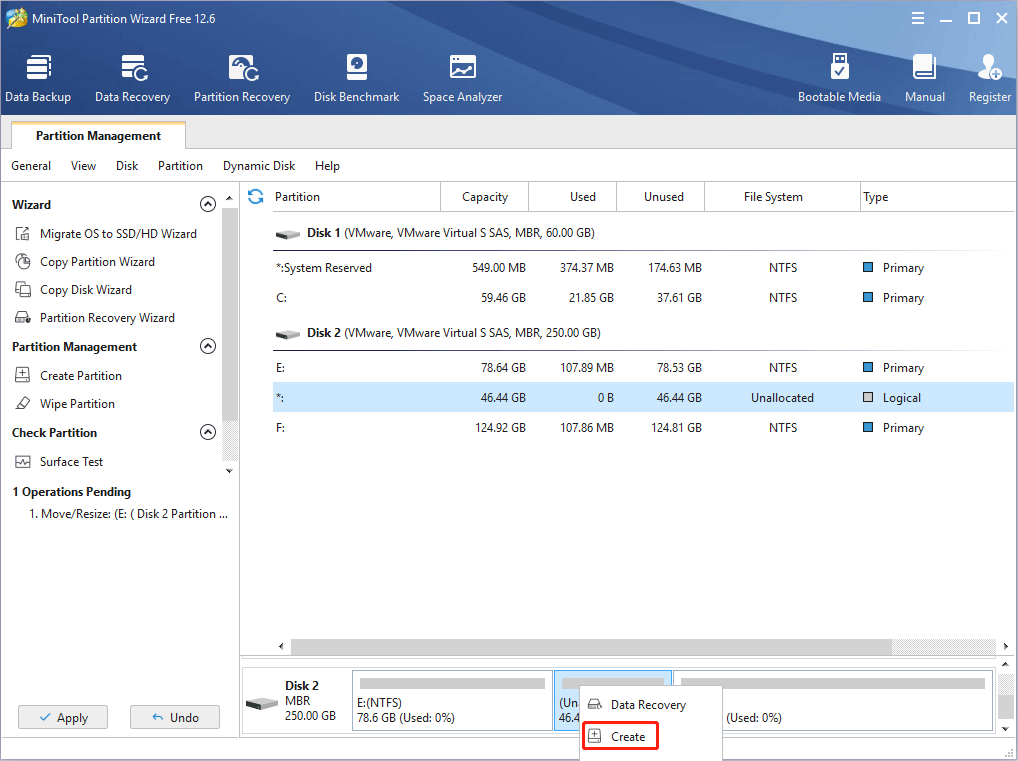
Step 3: Right-click the unallocated space and choose the Create button.
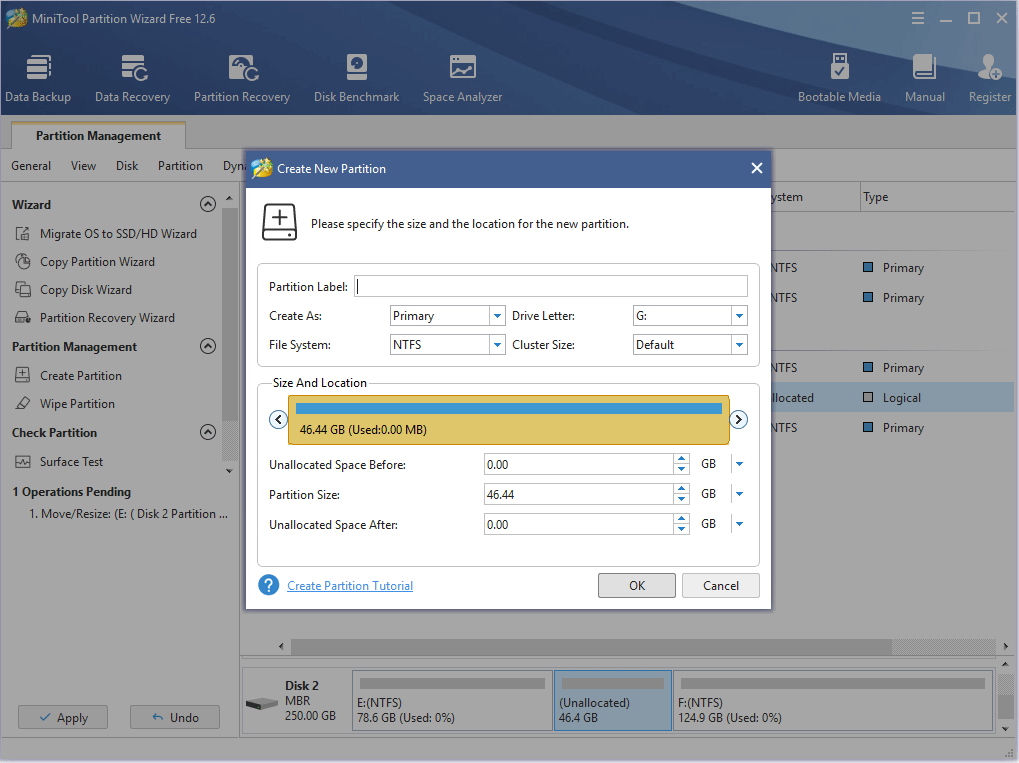
Step 4: Set parameters for the new partition. You can keep all of them to the default value if you don’t have specific demands. Then, click the OK button.
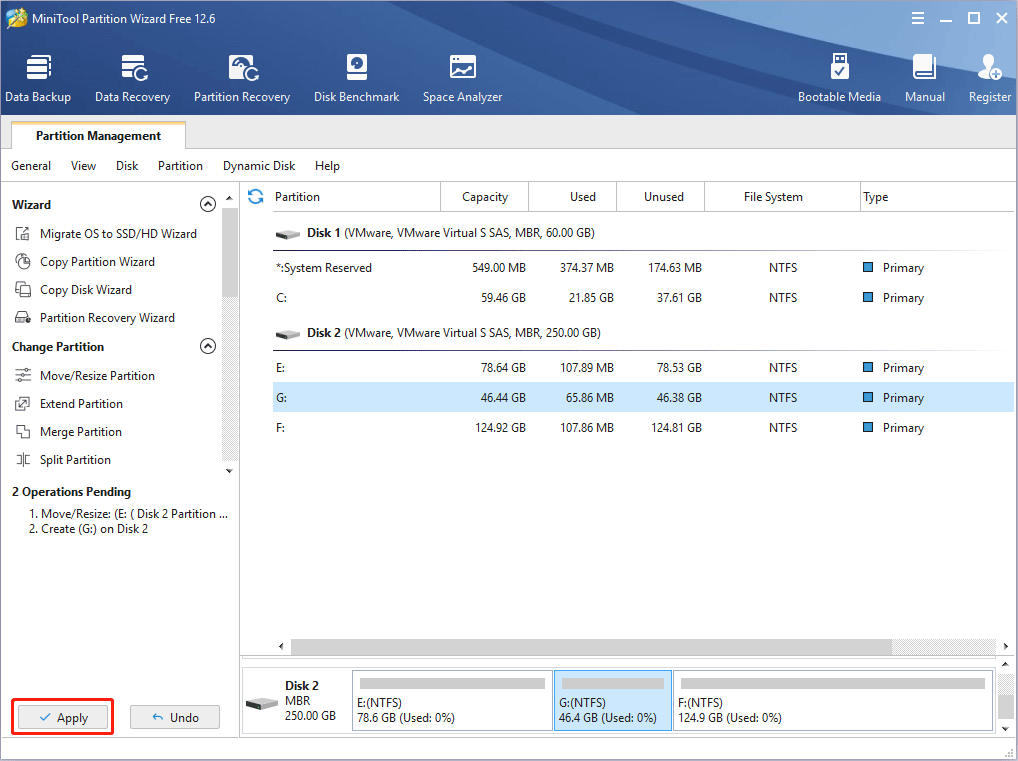
Step 5: Click the Apply button to execute pending operations.
Install VM Software (VMWare Is the Best Choice)
Because Neverware has offered a CloudReady image file for VMware, you can get a Chrome OS VM easily by importing the OVA image file into VMWare. However, the OVA image file can’t work well with all VMWare versions.
VMWare Workstation 14.1.1 is recommended. If you want to use VMware Workstation 15, please choose the Pro version. Neverware has tested and confirmed that the OVA file will work in the above two VMWare. As for other versions, the importing operation may fail.
If the importing operation is not supported in your VMWare, don’t worry, Neverware offers a guide on how to create a Chrome OS VM on VMWare from scratch. Therefore, VMWare is the best choice for Chrome OS VM.
No matter what VMWare version you choose, when installing the VMWare, please choose the partition you created just now as the installation location. You may need to create a folder in that partition in advance so that you can select that folder to store the VMWare installation files.
How To Run Google Chrome OS From Your USB Drive
Install Chrome OS VMWare
According to the VMWare version you use, you can choose to import the OVA file or create the Chrome OS VM from scratch.
Option 1: Import the Chrome OS
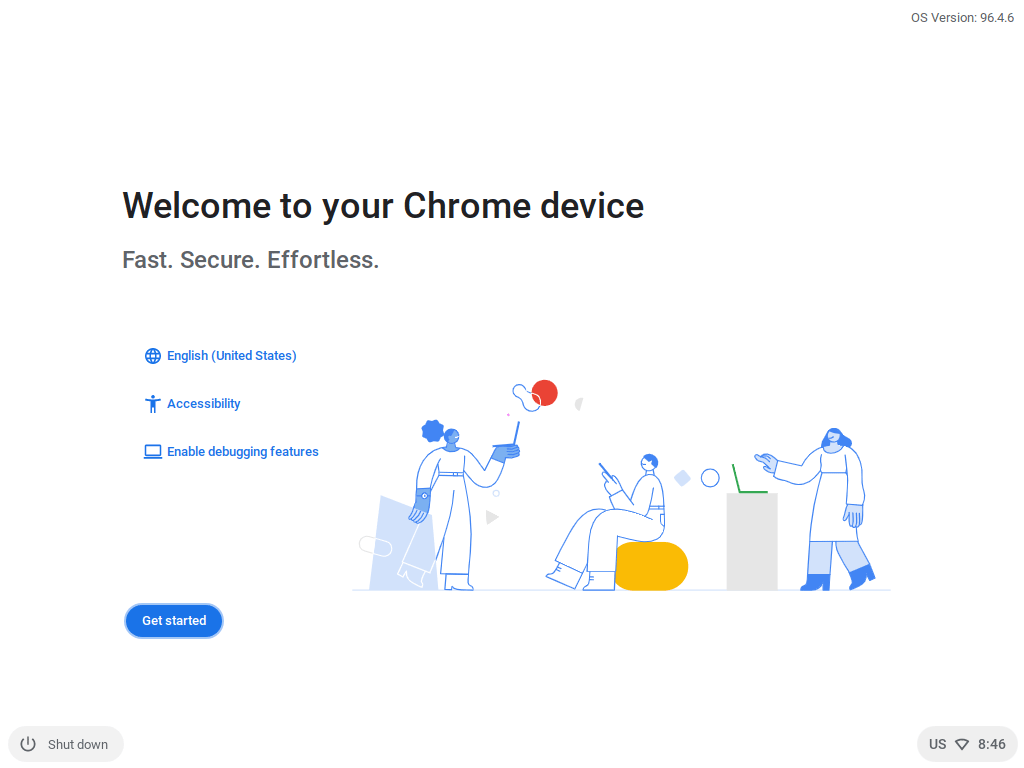
Now, you need to launch VMWare, head to File > Open, and then browse to the Chrome OS image. The Import Virtual Machine window will open. Keep the default options and press Import.
After the process completes, you’ll find an entry in the virtual machine list. Then, you just need to start this VM.
Option 2: Create the Chrome OS VM from Scratch
Step1: Please make sure you have created a normal CloudReady USB installer and then connect it to your PC.
Step 2: Launch VMWare, click File > New Virtual Machine, and then choose Custom (advanced). When you create a new VM, you should pay attention to the following points:
- When selecting a level of hardware compatibility, if possible, please select ESXi 6.5 to maximize compatibility. If your VMWare version doesn’t support ESXi 6.5, please choose the top compatibility option.
- When choosing the VM installation method, please select “I will install an operating system later“.
- When choosing the VM type and version, please select “Linux” and then “Other Linux 4.x or later kernel 64-bit“. If your VMWare version doesn’t have this option, please choose a similar one (like Linux 3.x, etc).
- Name the VM (Chrome OS or whatever you like) and then browse to the partition you created just now to change the VM installation location to there. You may need to create a folder in that partition in advance so that you can select that folder to store the Chrome OS VM installation files.
- Configure the number of processors and cores as desired. For optimum performance, 2 processors and 2 cores per processor are recommended.
- Allocate 2048MB of memory for the virtual machine.
- Select the desired network connection type. The bridged networking is recommended so that the VM can directly acquire an IP via DHCP on your local LAN.
- Keep the default of an LSI Logic controller.
- Select SATA as the virtual disk type.
- Select “create a new virtual disk“.
- Enter a maximum disk size of 16 GB, and select the “store virtual disk as a single file” option.
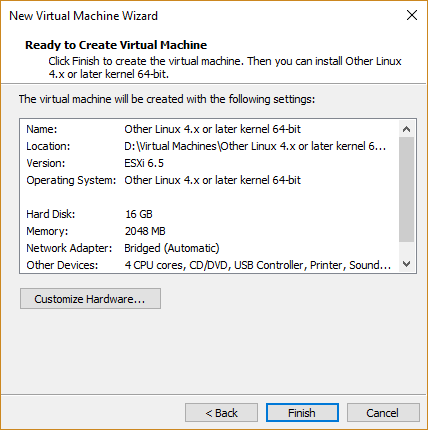
- Check the virtual disk file name, review the virtual machine settings, and click the Finish button.
Step 3: Once the VM is created, right-click the new VM (the window tab), and choose Settings. Then, you should change the following settings:
- Under the Hardware > USB controller tab, set USB compatibility to USB 3.0.
- Under the Hardware > Display tab, tick the box for “Accelerate 3D graphics“.
- Under the Options > Advanced tab, change the Firmware type to UEFI.
Step 4: After changing the above settings, please click the OK button to apply these changes. Then, click the inverted triangle icon beside the Start button and choose Power On to Firmware.
Step 5: As soon as the VM starts and the VMware logo is displayed, select “VM > Removable Devices > your USB > Connect (disconnect from host). This operation must be performed before the firmware boot manager appears.
Step 6: Use the down arrow key to highlight the “EFI USB Device” in the Boot Manager menu and then press Enter. Now, your newly created VM should boot from the CloudReady USB installer. Then, you just need to follow the on-screen instructions to complete the installation process. The VM will shut off when the installation is complete.
Bottom Line
Is this post useful to you? Do you have other ideas about Chrome OS VMWare? Please share your opinions with us in the following comment zone.
In addition, do you know how to create a Chrome OS VM from scratch on VirtualBox? I didn’t try this. Therefore, if you have ever done this, please share your experience with us. I will appreciate that very much!
Of course, if you have any problem with MiniTool Partition Wizard, please feel free to contact us via [email protected]. We will get back to you as soon as possible.
About The Author

Position: Columnist
Linda has been an editor at MiniTool for seven years. She continuously learns about computers and puts her knowledge into practice. Moreover, she is particularly knowledgeable in disk management, data recovery, system installation, and PDF editing. Her articles typically reference multiple examples or are based on her own experience, providing users with the most suitable solutions.
User Comments :