Where to Find Your System Product Name?
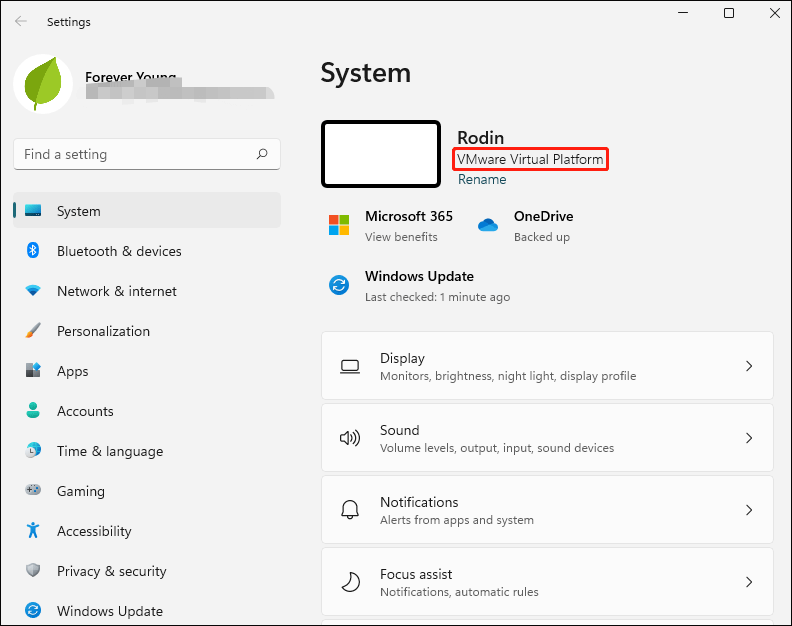
Considering the importance and usefulness of the system’s product name, Windows 11 has it prominently displayed in multiple places. One of the places Windows 11 displays the system product name is the Settings app header. If you open the Settings app, you will see the system product name under the computer name in the header.
So, let us show you how to change system product name in Windows 11.
How to Change System Product Name in Windows 11?
To change the Windows 11 system product name, you need to make a couple of registry changes.
Here are the steps to change system product name in Windows 11:
Step 1: Press the Win + R key to open the Run dialog.
Step 2: Type regedit in the search box and press the Enter button.
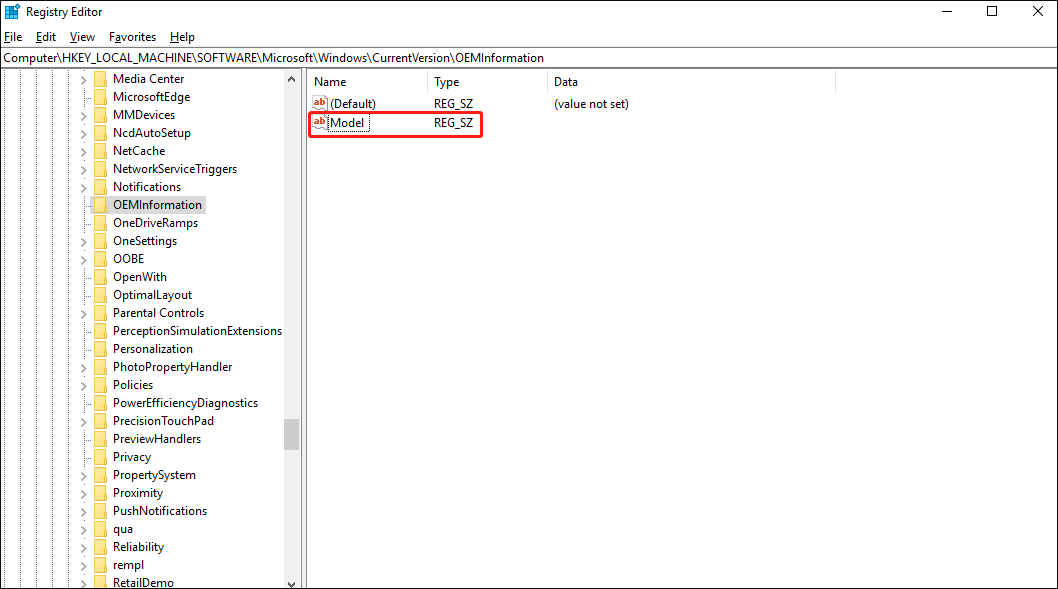
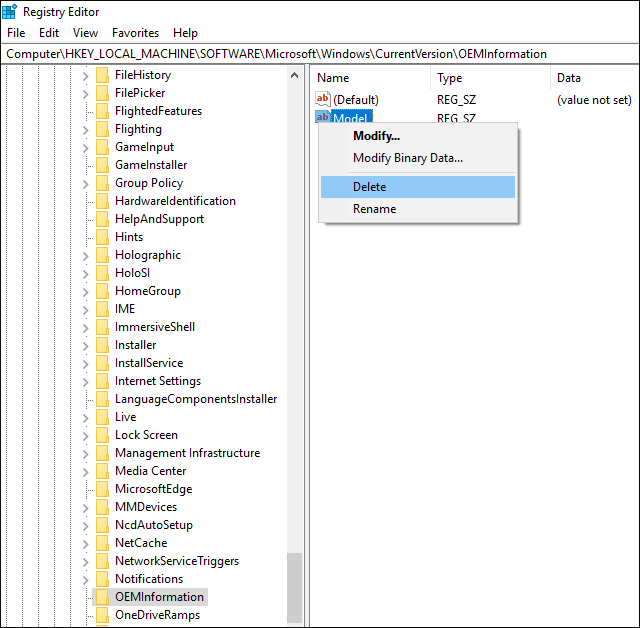
Step 3: After opening the Registry Editor on your computer, navigate to the following path:
HKEY_LOCAL_MACHINESOFTWAREMicrosoftWindowsCurrentVersionOEMInformation
Step 4: In the right panel of the OEMInformation key, double click the Model string value (REG-SZ) to modify it. Or you can right click the Model option and select Modify.
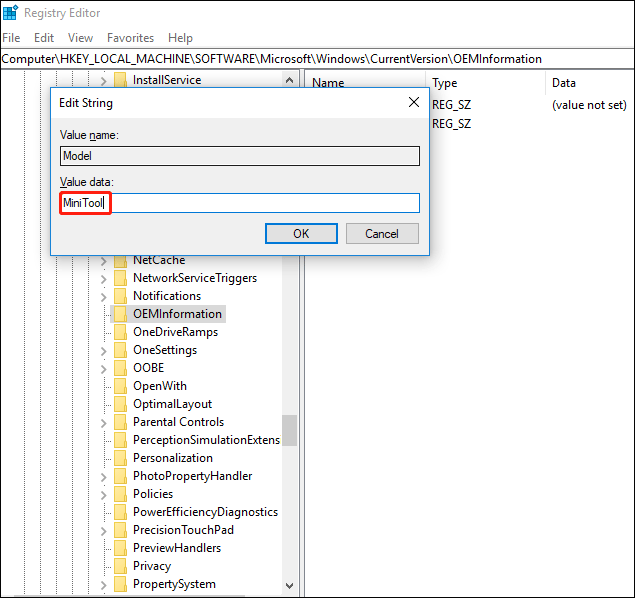
Step 5: Under the Value data section, type a system product name you want, and then click the OK button.
After that, restart your computer. Then open the Settings app with the Windows key + I shortcut, and you should see the new system product name under the computer name on the header.
How to Restore the Default System Product Name in Windows 11?
If you no longer want to use the custom product name or want to revert to the original system product name for some reason, you can do so by reverting the changes you just made. To do so, back up the registry and follow the steps below before making changes.
Step 1: Press the Win + R key to open the Run dialog.
Step 2: Type regedit in the search box and press the Enter button.
Step 3: After opening the Registry Editor on your computer, navigate to the following path:
HKEY_LOCAL_MACHINESOFTWAREMicrosoftWindowsCurrentVersionOEMInformation
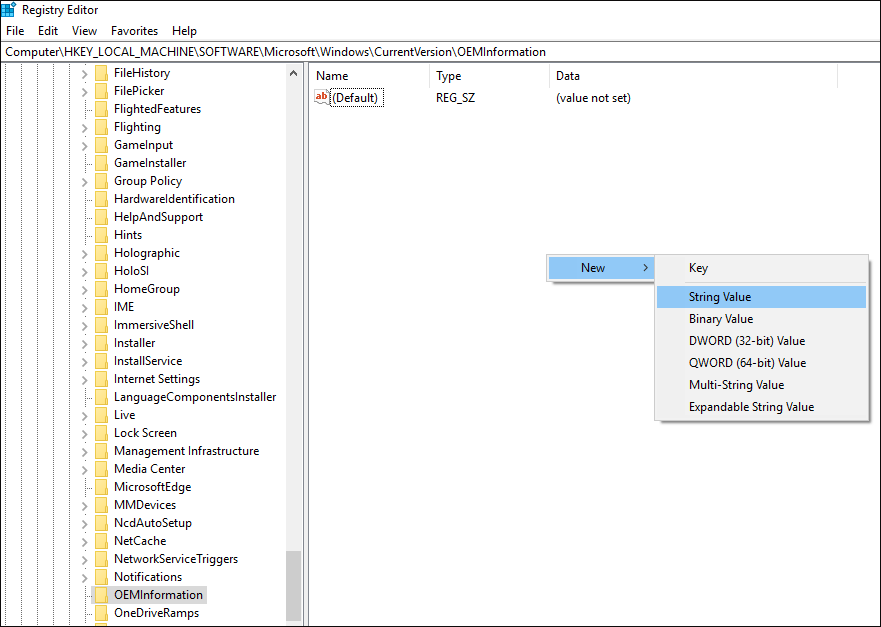
Step 3: In the right panel of the OEMInformation key, right click the Model string value (REG-SZ) and select the Delete option.
Step 4: When a prompted message pops up, click the Yes button to confirm your action.
Bottom Line
As you can see, a complete guide on how to change system product name in Windows 11 is illustrated in the post. We hope this simple guide can help you. If you are stuck or need some help, please let us know and we will get back to you as soon as possible.
About The Author

Position: Columnist
Vega enjoys helping people with computer problems, including disk management, data recovery, data backup, and more. She is constantly expanding her knowledge in related fields. And she will continue to bring more easy-to-understand professional articles to help people solve various problems on the PC.
User Comments :