Are you used to view the 12 hour clock or 24 hour clock? Which one do you expect to appear on the lock screen? This post from the MiniTool Partition Wizard website introduces how to change lock screen clock format to 12 or 24 hour clock on Windows 11/10.
When you start your computer, you will see the lock screen. Only if you enter the right password, you can sign in and start to use your computer. It is a way to protect the security and privacy of your computer. Windows lock screen is also commonly used when users need to leave for some time without turning off their computers.
On the lock screen, you can only view the current date and time as well as a lock screen image. By default, Windows 11/10 displays a 12 hour clock format. If you are used to checking the time in the 24 hour clock format, you can try one of the following methods to change lock screen clock format.
Method 1: Change Lock Screen Clock Format via Windows Settings
To change lock screen clock format to 24 hour clock on Windows 11, you can go to Settings.
Step 1: Press Win + I to access Windows Settings quickly.
Step 2: Select the Time & Language category in the left pane.
Step 3: In the right pane, select Language & region > Regional format. Then click Change formats.
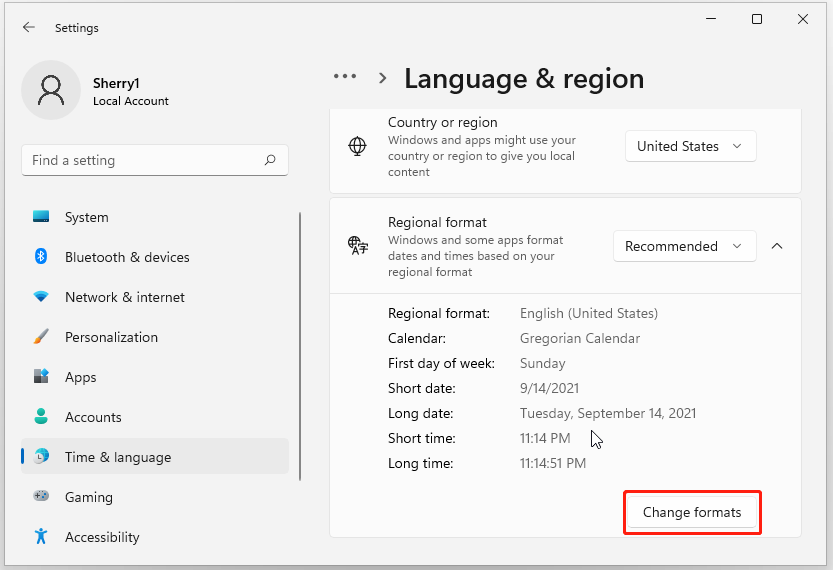
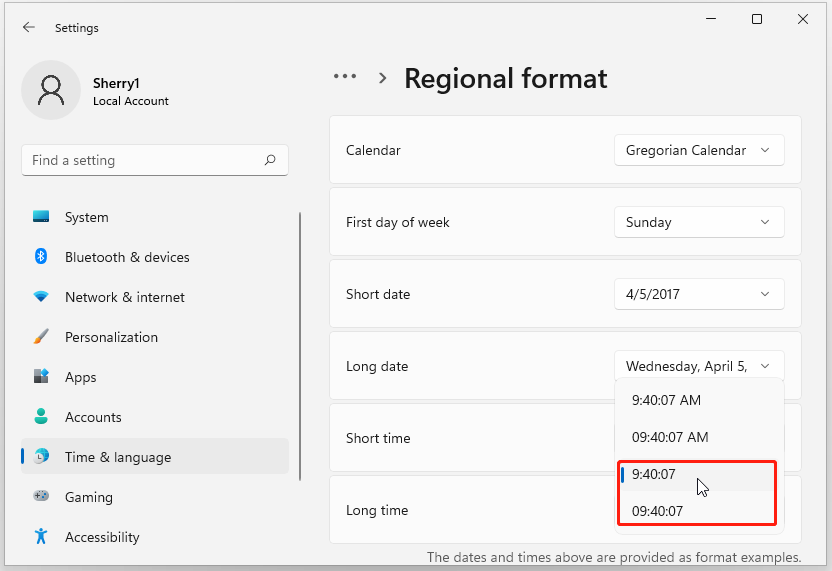
Step 4: Click Long time and change the time format to 24 hour clock (choose the time without AM).
Then press Win + L to lock your Windows 11 screen and it should be changed to the 24 hour clock.
Method 2: Change Lock Screen Clock Format via Control Panel
You can also change lock screen clock format in Control Panel. This method works for both Windows 11 and 10.
Step 1: Press Win + S to open the Windows Search utility.
Step 2: Search for Control Panel and open it.
Step 3: Select View by: Large icons from the upper right corner. Then click Region.
Step 4: Under the Formats tab, click the down arrow icon next to the Long time option to expand the menu. Then choose HH:mm:ss or H:mm:ss to change the clock format to 24 hour clock.
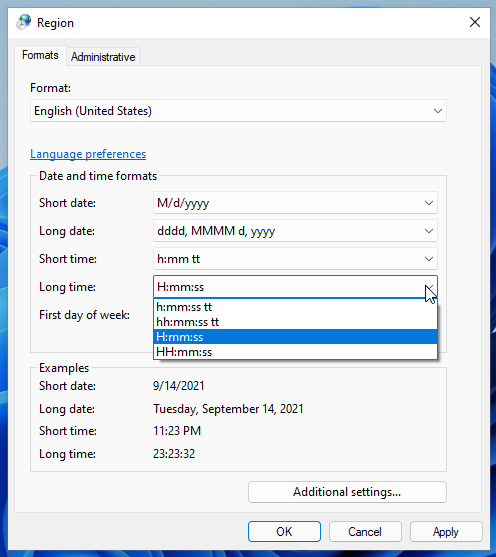
Step 5: Click Apply to save the changes.
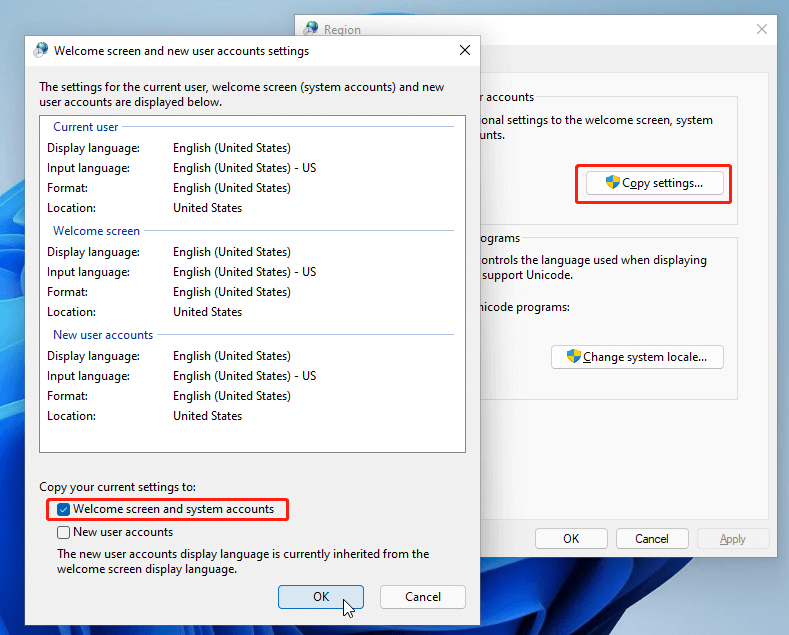
Step 6: Switch to the Administrative tab and click Copy settings under the Welcome screen and new user accounts section. In the pop-up window, check the box before the Welcome screen and system accounts option. Then click OK.
Step 7: Save the changes you have to made and restart your computer to make the changes take effect. Remember to keep your work before restarting.
After restarting your computer, you can find that the time on your lock screen has been changed from the 12 hour clock to 24 hour clock format.
User Comments :