There are several ways to change drive letters on Windows 11. This article from MiniTool Partition Wizard will introduce you to five practical methods. You can change the drive letter in tools such as the Settings app, Disk Management, Command Prompt, PowerShell, and MiniTool Partition Wizard.
What Is a Drive Letter
A drive letter (also called a device letter) is a single alphabetic character assigned to a storage device or partition in a computer’s file system.
In Windows, C: is assigned by default to the primary hard drive or primary partition where the operating system is installed.
A: and B: were originally used for floppy disk drives and are rarely used in modern computers. Drive letters like D: and E: are typically assigned to other drives, such as additional hard drive partitions, CD/DVD/Blu-ray drives, or devices like USB flash drives.
Note: Some partitions, such as the boot partition and the system reserved partition, do not automatically receive drive letters and are therefore not visible or directly accessible in File Explorer.
Now that you know what drive letters are, let’s take a look at how to change drive letters on Windows 11.
How to Change Drive Letter on Windows 11
There are several ways to change drive letters on Windows 11, so I’ll walk you through these methods below to help you easily assign drive letters.
Method 1: Via Settings App
Step 1: Click the Start icon and choose Settings.
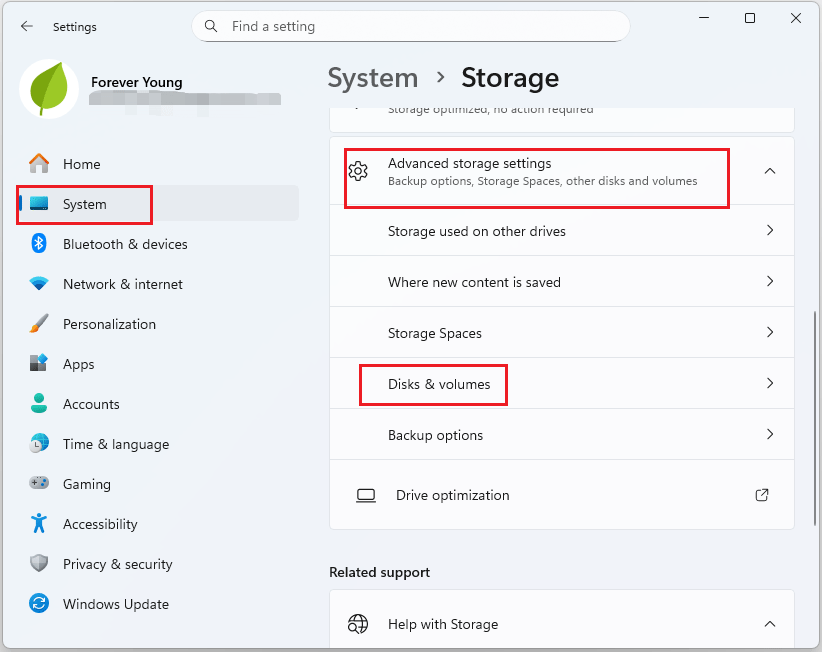
Step 2: In the left pane, select System. Then, click Storage > Advanced storage settings > Disks & volumes.
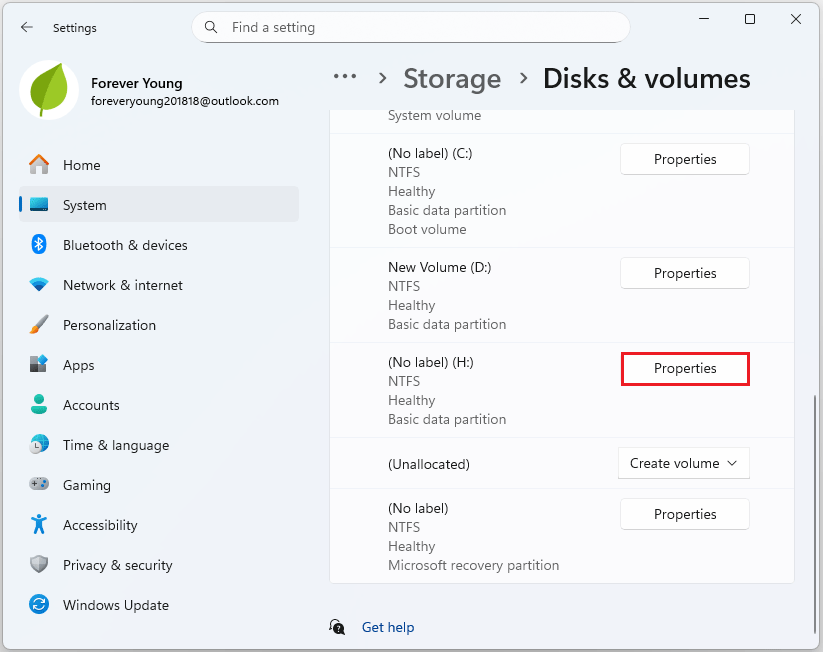
Step 3: Click the drive for which you want to change the drive letter and select Properties.
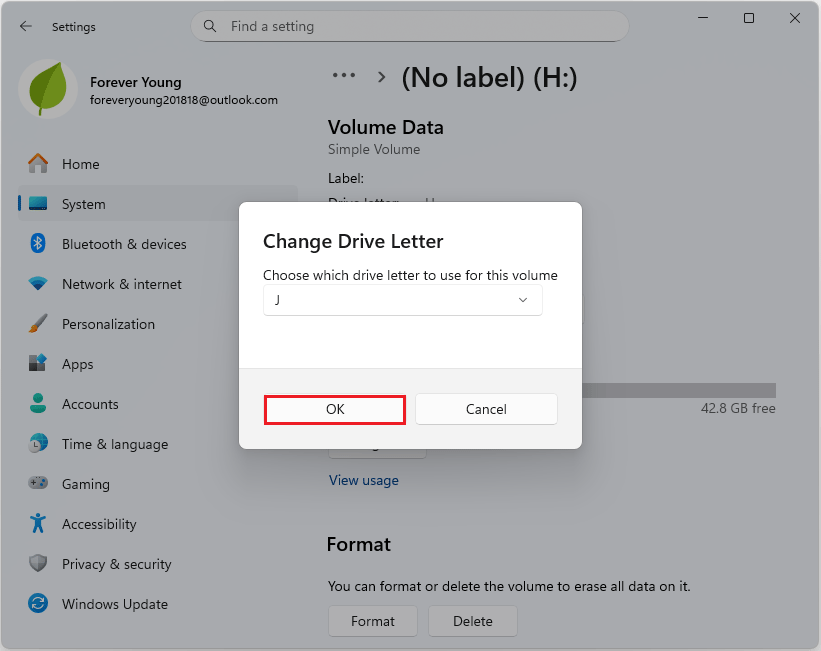
Step 4: Under the Volume Data section, click the Change drive letter button.
Step 5: Choose a letter and click OK to keep the changes.
Method 2: Via Disk Management
Disk Management is Windows’ built-in tool for managing disks and partitions. It lets you create, delete, extend, shrink, and format partitions.
The following are detailed steps for changing a drive letter:
Step 1: Right-click the Start button and select Disk Management.
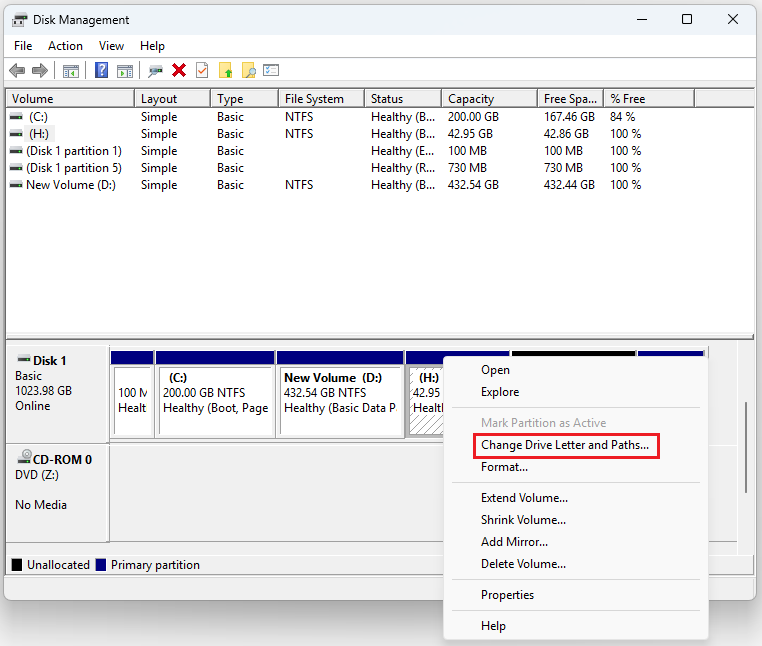
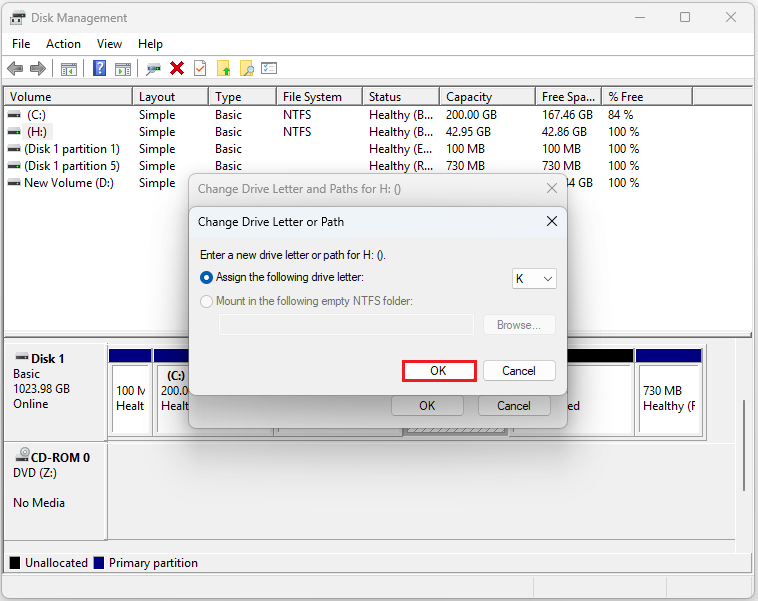
Step 2: Right-click the partition where you want to change the drive letter and then select the option Change Drive Letter and Paths.
Step 3: In the pop-up window, click the Change button. Then, select a drive letter and click OK > Yes to save the changes.
Method 3: Via Command Prompt
The Command Prompt is a command-line tool in Windows that allows you to perform various operations by entering commands.
It can help you perform operations such as changing drive letters, formatting disks, and extending partitions.
However, unfamiliar users should be cautious to avoid data loss or system damage due to incorrect commands.
Step 1: Type cmd in the Search box and choose Run as administrator.
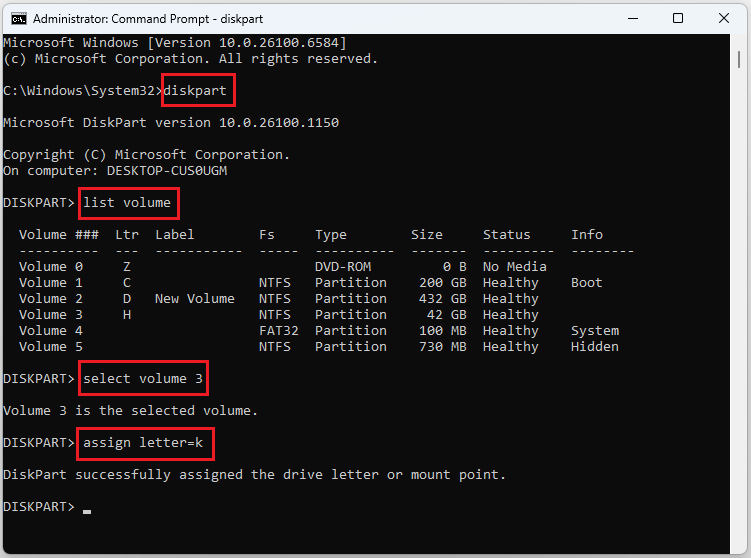
Step 2: Type the following commands one by one and press Enter.
- diskpart
- list volume
- select volume 3 (replace 3 with the volume number you want to change)
- assign letter=k (replace k with the letter you want to use)
Method 4: Via Windows PowerShell
The steps below explain how to change a drive letter on Windows 11 with PowerShell.
Step 1: Type Windows PowerShell in the Search box and choose Run as administrator.
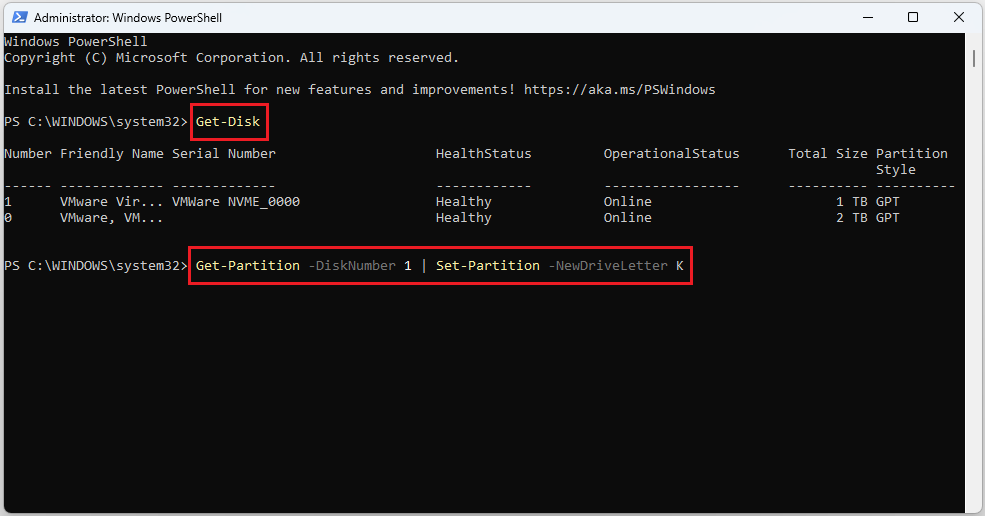
Step 2: Type the command Get-Disk and press Enter to identify the hard drive.
Step 3: Then type Get-Partition -DiskNumber 1 | Set-Partition -NewDriveLetter K and press Enter. (In the above command, replace “1” with the disk number of the drive you want to assign a drive letter to. The letter “K” represents the drive letter to be assigned to the drive.)
Method 5: Via MiniTool Partition Wizard
MiniTool Partition Wizard is a disk partition software that can also help you change drive letters by using the Change Letter feature.
This is ideal for casual users unfamiliar with the command line or system settings.
MiniTool Partition Wizard FreeClick to Download100%Clean & Safe
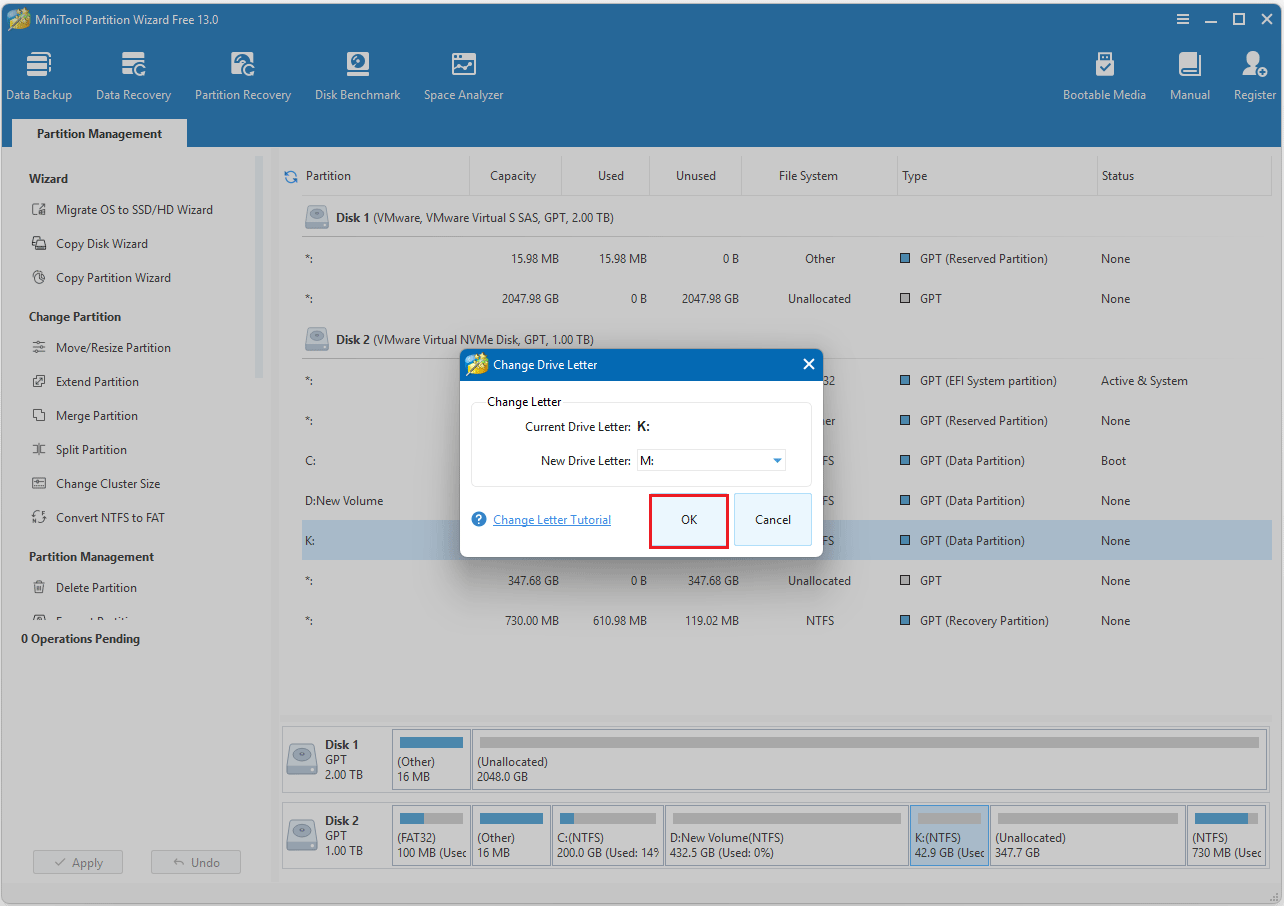
Step 1: Launch MiniTool Partition Wizard to its main interface. Right-click the partition and choose Change Letter.
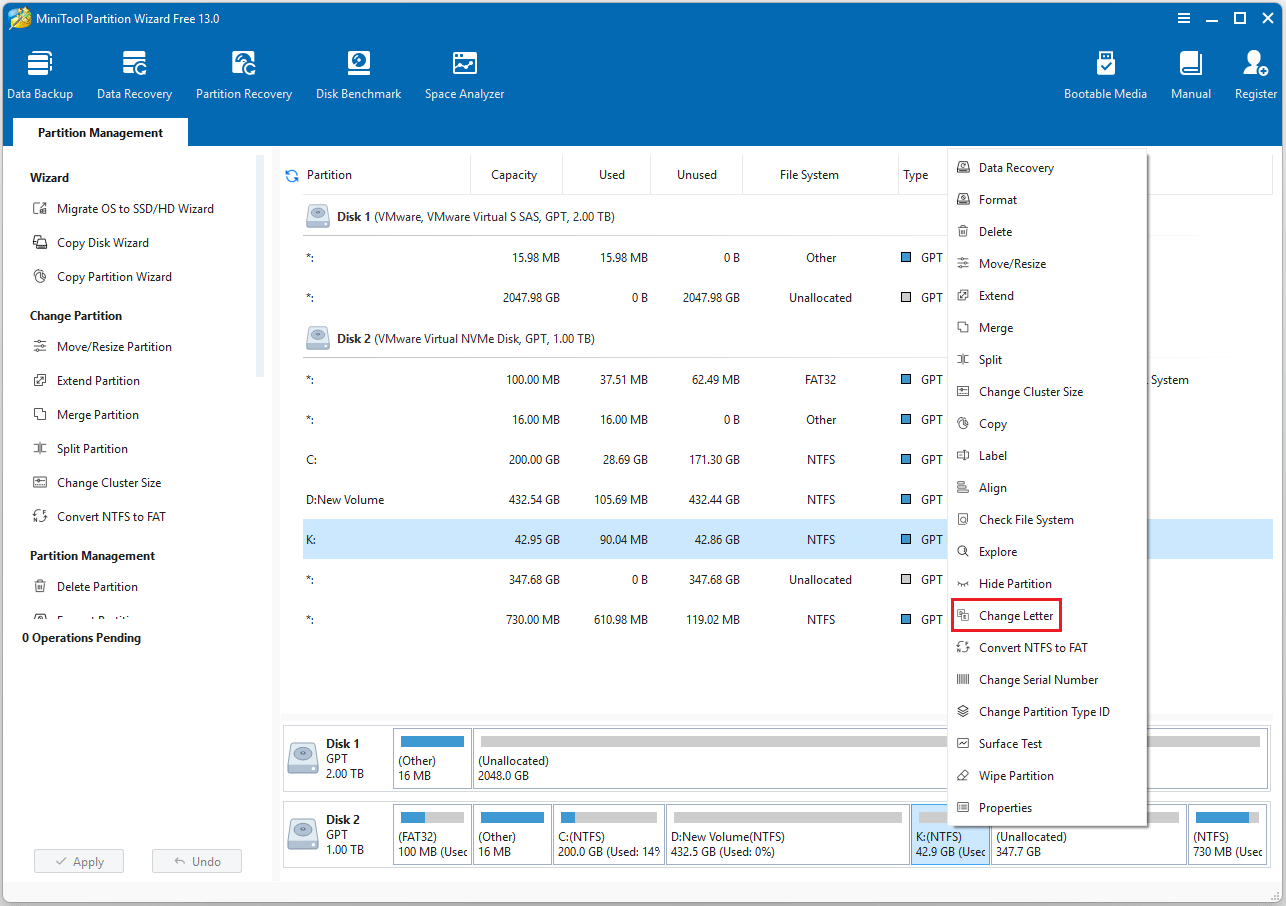
Step 2: In the new pop-up window, select a new letter and click OK > Apply.
As you can see, the steps to change a letter by using MiniTool Partition Wizard are very simple. It’s worth trying.
In addition to changing a drive letter, it can also help you extend/move/merge/split partitions, clone HDD to SSD, wipe disks, recover data from hard drives, convert disks between MBR and GPT, and perform conversion between FAT32 and NTFS without data loss.
Bottom Line
This article introduces five practical methods for changing drive letters on Windows 11, including using Command Prompt, PowerShell, and tools like MiniTool Partition Wizard, to help you easily change drive letters based on your needs.
If you have any questions or suggestions while using MiniTool Partition Wizard, you can contact us at [email protected] for further assistance.
Change Drive Letter on Windows 11 FAQ
About The Author

Position: Columnist
Cecilia has been an editor at MiniTool for two years. She primarily focuses on disk and partition-related content, with particular expertise in disk cloning, partition recovery, and PDF document conversion. She is dedicated to providing users with clear and accurate solutions to help them efficiently resolve common computer problems.
User Comments :