In many situations, we may need to delete an existing volume (it is also called partition in old versions of Windows OS like Windows XP and Server 2003) to free up space or delete all volumes to convert disk from dynamic to basic or from MBR to GPT.
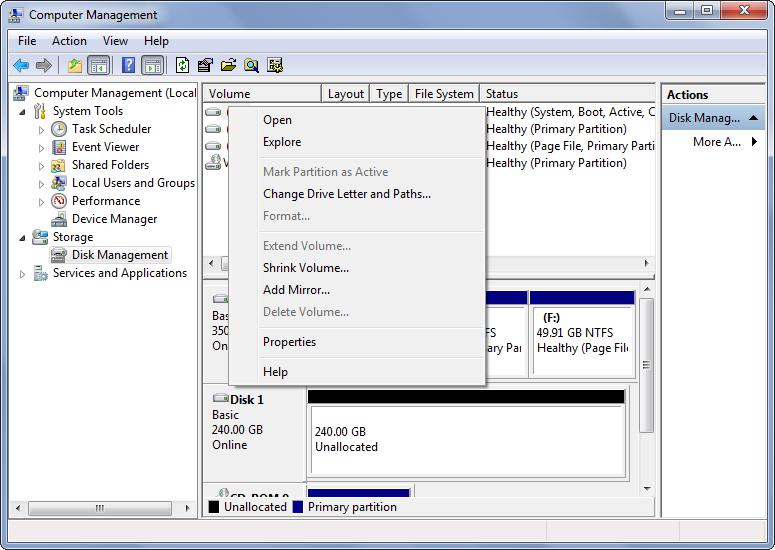
Normally, it is very easy to delete volumes: go to Disk Management utility of Windows, then right click the volume we want to delete, and choose “Delete Volume” feature from the popup menu.
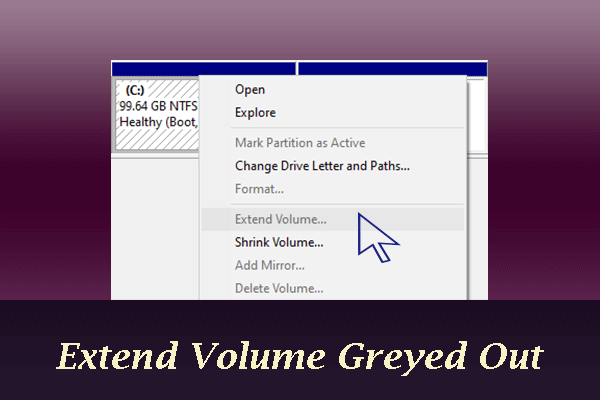
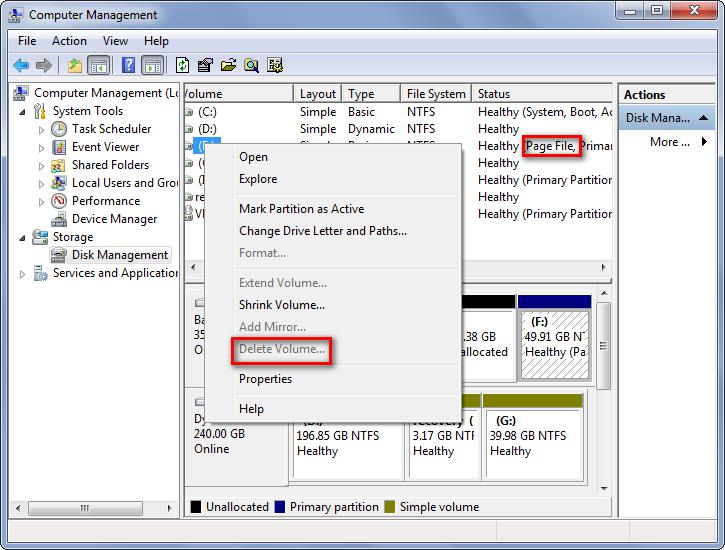
However, when deleting volume C in Disk Management users may encounter the situation where “Delete Volume” feature is grayed out, like these:
Actually, drive C is not the only volume that cannot be deleted in Disk Management, and boot volume, the volume saving page file, crash dump files, or hibernation files, the protected EFI system partition, recovery partitions, OEM partition, and the partition on removable device cannot be deleted in Windows Disk Management, too.
Next, let’s see reasons.
Why Some Volumes Cannot Be Deleted in Disk Management
Why Volume C Cannot Be Deleted
Generally, the volume saving Windows system files is always allocated with letter C by default when we are installing the first operating system. If Windows OS saved in volume C is running, we will be not allowed to delete the volume, because deleting it will result in a lot of errors and disorder.
Actually, we had better say the volume storing Windows OS which is loaded cannot be deleted rather than volume C. For example, if we are dual booting Windows 7 and Windows 8, with Win7 saved in drive C and Win8 in drive D, we are able to delete volume C but cannot delete D when Windows 8 is running.
Why EFI System Volume Cannot be Deleted
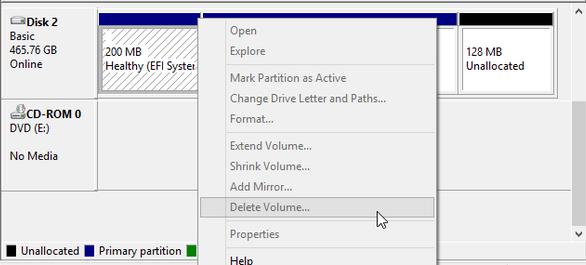
Currently, after we successfully install Windows OS or Mac OS X on a GPT disk of PC, an EFI system partition (ESP for short) may be created, and it isn’t shown in Windows Explorer or Macintosh Explorer. To see it, we have to enter Disk Management or Disk Utility. Commonly we are unable to delete it in Windows (Delete Volume feature is grayed out):
What’s the reason? To answer this question, we need to know what it saves. According to Wikipedia we know:
ESP contains the boot loader programs for all installed operating systems (which are contained in other partitions on the same or other storage device), device driver files for devices present in a computer that are used by the firmware at boot time, system utility programs that are intended to be run before an operating system is booted, and data files such as error logs.
In order to protect all these important files, Windows does not appoint this volume with a drive letter so that it cannot be seen in Windows explore, and also does not allow us to delete it, because deleting it will cause installed systems unbootable.
However, in some situations users are eager to delete it since it takes up some space. For example, users may want to delete the EFI system partition created on the Mac hard drive after uninstalling Mac OS X. At this time, how can they delete the system volume in Windows? The solution will be introduced letter.
Why Recovery Partition Cannot Be Deleted
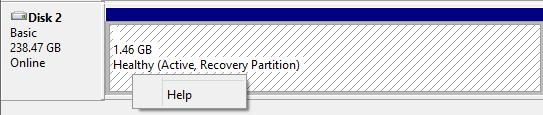
After installing Windows 7, Windows 8, or other systems, we may find that several recovery partitions are created on the system disk, which take up space from several hundred MB to dozens of GB. After right clicking a recovery volume we will find only one feature namely “Help” is available and there is no option to delete it:
What’s the reason?
Recovery partition is created by PC manufacturers rather than Windows OS so that Windows does not provide any function to operate it except for “Help”. It saves files and driver programs which can help restore our computer to the state when Windows was installed at the beginning of time. Therefore, it is very necessary to keep it.
However, if you own Windows installation disc or have created a backup for system, there is no need to keep this partition especially on small capacity hard disks like SSD. After all, a lot of space is occupied.

Why OEM Partition Cannot Be Deleted
OEM partition is also created by PC manufacturers so that Windows Disk Management does not provide a function to delete it:

It saves the backup of system one-key restoration, and the so called one key restoration is completed in this volume. That is to say without the volume system recovery will be impossible. However, if you have backed up system, there is also no need to reserve the volume.
Why Volume Saving Crash Dump, Hibernation and Page Files Cannot Be Deleted
First of all, let’s see what crash dump file, hibernation file, and page file are.
#1. Crash Dump File
In the event of a system crash (rather than any application failure), information about the state of the operating system will be captured, and this kind of information is called crash dump file. Once these files are lost, it will be quite difficult to detect errors of our computer, which may be the reason why Windows does not allow us to delete the volume saving crash dump files. Settings for dump files are configured in Control Panel and saved in drive C by default. Here we take 32 bit Windows 7 for example:
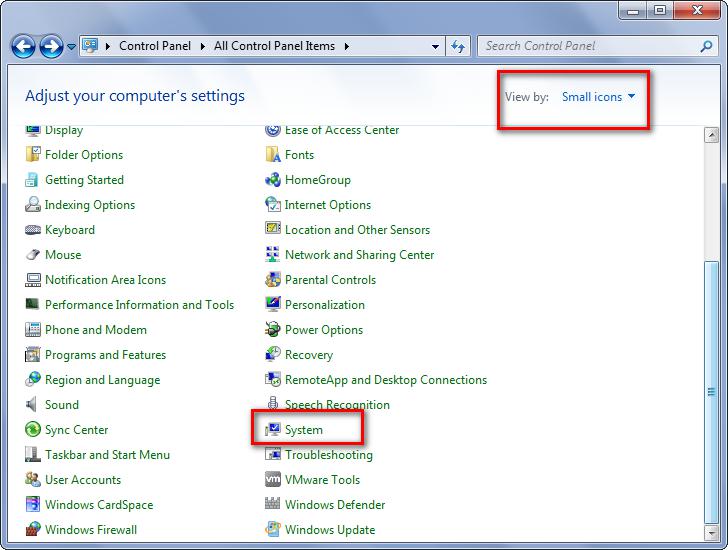
Go to Control Panel. Choose View by small icon and select “System”.
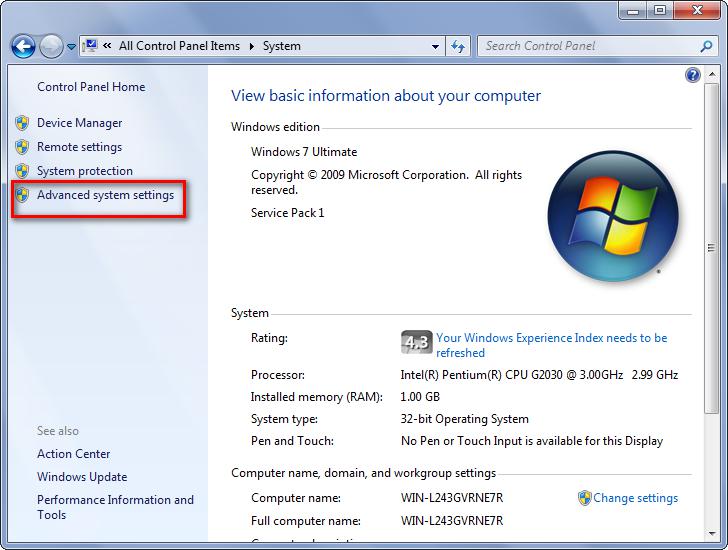
Tap on Advanced System Settings.
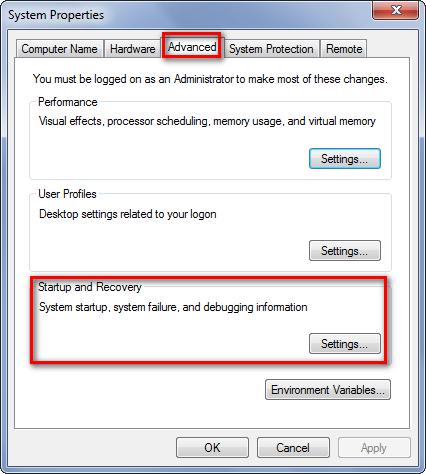
Under Advanced menu choose “Settings” under Advanced -> Startup and Recovery.
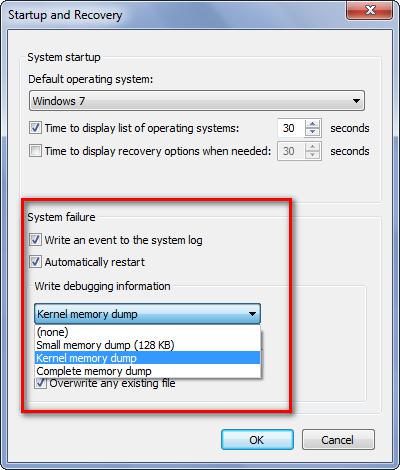
Now we can see details of crash dump file configurations.
#2. Page File
Page file is a form of virtual memory on our hard drive. It is always located in drive C but can be moved to another drive, like drive D or F:
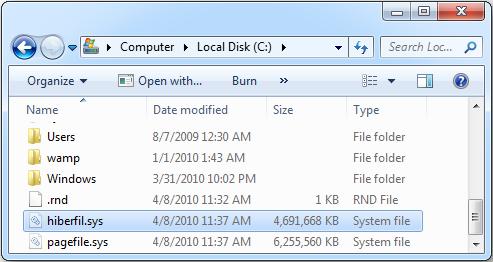
We are unable to see page files unless we disable the option “hide protected operating system files” in Folder Options. When our RAM is full, Windows will move some of the data from RAM back to hard drive, placing it in the page file.
Disabling the page file can result in some errors. If all available memory is used up, running programs will start crashing since they cannot be swapped out of the RAM into page file. Moreover, apps which require a large amount of space may refuse to run when RAM is out of space. Therefore, Windows does not allow us to delete the volume which is saving page files, I think.
#3. Hibernation File
there are 2 power management modes: sleep mode and hibernate mode, and the hibernate mode uses the hiberfil.sys file to store the current state of the PC. The very file is located in the root folder of the volume where the operating system is installed, and Windows Kernel Power Manager reserves the file when we are installing Windows. It is managed by Windows so that we are unable to delete the volume saving hibernation file via common ways.
Why Partition on Removable Device Cannot Be Deleted
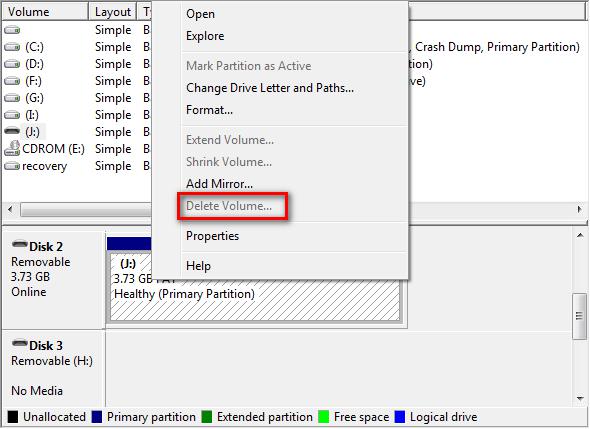
As we know, USB flash drive, SD card, and optical disc are removable devices (whether the particular device is fixed or removable is determined by driver). Such storage media either do not require partitioning, or should contain only one partition since using more than one partition confuses the removable Storage service.
Deleting the unique partition on the removable device will make the entire device unavailable, which may be the reason why Windows does not allow us to delete volume on removable device.
Actually, though we are not allowed to delete these volumes in Disk Management, there are still solutions.
Ways to Delete Special Volumes
How to Delete Volume on Removable Device
To do such a deletion, we can make use of “clean” command in Diskpart. In this test, I’m going to delete the partition on a USB flash drive.
- Run Diskpart as administrator to get the main window:
- Type list disk → select disk 1 → clean successively, and each type ends with pressing on Enter key. (Here disk 1 is the USB flash drive.)
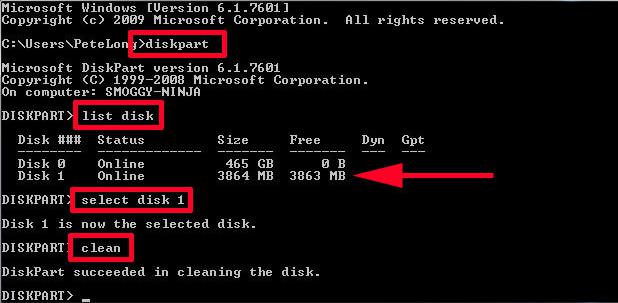
After Diskpart shows it succeeded in cleaning the disk, the entire device will be unallocated in Disk Management. At this time, we are able to create a volume taking up all space of the removable device.
How to Delete OEM Partition and Recovery Partition
This kind of deletion can also be done in Diskpart.
- Type list disk and press on enter, then type select disk N (N is the number of the disk where OEM partition or Recovery partition is located) and press on Enter.
- Type list partition and press on Enter.
- Type select partition N (now N is the number of OEM partition or recovery partition) and press on enter.
- Type delete partition override and press on Enter, and at last type exit and press on Enter to quit from Diskpart.
How to Delete System Volume, Boot Volume, and Volume Saving Page File, Hibernation File, or Crash Dump File
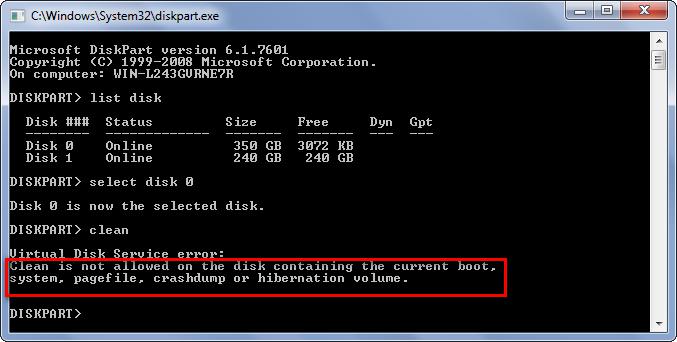
Unlike removable devices, we are unable to clean hard disks with the “clean” command if the disk saves the current boot volume, system volume, etc.
But there are several solutions.
- Dismount the hard disk we want to operate and connect it to another computer. Then, delete volumes in Disk Management of that computer.
- If you have more than one operating system, boot the one saved in the volume which will not be deleted, and then delete the target one in Disk Management.
- Delete volumes by using third party partitioning programs, which work to any type of volume mentioned in this post.
Professional bootable partition software is capable of deleting a specified volume. Here we suggest using MiniTool Partition Wizard Pro.
Steps to Delete Volume with MiniTool Partition Wizard
- Run this program to get its starting interface and then follow this guide to create a bootable USB drive.
- Now boot your PC with the USB drive.
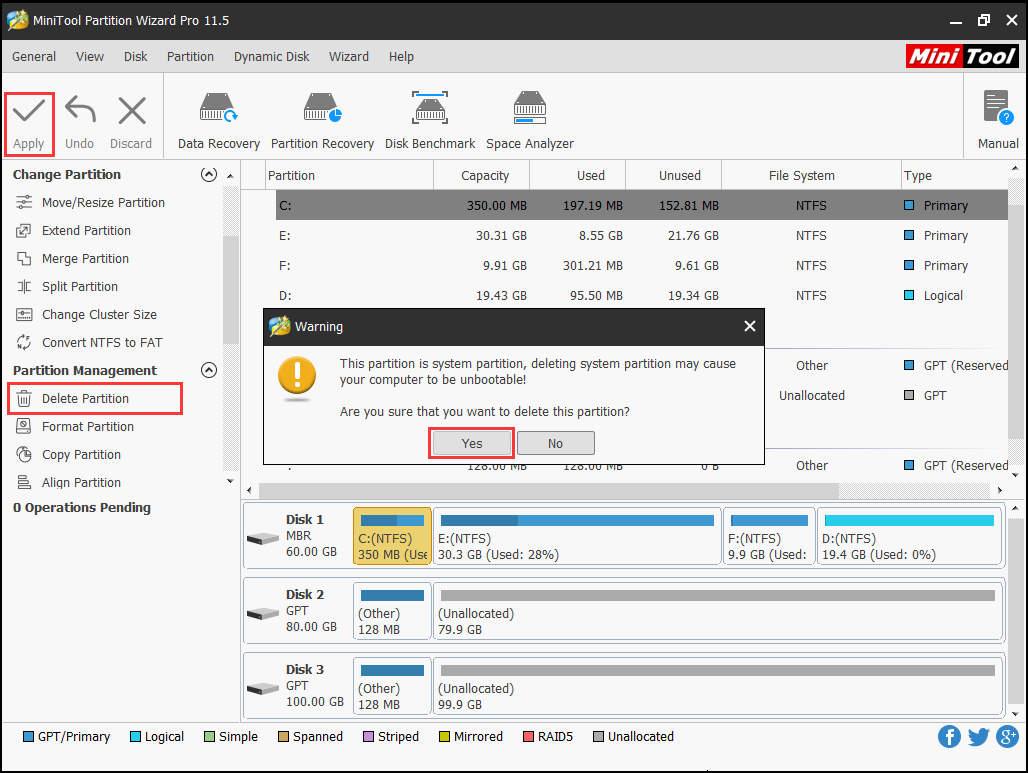
- Select the partition which needs deleting and choose “Delete Partition” feature from the left side. Here, take deleting volume C for example. Since volume C saves Windows system files, MiniTool Partition Wizard will ask us to confirm whether to delete it, and we only need to click “Yes”.
- Now we can see volume C has become an unallocated space. At this time, please click “Apply” button to perform the change. However, as drive C saves Windows which is running now, we will be asked to restart computer. Please do as told, and then all changes will be performed in boot mode.
Now users would know how to delete volumes which cannot be deleted in Disk Management. If you are troubled by this kind of problems, try one of solutions introduced in this post. Of course, you can also make use of MiniTool Partition Wizard Bootable CD, which is capable of operating hard disk without starting Windows.
For any questions while using MiniTool Partition Wizard, don’t hesitate to contact us or send an email to [email protected].
About The Author

Position: Columnist
Rodin is an enthusiastic IT writer focusing on Windows trends, disk partition management and data recovery. She loves to write and share her idea about the useful tips and tricks on personal computers' maintenance. If you are looking for methods to improve your computer performance, manage hard drives and recover data from different devices, Rodin can provide reliable solutions for data management.
User Comments :