Are you looking for effective solutions to the Windows update error 8024400A? If so, you are at the right place. Here, this post from MiniTool Partition Wizard introduces how to fix this error in detail. You can take a look.
Microsoft releases Windows updates frequently to add new features or fix the found bugs. In some cases, you may need to install such updates to improve your Windows. However, what bothers you during a update is that you may randomly fail to complete this process with errors like Windows update error 8024400A.
How can you fix the Windows update 8024400A error? There are several solutions available. You can pay attention to the following content and choose the suitable solution to sort your problem out.
MiniTool Partition Wizard DemoClick to Download100%Clean & Safe
Solution 1: Run the Windows Update Troubleshooter
When you run into the Windows update error 8024400A, you can first try to fix it with the Windows Update troubleshooter. It’s a Windows built-in utility that always helps repair plenty of issues related to Windows updates. Here’s a detailed guide provided.
Step 1: Open Windows Settings by pressing Windows + I. Then select Update & Security.
Step 2: Go to Troubleshoot and then click Additional troubleshooters from the right side.
Step 3: In the next window, click Windows Update and then click Run the troubleshooter.
Step 4: After that, this troubleshooter will automatically detect problems associated with Windows updates. If any are found, you should follow the on-screen instructions to fix them.
Step 5: Once done, restart your PC and re-try the Windows update to see if the Windows update error code 8024400A disappears.
Solution 2: Temporarily Disable the Antivirus
The third-party antivirus software installed on your PC and Firewall may sometimes recognize the update as a threat and interfere with this process, causing the Windows update error 8024400A. Therefore, to avoid this error, you’d better temporarily disable the antivirus.
Solution 3: Run SFC and DISM Scans
Corrupted or missing system files may lead to the Windows update 8024400A error as well. On this occasion, it’s recommended that you use the SFC and DISM utilities to repair these files and resolve this annoying error. To do this, follow the steps below.
Step 1: Right-click the Start icon and select Run.
Step 2: Type cmd in the Run dialog box and then press Ctrl + Shift + Enter to run Command Prompt as an administrator.
Step 3: In the elevated Command Prompt, type sfc /scannow and press Enter.
Step 4: Wait for the process to end. Then restart your PC and open the elevated Command Prompt again.
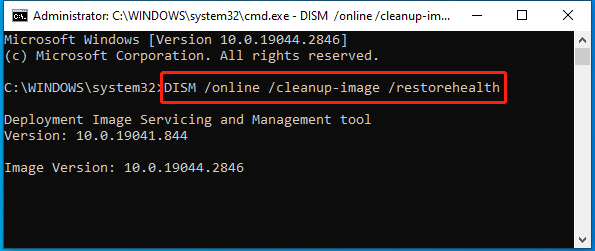
Step 5: Type DISM /online /cleanup-image /restorehealth and press Enter to execute this command.

Step 6: Once the scan ends, restart your PC to see if the Windows update error 8024400A persists.
Solution 4: Reset Windows Update Components
Resetting Windows Update components may help you get rid of the Windows update error code 8024400A too. If you have no idea how to do this, you can follow this post: How to Reset Windows Update Components in Windows 11/10?
When you encounter the Windows update error 8024400A, you can try to fix it with the above methods. If you have any other great solutions to this error, you can share them with us in our comment part below.

User Comments :