According to user reports, the “cloned error the external backing provider not recognized” often occurs after they fail to clone a system drive to SSD via a disk clone tool like DiskGenius. When they open Disk Management or Computer Management, the error message pops up. Here’s a user report from the Windows 11 forum:
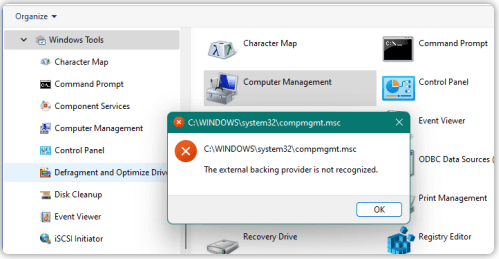
I’ve been trying to migrate from my original 500GB system NVMe drive to a new 1TB NVMe. I’m using DiskGenius FREE. The operation completes and I swap the two drives. Everything looks good, but when I try to open Computer Management, Disk Management, or some other “Windows Tools” on the new 1TB target drive I see this error message: The external backing provider is not recognized.https://www.elevenforum.com/t/problem-migrating-the-system-drive-from-my-source-nvme-to-a-new-target-nvme-the-external-backing-provider-is-not-recognized.23214/
The error can be caused by some possible causes, like insufficient space on the target drive, corrupted system files, conflicting external devices, and outdated disk drivers. Here we summarize 4 feasible troubleshooting methods after analyzing extensive user reports. Let’s start trying.
Solution 1. Use MiniTool Partition Wizard to Migrate the System NVMe Drive
First of all, we highly recommend you use an alternative tool to DiskGenius. MiniTool Partition Wizard is a powerful disk migration tool that can clone hard drive, migrate only OS to SSD, and copy partitions. With this tool, you can even migrate the system drive to a smaller drive without reinstalling OS. For that:
MiniTool Partition Wizard DemoClick to Download100%Clean & Safe
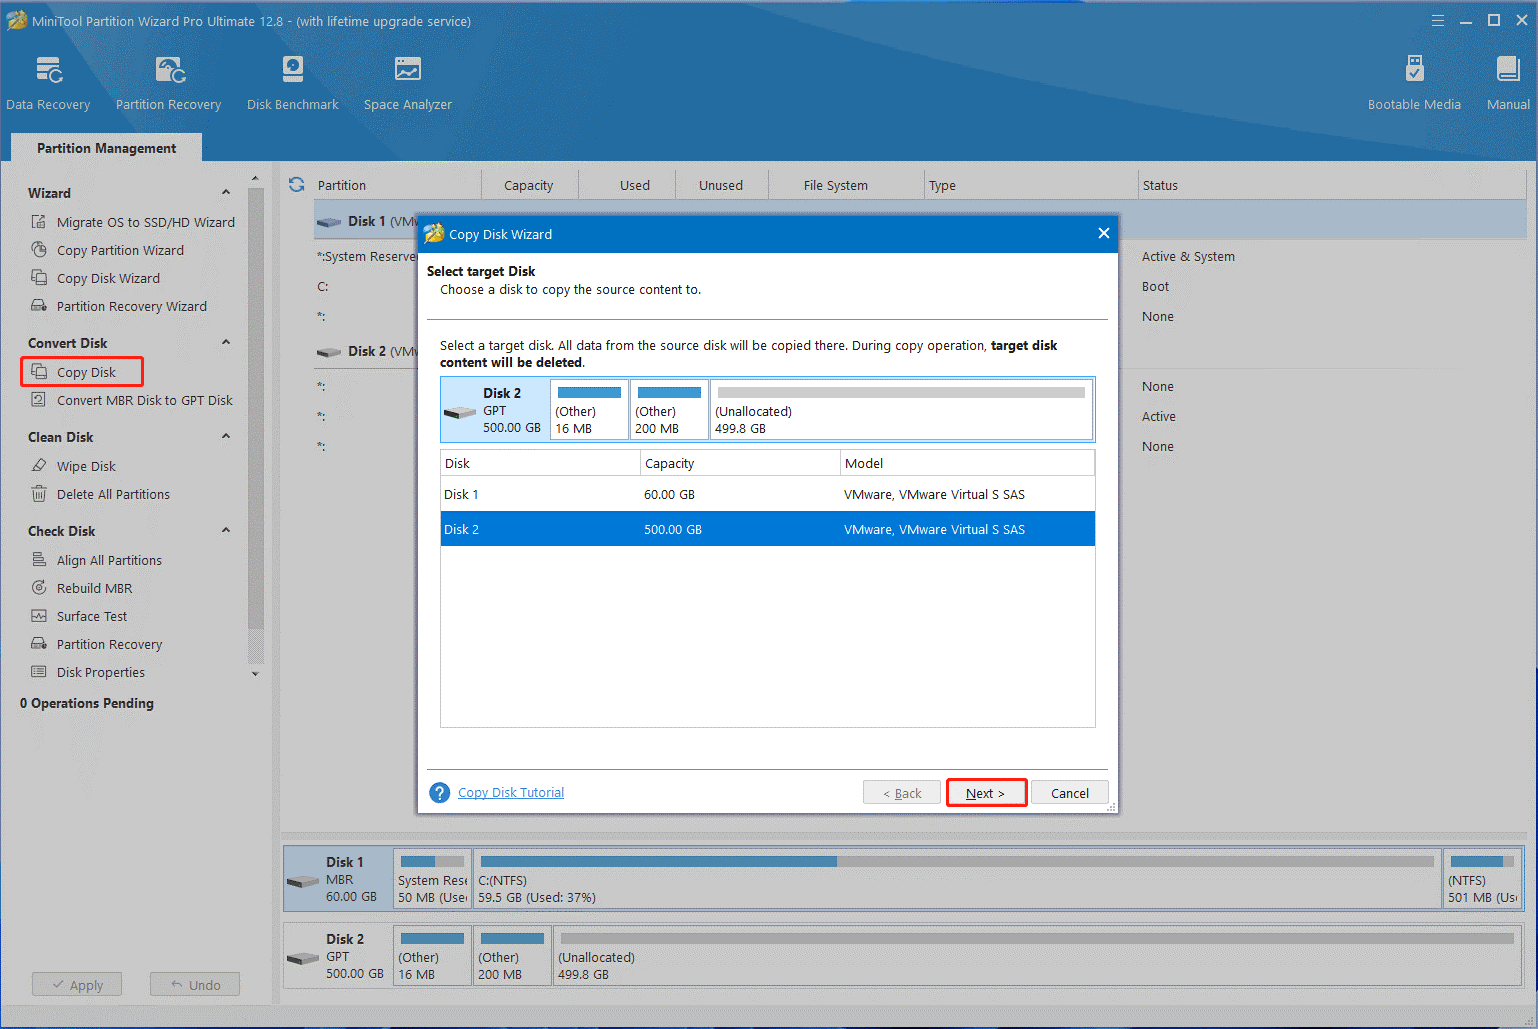
Step 1. Open the MiniTool program to enter its main interface, select the system drive from the disk map, and click on Copy Disk from the left action panel.
Step 2. In the pop-up window, select the target SSD and click on Next. Then click on Yes to further confirm it.
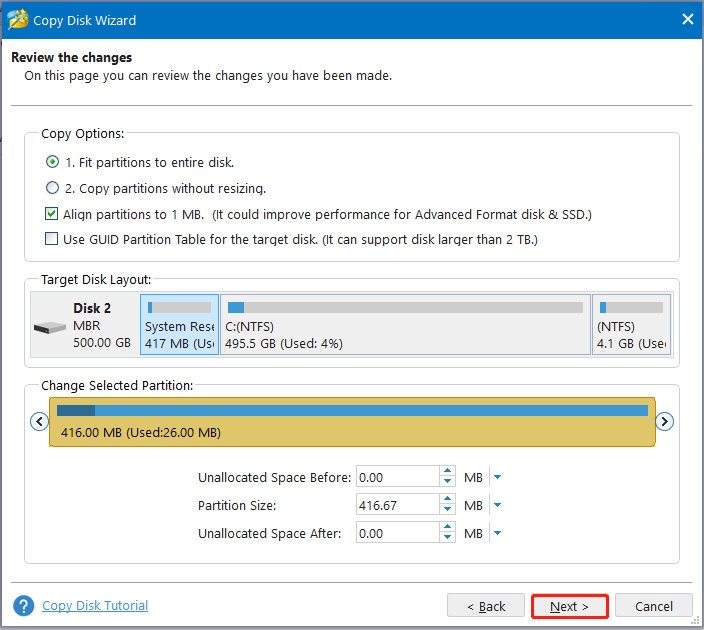
Step 3. Select copy options based on your preference and click on Next. Here make sure you tick the box of Fit partitions to the entire disk, which can adjust the unallocated space on the drive and help clone it to a smaller SSD.
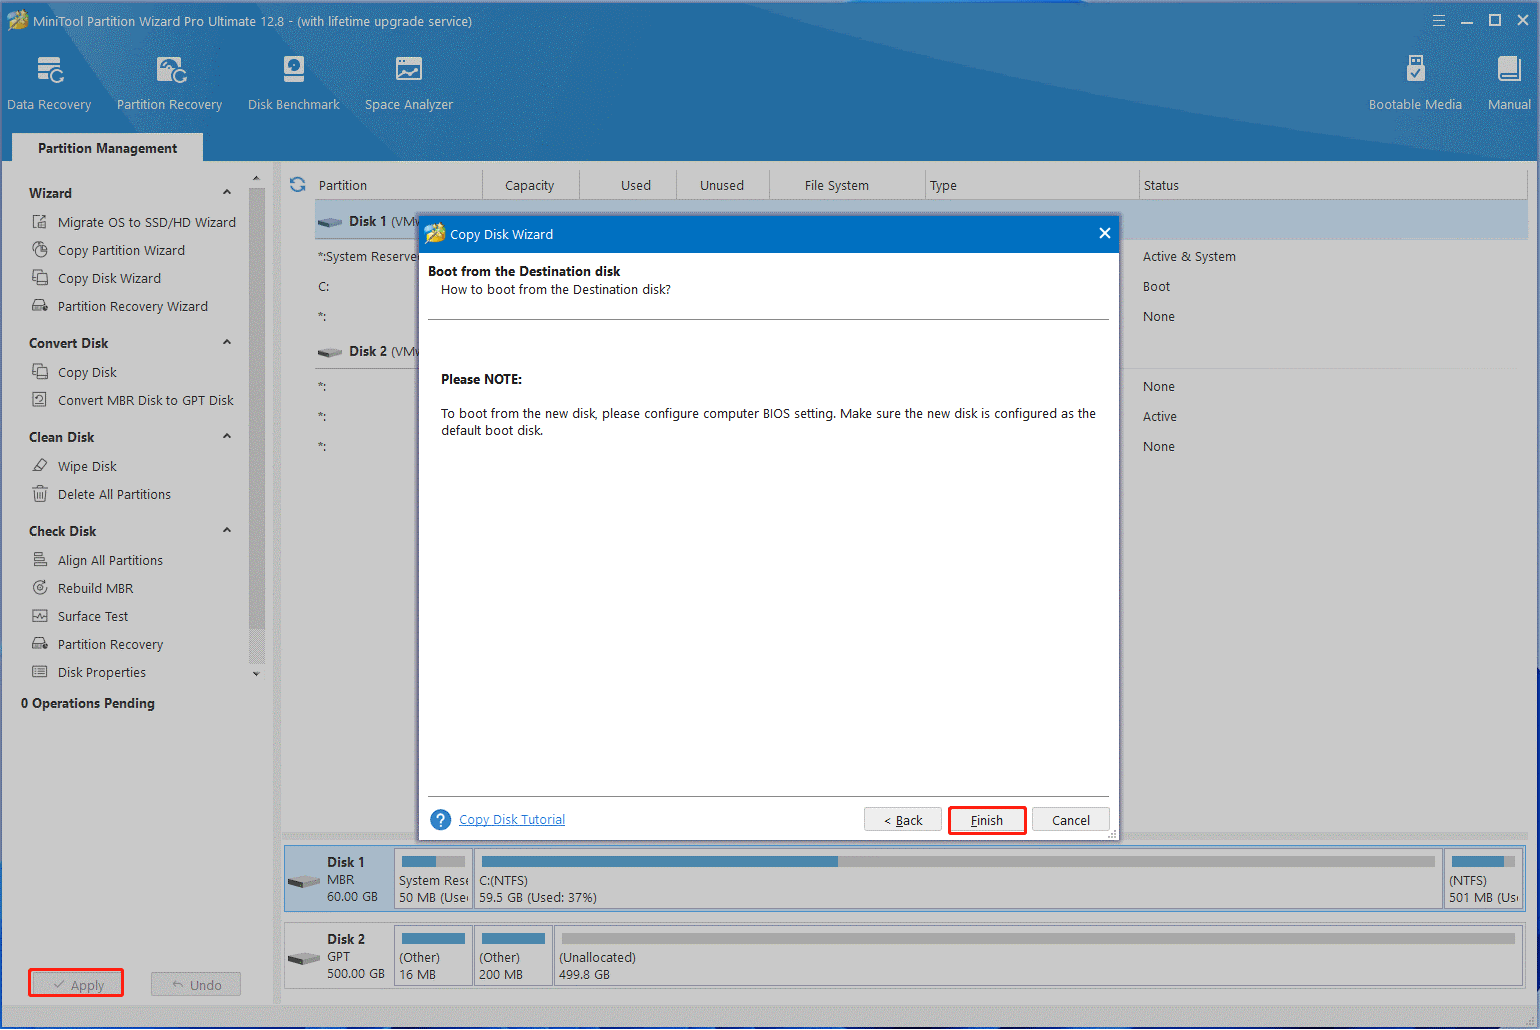
Step 4. Read the Note information and click on Finish > Apply to execute the cloning operation.
Solution 2. Run SFC or DISM Scan
If some important system files are corrupted or missing, you may receive the “The external backing provider is not recognized error when migrating system drive”. In this case, you can run SFC or DISM to repair the system files.
Step 1. Type cmd in the Search box, and then right-click Command Prompt and select Run as administrator. Then click Yes in the UAC window to further confirm it.
Step 2. Type the sfc /scannow command in the elevated command prompt and hit Enter.

Step 3. If the SFC tool fails to work, you can try using the DISM tool. Run the following commands in order. After that, restart your computer and migrate OS again to see if the computer management error the external backing provider is not recognized disappears.
DISM /Online /Cleanup-Image /CheckHealth
DISM /Online /Cleanup-Image /ScanHealth
DISM /Online /Cleanup-Image /RestoreHealth
Solution 3. Remove Any External USB Devices
Some users from the Windows 11 forum reported that the “cloned error the external backing provider not recognized” is also related to conflicting devices. If you are using any external devices, like a mouse, keyboard, or printer, disconnect all of them from your PC. In addition, you can try disabling the third-party antivirus software temporarily when cloning and see if it works.
Solution 4. Reinstall or Update the Disk Driver
Sometimes outdated device drivers are also responsible for the computer management error the external backing provider is not recognized. You can try updating or reinstalling the disk driver and see if it works.
Step 1. Press the Win + X keys to open the context menu and select Device Manager.
Step 2. In the pop-up window, expand the Disk drives category, right-click the driver, and select Update driver.
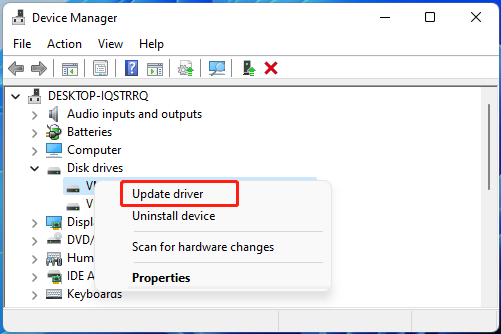
Step 3. Select the Search automatically for drivers option and follow the on-screen prompts to update the driver. If the external backing provider is not recognized error when migrating system drive persists, you can select Uninstall device to uninstall the disk driver and restart your PC to automatically reinstall a new driver for the disk.

User Comments :