How to Roll Back Windows 11
If you update Windows 11 or upgrade from Windows 10 to Windows 11 recently but you are not satisfied with the installed version, you can go back to the previous version of Windows in 10 days.
How to roll back Windows 11? Here is the guide:
- Press Windows + I keys to open Settings.
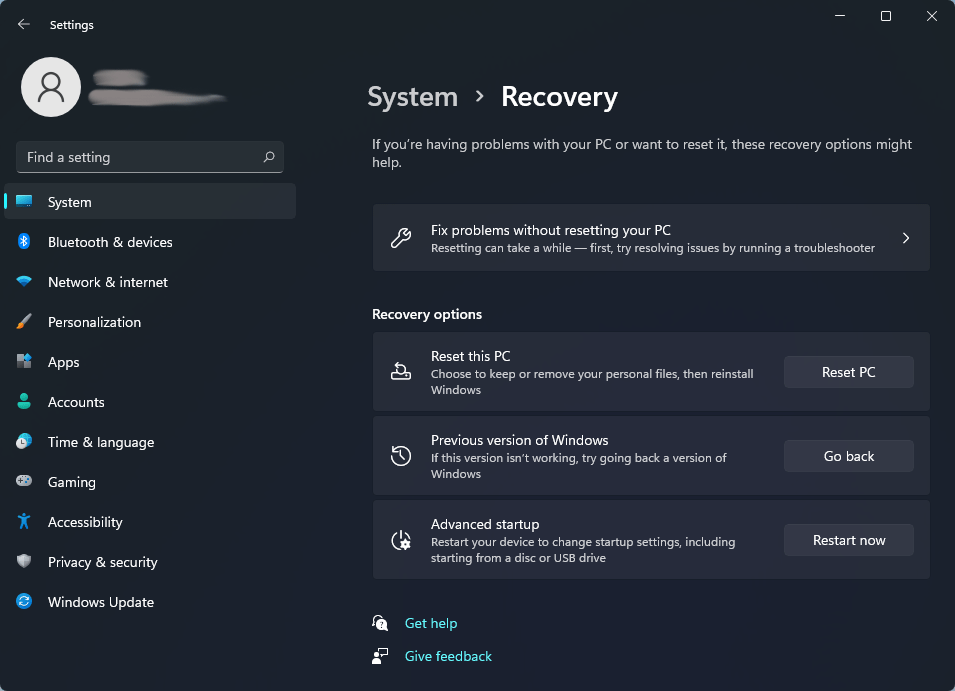
- Go to System > Recovery.
- Under the Recovery options section, in the Previous version of Windows settings, click the Go back button.
- A window will pop up asking you to tell it why you are going back. You just need to select any of the reasons available. Then, click Next. Then, follow the wizard to roll back Windows 11.
After rolling back Windows 11, you’ll lose any changes made to settings after installing the latest build and have to reinstall some apps and programs.
How to Roll Back Windows 11 Manually
As mentioned above, the Windows rollback period is 10 days. If you miss the 10-day time frame, the Go back button will be grayed out. In this case, you need to roll back Windows 11 manually.
In addition, if your PC won’t boot, you can also use the following methods to roll back Windows 11.
#1. Uninstall Windows 11 Updates
If the reason why you want to roll back Windows 11 is that you want to uninstall Windows 11 update but the Go back button is not available, you can do that through the steps below:
- Open Control Panel and click Uninstall a program under Programs.
- Click View installed updates in the left panel.
- Right-click the update you want to delete and click Uninstall.
If your PC won’t boot, you can follow the guide below to uninstall Windows 11 updates.
- Power on your PC. As soon as you see the Windows logo appear, press and hold the computer’s power button until it turns off. Repeat this process two times and then turn on your PC on. You will enter WinRE.
- When the Automatic Repair window appears, click the Advanced options button, and then click Troubleshoot.
- Click the Advanced options icon, select Uninstall Updates, and then select Uninstall latest quality update or Uninstall latest feature update.
#2. Go Back to Windows 10
If the reason why you want to roll back Windows 11 is that you want to go back to Windows 10 but the Go back button is not available, you can do that through the steps below:
- Download the Windows 10 Media Creation tool from Microsoft.
- Insert a USB drive of at least 8GB to your computer.
- Run the Windows 10 Media Creation tool and follow the wizard to make a Windows 10 installation USB drive. During this process, you need to choose Create installation media (USB flash drive, DVD, or ISO file) for another PC when it asks you what you want to do.
- Shut down your computer.
- Power on your computer and press the BIOS key when the PC logo appears. You will enter the firmware. Choose the USB drive as the boot device and then boot your computer.
- Follow the wizard to install Windows 10. During this process, you need to choose Upgrade: Install Windows and keep files, settings, and applications when it asks you which type of installation you want.
To get the detailed steps, you can read this post: How to Install Windows 10 on a New Hard Drive (with Pictures).
Bottom Line
MiniTool Partition Wizard is an all-in-one disk management tool. It can clone a hard drive, migrate OS, and recover data. If you have this need, you can try it.
MiniTool Partition Wizard DemoClick to Download100%Clean & Safe
About The Author

Position: Columnist
Linda has been an editor at MiniTool for seven years. She continuously learns about computers and puts her knowledge into practice. Moreover, she is particularly knowledgeable in disk management, data recovery, system installation, and PDF editing. Her articles typically reference multiple examples or are based on her own experience, providing users with the most suitable solutions.
User Comments :