Have you accidentally deleted files or lost data on your Dell laptop? Fear not! This comprehensive guide from Partition Magic will walk you through various methods to recover data from Dell laptop. Pick one method to recover deleted data from Dell laptop now!
Reasons for Data Loss on Dell Laptop
In the digital age, data loss can be a nightmare, especially when it involves important files or documents stored. Data loss on Dell laptop can be caused by many reasons. Here are a few common reasons:
- Accidentally delete files or format your drives.
- The laptop gets infected or damaged.
- There are bad sectors on the hard drives.
- The power fails suddenly.
Are you worried about how to recover data from Dell laptop? Don’t worry. There are effective methods available to recover data from Dell laptop and prevent future data loss on the device.
How to Recover Data from Dell Laptop
Here we introduce 6 methods to recover data from Dell laptop, including using a data recovery tool like MiniTool Partition Wizard, and utilizing the Windows built-in tools like Recycle Bin, Backup and Restore, File History, Windows File Recovery, and System Restore.
Method 1. Recover Data from Dell Laptop via MiniTool Partition Wizard
How to recover data from Dell laptop? Well, an effective and reliable way to perform Dell laptop data recovery is to use a piece of professional data recovery software. MiniTool Partition Wizard is such a tool.
Its Data Recovery feature can help you recover various file types including documents, photos, videos, audio, music, emails, archives, and other files from storage media like internal/external hard drives, USB drives, SD cards, SSDs, etc. Besides, MiniTool Partition Wizard also enables you to recover lost or deleted partitions.
Additionally, this free partition manager allows you to perform various operations related to disks/partitions. Specifically, it allows you to create/format/resize/move/extend/delete/copy partitions, convert MBR to GPT, rebuild MBR, clone a hard drive, migrate OS to SSD/HD, etc.
Download and install MiniTool Partition Wizard on your PC, and then use it to recover data from Dell laptop with the steps below.
MiniTool Partition Wizard DemoClick to Download100%Clean & Safe
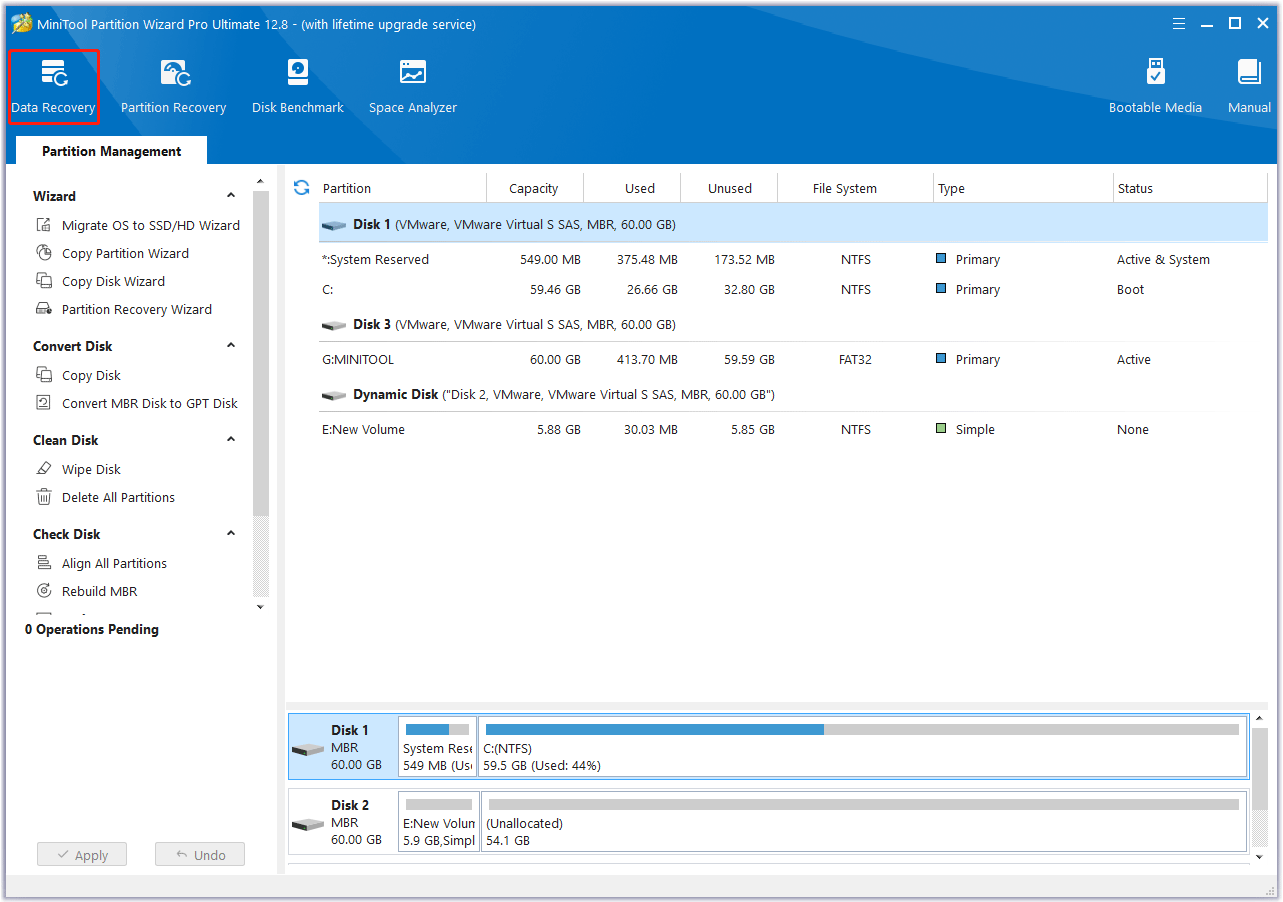
Step 1: Launch MiniTool Partition Wizard to enter its main interface. On the interface, click on Data Recovery on the top toolbar.
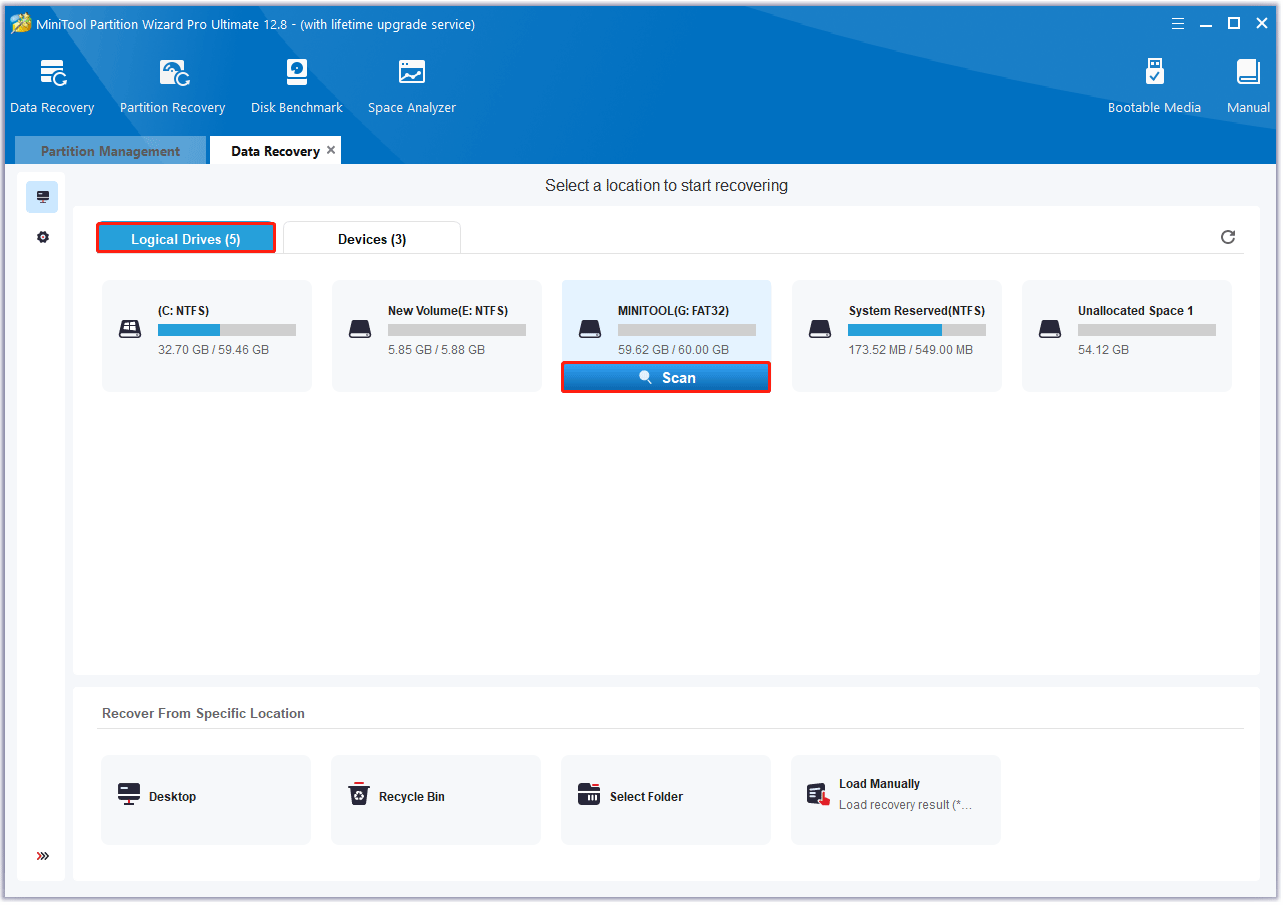
Step 2: In the Data Recovery wizard, under the Logical Drives section, hover the cursor over the target partition and click on Scan. You can also click on Devices and then scan an entire hard drive to recover data.
Step 3: After that, this software will scan the selected place to find the lost files. If you find the wanted files during the scanning process, you can click on Pause or Stop to pause or end the scan and save the data.
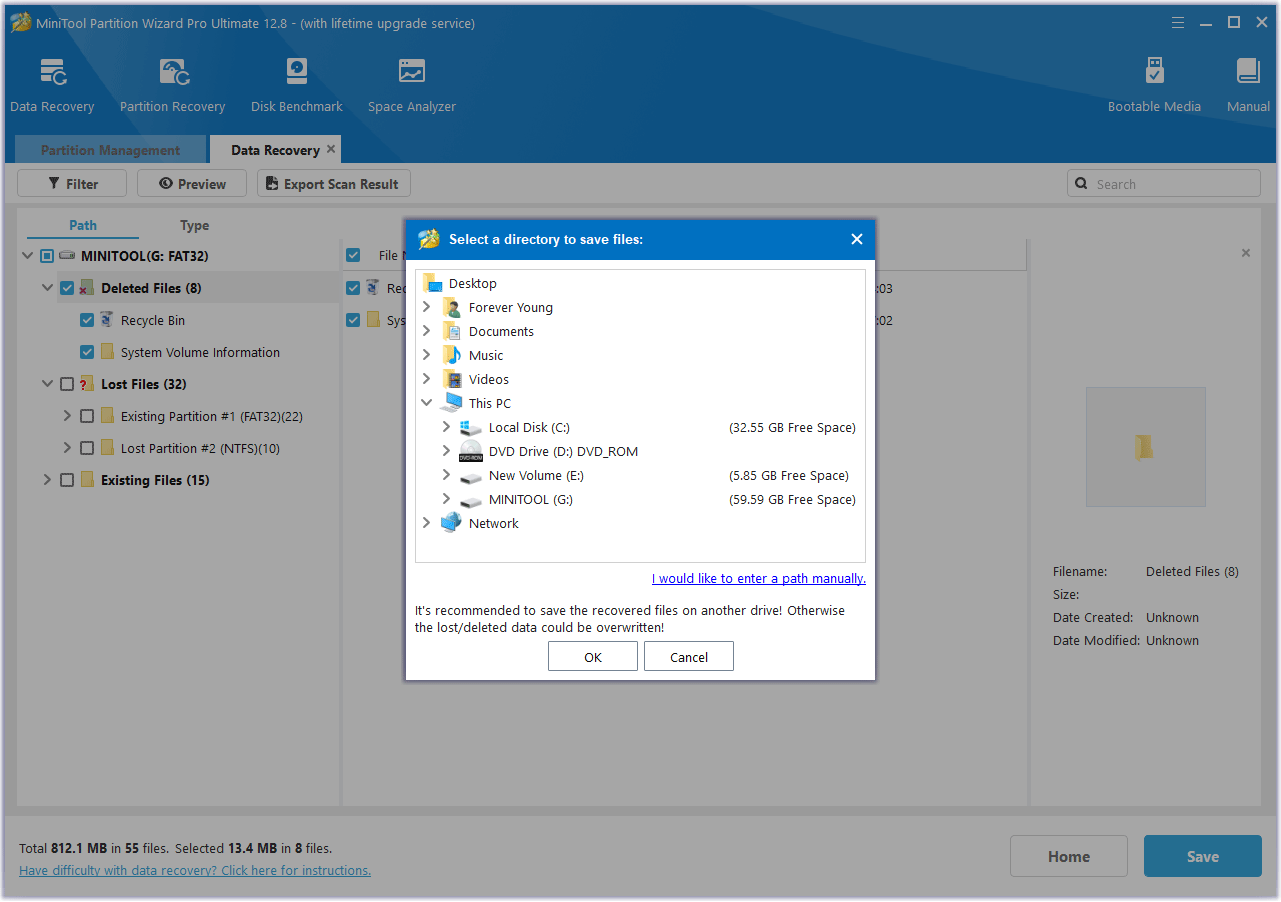
Step 4: Check all the files you want to recover and then click on Save.
Step 5: In the pop-up window, choose a directory to store the selected files and click on OK. You’d better choose a different drive to save these files. Or, the lost/deleted data could be overwritten.
Also read: [Full Guide] How to Recover Data from Sony Vaio in 5 Ways
Method 2. Recover Data from Dell Laptop via Recycle Bin
If you accidentally delete important data, just recover deleted files from Dell laptop via Recycle Bin. Generally speaking, files will be recycled to the Recycle Bin after being deleted. When you encounter data loss, follow the steps below to perform Dell laptop data recovery via Recycle Bin.
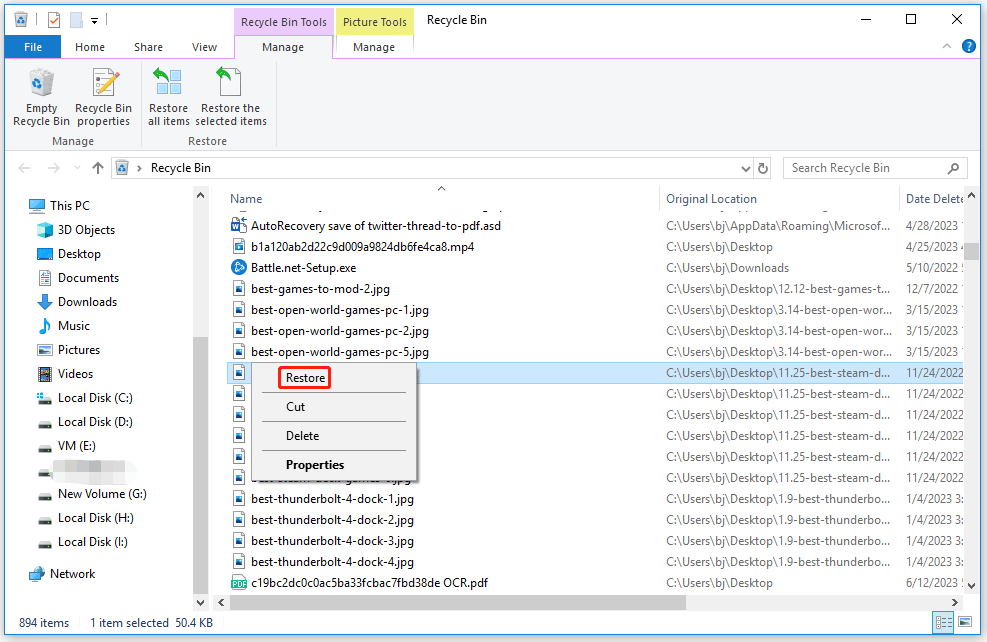
Step 1: Find and double-click Recycle Bin on your PC to open it.
Step 2: Look for the deleted files you want to restore. You can also type a file name into the Recycle Bin search box to find it directly.
Step 3: Right-click on the files and choose Restore from the context menu. Alternatively, you can also drag the files out of Recycle Bin directly to put them back in their original location.
Method 3. Recover Data from Dell Laptop via Backup and Restore
If you have previously set up Windows Backup, you can use it to recover deleted files from Dell laptop. To recover files from a backup, follow the steps below:
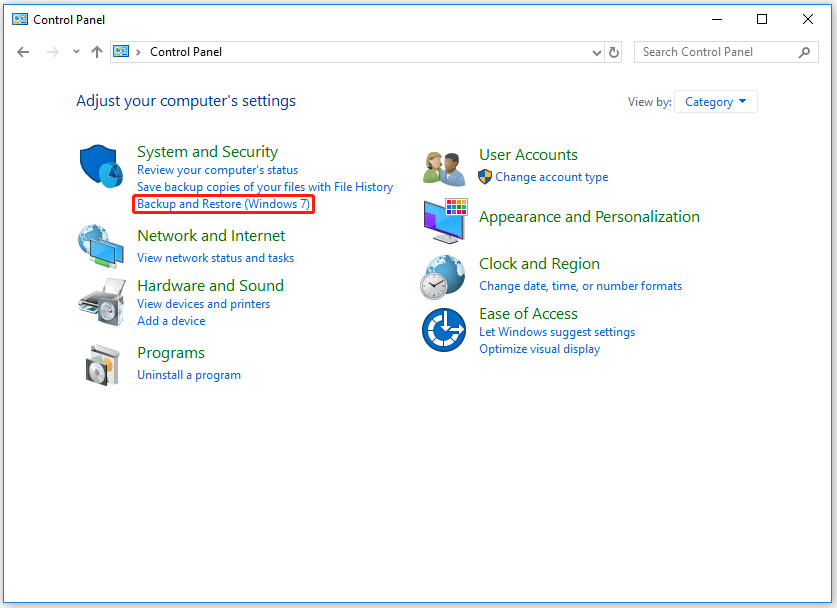
Step 1: Type control panel in the Search bar and select Control Panel from the list of results to open Control Panel.
Step 2: In the Control Panel window, set the View by to Category, and then click on the Backup and Restore (Windows 7) link under the System and Security section.
Step 3: Click on Select another backup to restore files from and choose your backup.
Step 4: Click on Next and follow the instructions to complete the recovery process.
Method 4. Recover Data from Dell Laptop via File History
File History is another Windows built-in tool that helps you recover deleted files from Dell laptop. File History is inactive by default when Windows is installed. If you have enabled it, you can use it to recover lost data. To avoid losing data again, then you need to manually turn on File History in advance.
To recover lost data using File History, you can follow the steps below:
Step 1: Open Control Panel again. Then click File History.
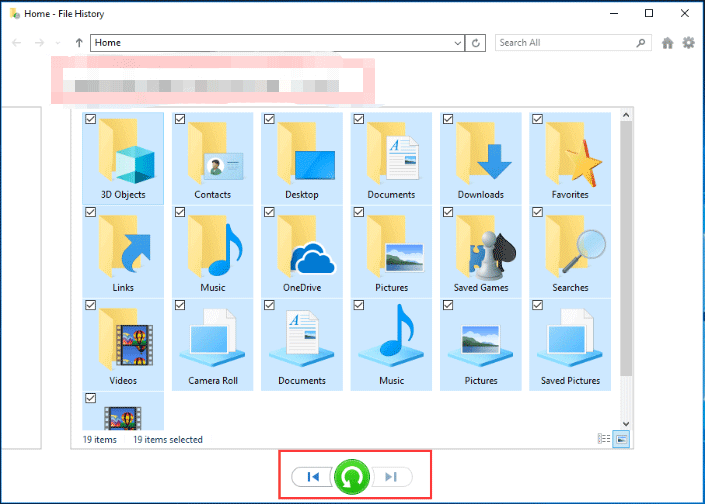
Step 2: Select Restore personal files.
Step 3: In the File History backups window, find and select the file or folder you want to restore, and click on the green Restore button to restore the selected file or folder to its original location.
If you have backed up your data using Dropbox or OneDrive, you can refer to these articles to recover data:
Method 5. Recover Data from Dell Laptop via Windows File Recovery
Windows File Recovery is a command-line utility that comes with Windows 10/11. It enables you to recover deleted files from Dell laptop.
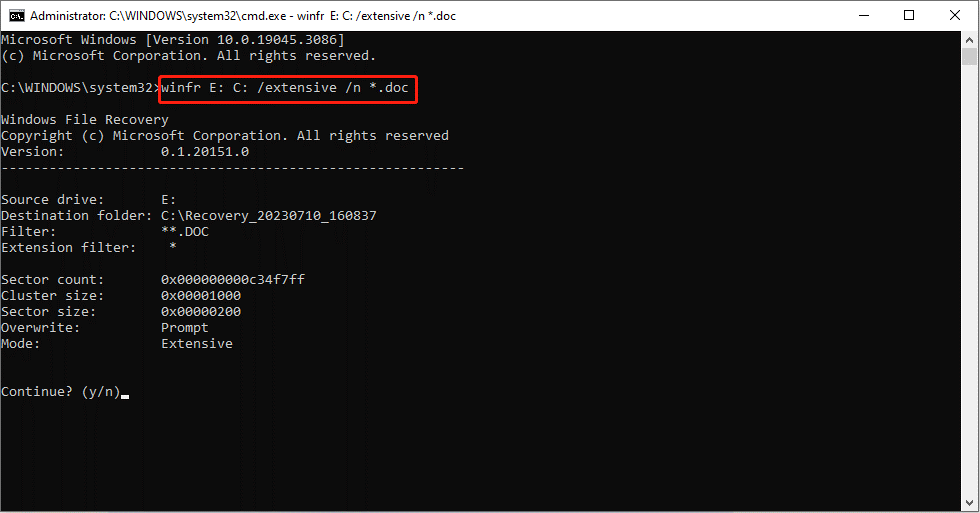
Step 1: Type Windows file recovery in the search box. Then open the program by clicking Windows File Recovery under Best match.
Step 2: In the elevated Command Prompt window, specify the source drive, search for the deleted files, choose the destination drive for the recovered files, and choose switches based on the following basic command line. You need to replace these parameters with the actual ones. Then press Enter to execute the operation.
winfr source-drive: destination-drive: [/mode] [/switches]
Step 3: Wait for the finish of the process.
Also read: Windows File Recovery Stuck at 99%? Here’re 5 Fixes
Method 6. Recover Data from Dell Laptop via System Restore
If you had created a restore point before the Dell laptop data loss occurred, you can perform Dell laptop data recovery by restoring the system to an earlier state.
Step 1: Type control panel in the Search bar and select Control Panel from the list of results to open Control Panel.
Step 2: Find and click Recovery, and then click on Open System Restore.
Step 3: Then, a new window will pop up telling you that the system restore will not affect any of your documents, pictures, or other personal data. However, recently installed programs and drivers may be uninstalled. Just click on Next to continue.
Step 4: Based on your needs, select a restore point and click on Next.
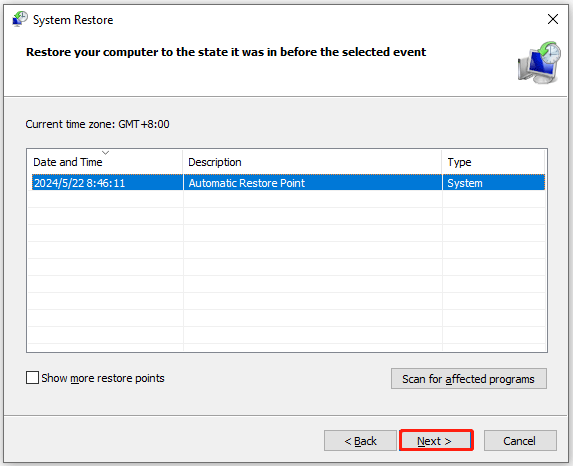
Step 5: In the next window, confirm your restore point and click on the Finish button to save the changes. After some time, your system will be restored to the selected point. Then check whether your Dell laptop data is recovered.
How to Recover Data from Dead Dell Laptop
What if the Dell laptop you want to perform data recovery on crashes/freezes? Can you recover data when you cannot boot your computer? Our answer is yes. In this case, MiniTool Partition Wizard can help you recover data as well.
MiniTool Partition Wizard Bootable Edition can help you recover data from dead Dell laptop. Here are detailed steps:
MiniTool Partition Wizard DemoClick to Download100%Clean & Safe
Step 1: Make a bootable USB drive on a working computer.
- Insert a USB drive into another working PC.
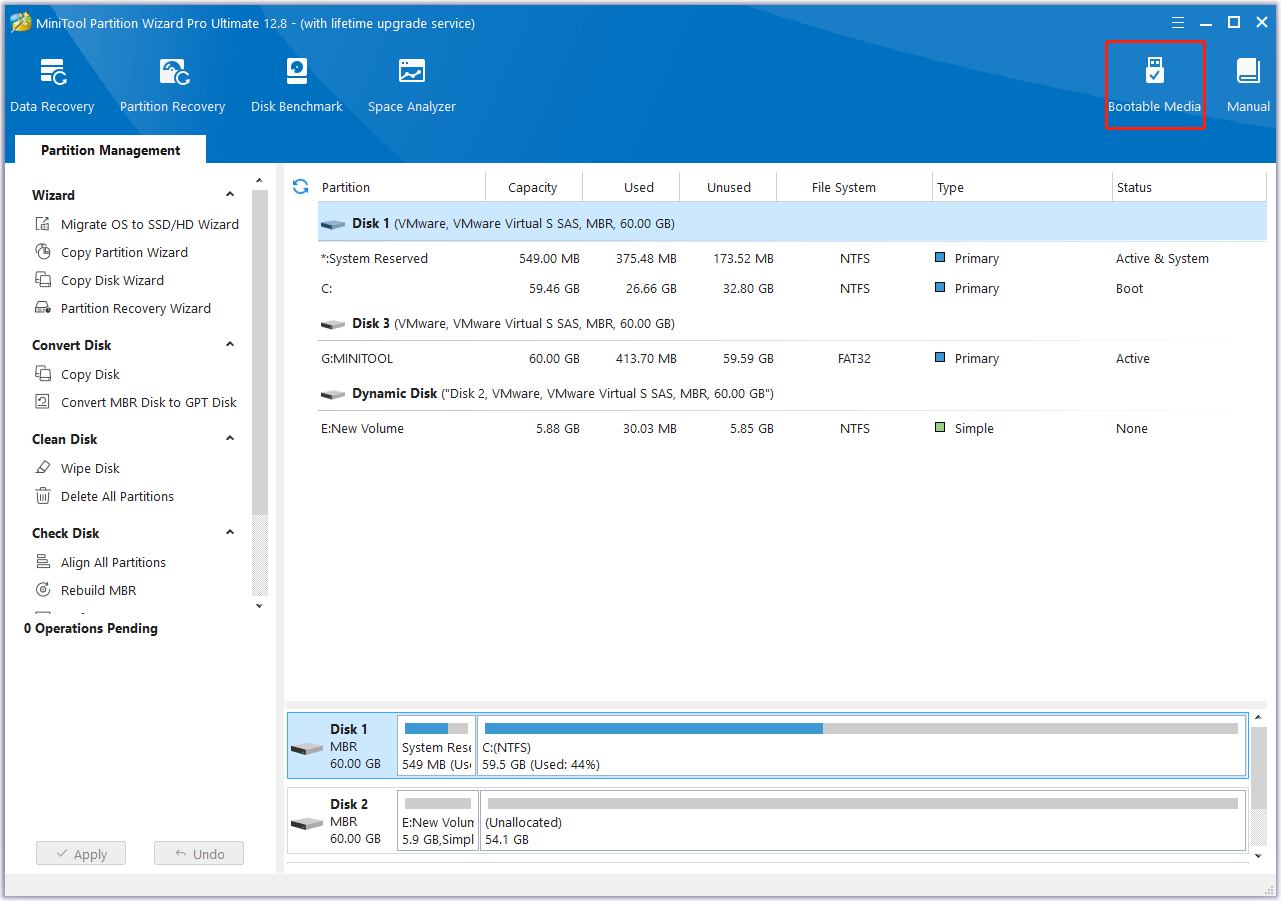
- Launch MiniTool Partition Wizard and click Bootable Media.
- Click WinPE-based media with MiniTool plug-in.
- Click the USB Flash Disk. You will be warned that the data on the USB disk will be destroyed. Click Yes and then MiniTool Partition Wizard will start to create a bootable drive.
Step 2: Boot your PC from the USB drive.
- Insert the USB drive into your PC.
- Shut down your PC.
- Power on your PC and then press the BIOS key (F2, Del, Esc, etc.) immediately once the PC logo screen appears.
- After you enter the firmware, go to the Boot tab, and select the USB drive as the (first) boot device.
- Save changes and exit the firmware. Then, the PC should boot from the USB drive.
Step 3: After the PC boot from the USB drive, click on OK twice and then you will see MiniTool Partition Wizard’s main interface. Then refer to method 1 above to recover data from dead Dell laptop.
How to Prevent Data Loss on Dell Laptop
To avoid data loss on your Dell laptop, you can take the following measures.
- Perform regular backups. You can use a third-party Windows backup utility – MiniTool ShadowMaker to back up data.
- Keep the antivirus up to date all the way, avoiding data being deleted by viruses.
- Frequently check the disk to make sure it can work well.
- Avoid any physical damage to the Dell laptop.
Also read: All Things You Should Know About Laptop Data Recovery
Bottom Line
This post shows you how to recover data from Dell laptop, including recovering data from dead Dell laptop, and some tips for preventing data loss.
If you encounter certain issues while using MiniTool Partition Wizard, you can send us an email via [email protected] to get a quick reply.
About The Author

Position: Columnist
Vega enjoys helping people with computer problems, including disk management, data recovery, data backup, and more. She is constantly expanding her knowledge in related fields. And she will continue to bring more easy-to-understand professional articles to help people solve various problems on the PC.
User Comments :