What is MSI Burn Recovery
MSI, short for Micro-Star International Co., Ltd, is a multinational technology corporation. It offers users computer hardware-related products and services, such as desktops, laptops, motherboards, etc.
MSI computers are reputable and popular. Considering that issues might happen on computers after a long time of use, MSI provides a useful tool to create a recovery storage device on their computers – MSI Burn Recover, also referred to as MSI BurnRecovery and MSI Recovery Image Backup.
MSI Burn Recover uses the data inside the system recovery partition to create a Windows recovery storage device. And the storage device can be a DVD or USB flash drive. In addition, MSI Burn Recovery also supports an ISO image.
After creating such a device, users can restore the system to default settings, which is quite useful when the computer doesn’t work properly or crashes.
If you have never used this MSI burn recovery tool, don’t worry. In the following content, you can learn how to use it to create a Windows recovery disk and restore Windows when you encounter problems.
How to Get MSI Burn Recovery
MSI Burn Recovery is free to use on MSI computers. To get this tool, you just need to:
Step 1: Visit the official website of MSI and download MSI Burn Recovery tool.
Step 2: Unzip the downloaded zip file and launch the setup.exe file to start the installing process.
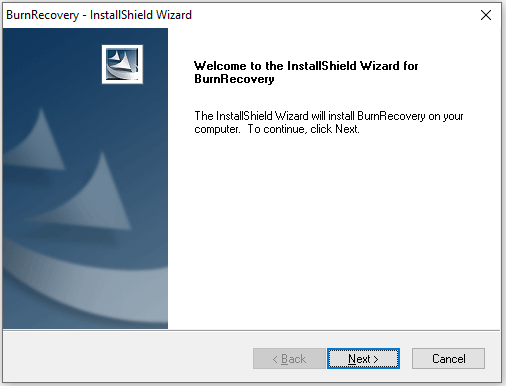
Step 3: When you get the following welcome window, click Next to continue. Then MSI BurnRecovery will configure the new installation automatically and you just need to wait patiently and don’t interrupt the process.
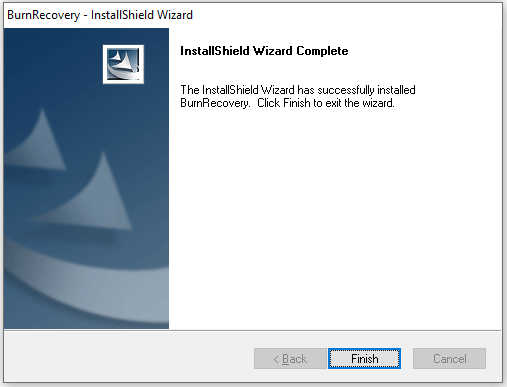
Step 4: When the MSI BurnRecovery is successfully installed, click Finish.
After installing the application, you can start to use this tool with the following tutorial. If your MSI BurnRecovery doesn’t work, you should try uninstalling and reinstalling the software to solve the problem.
How to Create a Windows Recovery Tool with MSI Burn Recovery
It is a good habit to create a recovery tool for your system when your computer works properly, because you can use it to restore and fix your computer if it crashes in the future.
For MSI computers, you can use MSI Burn Recovery to create such a tool, and here are three options you can choose: ISO, USB, and DVD. Let’s see them one by one:
How to Create a Recovery ISO File
An ISO image (optical disc image) is usually used for creating backups of optical discs as well as distributing large programs and operating systems. If you want to create a recovery ISO image for your operating system with MSI Burn Recovery, you can follow the steps below.
Step 1: Press Win + S to open the Windows Search utility. Then search for MSI BurnRecovery and launch it.
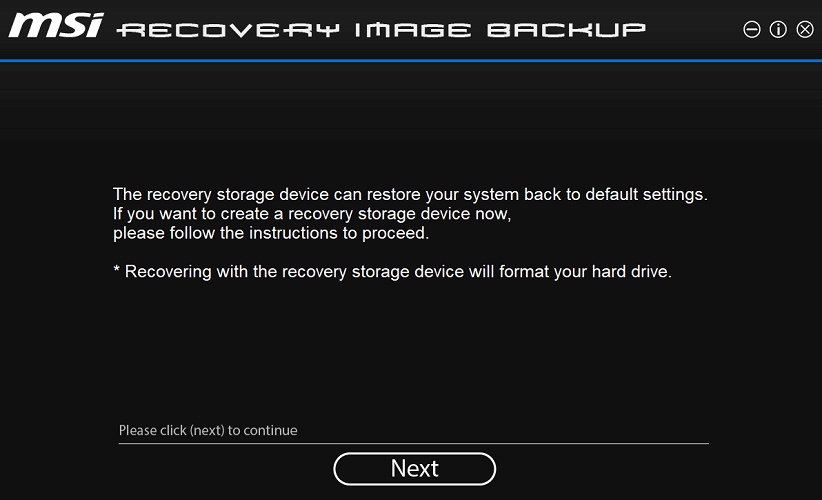
Step 2: When you get the interface of MSI BurnRecovery, click Next to continue.
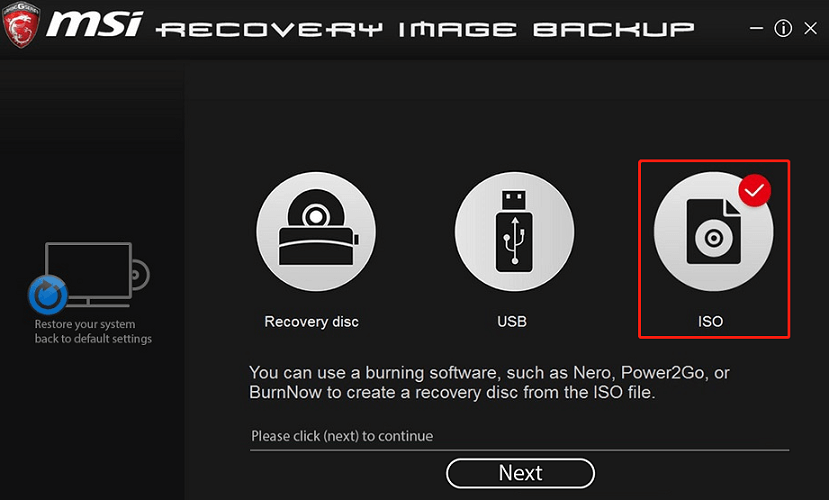
Step 3: On the following page, select the ISO option and click Next to continue.
Step 4: You will be asked to select the directory path for the ISO file to be saved. Please click the three-dot icon to browse your computer and select a place to save the ISO file. Then click Next to start the process.
Step 5: The process will take some time and you just need to wait patiently. When the ISO file is created successfully, select remove the temporary files and click Finish.
How to Create a Recovery USB Flash Drive
If you don’t like to use ISO files, you can choose to create a Windows recovery tool via USB flash drive with MSI Burn Recovery.
Please note that the USB flash drive will be formatted in the process and all the data on it will be deleted. Therefore, you’d better prepare a blank USB flash drive or back up the USB drive in advance. What’s more, the USB flash drive should be large enough. According to MSI, it is recommended to use a minimum of 32 GB USB drive.
Here is how to create a recovery USB flash drive with MSI BurnRecovery.
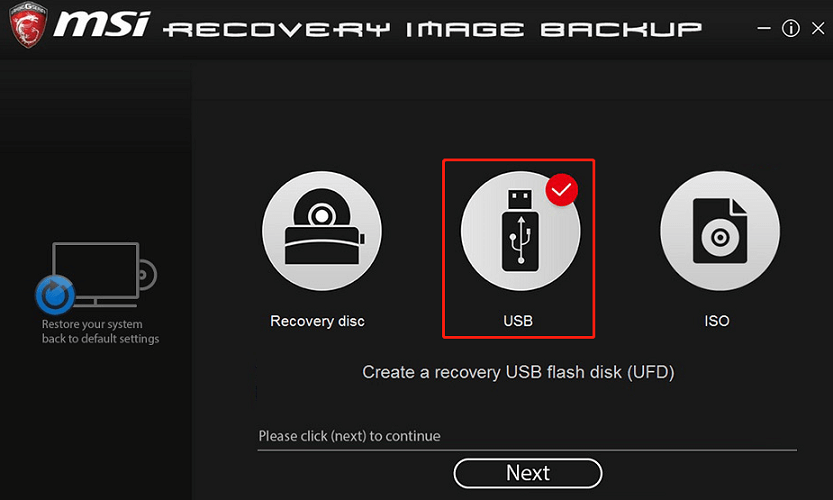
Step 1: Connect a USB flash drive to your computer. Then launch MSI BurnRecovery and click Next to continue.
Step 2: Select the USB option and click Next in the following window.
Step 3: Choose your USB flash drive and click Next to start creating the recovery USB flash drive. The original data on the USB flash drive will be deleted in the process.
Step 4: Once the process is completed, select remove the temporary files and click Finish.
How to Create a Recovery DVD
In addition to ISO and USB, MSI Recovery Image Backup also supports DVD recovery media. This method requires multiple DVDs depending on the model of your computer, and the size of the DVD needs to be around 30 GB. You can check the detailed requirements during the burning process.
Step 1: Run MSI BurnRecovery and click Next.
Step 2: Select the Recovery disc option and click Next.
Step 3: Wait for a while and MSI BurnRecovery will display how many discs are needed and the storage capacity of each disc. Please read the instructions carefully.
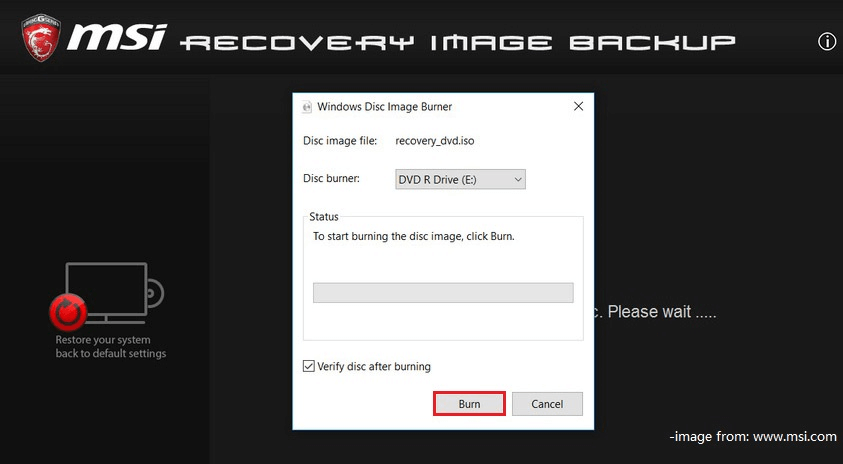
Step 4: Insert the first blank writable DVD into your MSI computer and click the Burn button in the pop-up window. When the burning process is completed, click Close.
Step 5: Insert the second blank writable DVD and click Next. Then repeat Step 4 to burn all the required discs by following the instructions on the screen.
Step 6: When all the required discs are burned successfully, select remove temporary files and click Finish.
How to Restore the System with an MSI Recovery Storage Device
Once you have an MSI system recovery tool, you can use it to restore your system to default settings when it works improperly. Please note that you will lose data during the process.
Therefore, please recover your important data and store it on another storage device. Alternatively, you can replace the hard drive in your MSI computer and then restore the system.
Please keep reading for more details.
Recover Your Important Data Before Restoring System
When you restore the system with the recovery storage device made by MSI Burn Recovery, it performs a factory reset for your hard drive, which means you will lose all the files and settings. Therefore, you’d better back up or recover the important files you need before the operation. If your computer crashes and won’t boot, MiniTool Partition Wizard can help you recover files.
MiniTool Partition Wizard is a professional and reliable disk manager tool. It can be used to create, delete, resize, and recover partitions. Here we can use it to recover data from a crashed PC.
Step 1: Download and install MiniTool Partition Wizard on a properly working computer. Then launch and register it.
MiniTool Partition Wizard DemoClick to Download100%Clean & Safe
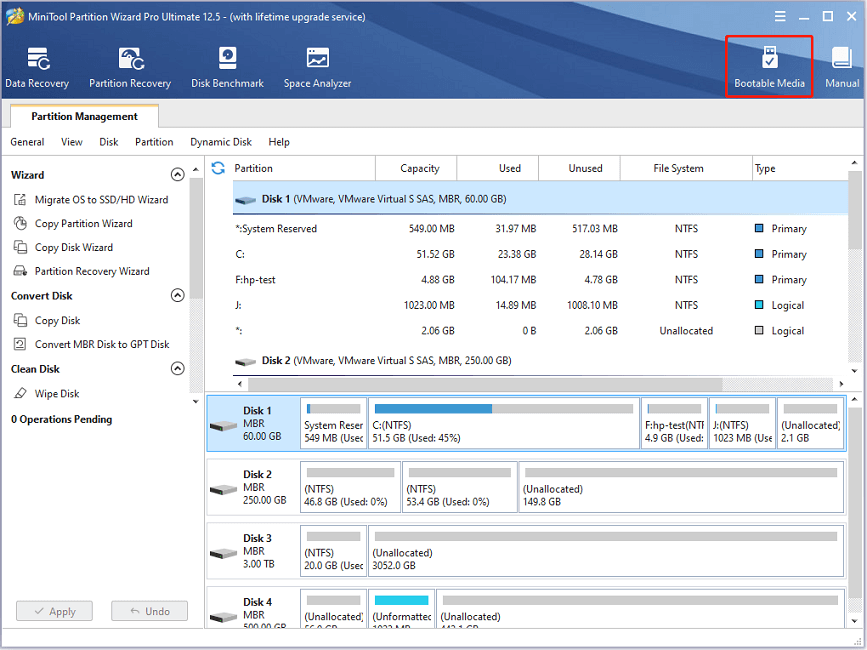
Step 2: When you get the main interface, click Bootable Media from the upper right corner. Then follow the on-screen instructions to create a bootable USB flash drive for MiniTool Partition Wizard.
Step 3: Connect the bootable USB flash drive to your MSI computer and boot the computer from the USB flash drive. Usually, you can press F11 to enter BIOS while starting the MSI computer to change the boot order.
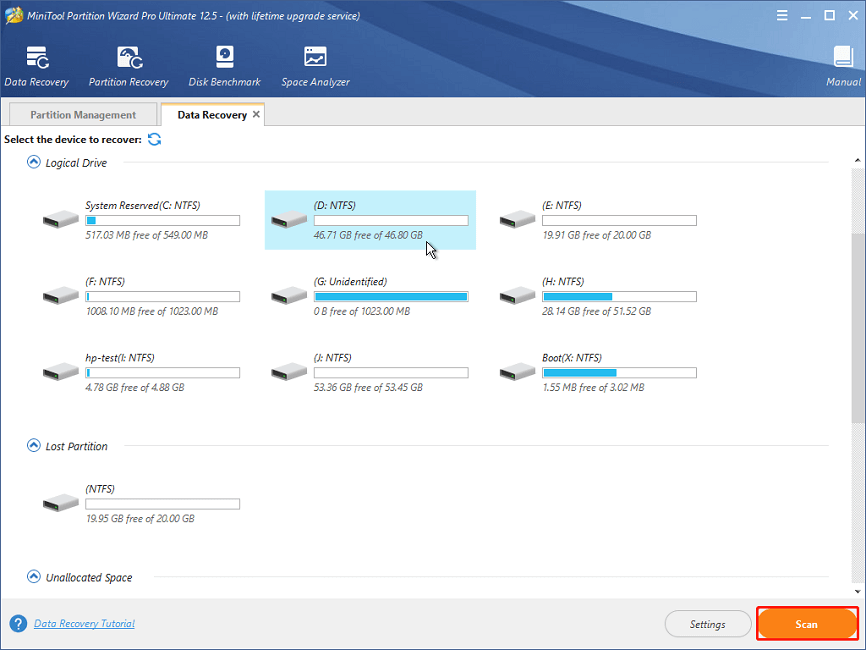
Step 4: When you are in MiniTool Partition Wizard, select the Data Recovery feature from the upper toolbar.

Step 5: In the following window, select a partition under the Logical Drive section or select your hard drive under the Hard Disk section. Then click the Scan button to start the scanning process.
Step 6: When the scanning process is finished, check needed files or folders and click the Save button.
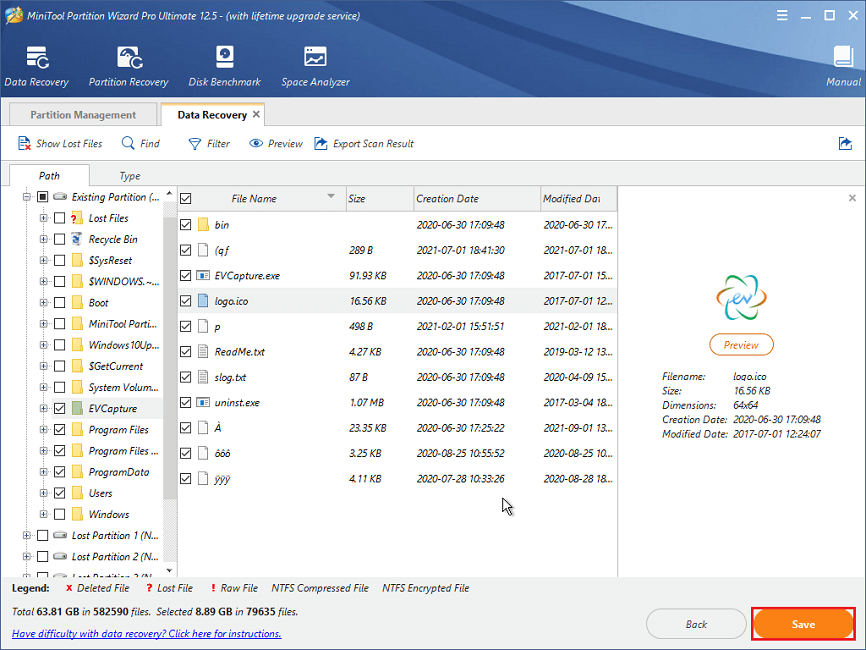
Step 7: In the pop-up window, select a location to save the files you want to recover and click OK. It is recommended to store the recovered files on another hard drive such as an external hard drive.
Restore System with Burned Recovery Tool
After recovering needed data, you can use the recovery tool burned with MSI Burn Recovery to restore your system to factory settings without any worries about data loss.
Step 1: Connect the Windows recovery tool to your MSI computer and boot from it.
Step 2: When you see the MSI Recovery System interface, select Hard Disk Recovery. Please note that this option will format the whole hard disk on your MSI computer and all the data will be restored to factory default settings. Therefore, make sure you have backed up your data before the operation.

Step 3: Select the destinations disks to restore the system. Here are two options and you can choose one according to your needs. Then click OK to continue.
- Restore both Windows OS and the recovery partitions to the same disk.
- Separate Windows OS and the recovery partitions into two different disks.
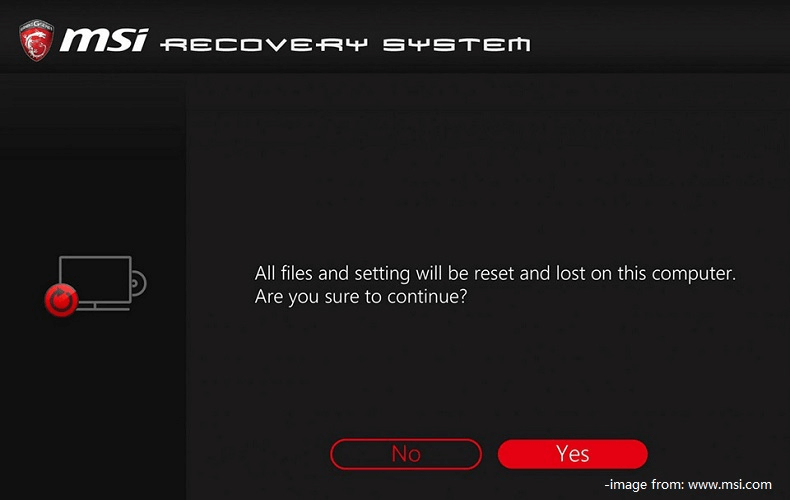
Step 4: You will be reminded that all files and settings will be reset and lost on this computer. If you want to continue, click Yes. If you haven’t backed up your data, you can click NO to cancel the operation.
Then you just need to wait patiently and follow the on-screen instructions to finish the operation. When the process is successfully completed, restart your system and check whether your computer can work properly.
Bottom Line
If you have an MSI computer, it is recommended to create a Windows recovery storage device with MSI Burn Recovery. It can help you restore your system to factory settings when your computer runs into problems. By the way, don’t forget to recover your data and save it to another device before restoring your system.
You can share your experience and ideas in the following comment zone. For any questions about MiniTool software, you can contact us via [email protected].
User Comments :