Fix 1. Install the Fonts for All Users
One of the most common methods for the installed fonts not showing up in Word Windows 10 is to install for all users. To do so, follow the steps below:
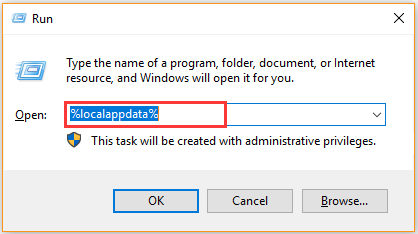
Step 1. Press Win + R keys to open the Run dialog box, and then type %localappdata% in the search box and hit Enter.
Step 2. Inside the Local folder, navigate to Microsoft > Windows > Fonts one by one.
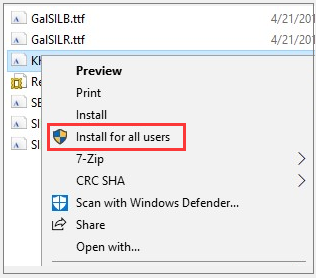
Step 3. Open the Fonts folder, and then right-click the font that you would like to use and select Install for all users. After that, you can repeat this step to install all fonts on Windows 10.
If you still can’t install fonts Windows 10, move on to the following methods.
Fix 2. Check If the Font Files Are Corrupted
Sometimes the font files can get corrupted by a power outage during installing or restoring the data on your PC. If you can’t install fonts Windows 10, it’s necessary to check if the TTF files are corrupted.
Step 1. Open the Run dialog box by pressing Win + R keys, and then type ms-windows-store and hit Enter to open Windows Store.
Step 2. Type the font that you want to install in the search bar and hit Enter.
Step 3. Select the target font and click on Get to download it.
Step 4. Now, you can try installing the font. If Windows 10 can’t install fonts, then it indicates that the original files are not corrupted and you need to continue with other solutions.

Fix 3. Install the Fonts in Safe Mode
Safe Mode is a special diagnostic mode that can be used to troubleshoot some Windows problems, including software and hardware issues. Since the mode only allows basic system programs and services to be started at startup, you can easily detect and repair computer system errors.
If you are troubled by the installed font not showing up in Word problem, you can run Word in Safe Mode.
Step 1. Open the Run dialog box again, and then type winword /safe in the box and hit Enter.
Step 2. Now, Microsoft World should be opened in Safe Mode. You can press Ctrl + N keys to open a new Word document and use the fonts that you have installed.
Fix 4. Don’t Install the Fonts from a Removable Storage
According to some user reports, they can’t install fonts Windows 10 from a removable storage device including a USB flash drive, external hard drive, etc. In this case, you need to copy the font files from the external drive to your internal hard drive and then install the fonts again.
Fix 5. Copy and Paste the File to Another Folder
Some users reported that they fix the installed fonts not showing up in Word windows 10 error simply by moving the file to another location. To do so, you can copy the font file and then paste it into another folder. After that, right-click the font from the new location and select Install for all users.

User Comments :